Stroh Violin Repair
I generally do not take commissions, however every once in a while a friend will ask me to make or repair something and it will be an interesting enough project that I will take it on. That was the case with this Stroh violin. The Stroh violin was an instrument developed between the invention of the phonograph and the invention of electronic amplification. In those days the power of the sound itself was what physically cut the grooves into the wax master cylinder to create a recording. This meant that whatever music was being recorded need to to be quite loud. A conventional violin could not produce a loud enough sound for a clean recording, so the Stroh violin with its amplifying horn and aluminum diaphragm was invented. They are not very pretty sounding violins but they are very loud.
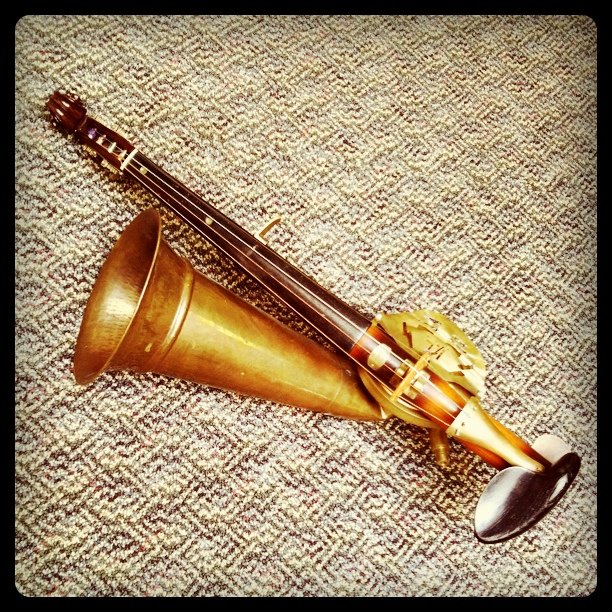
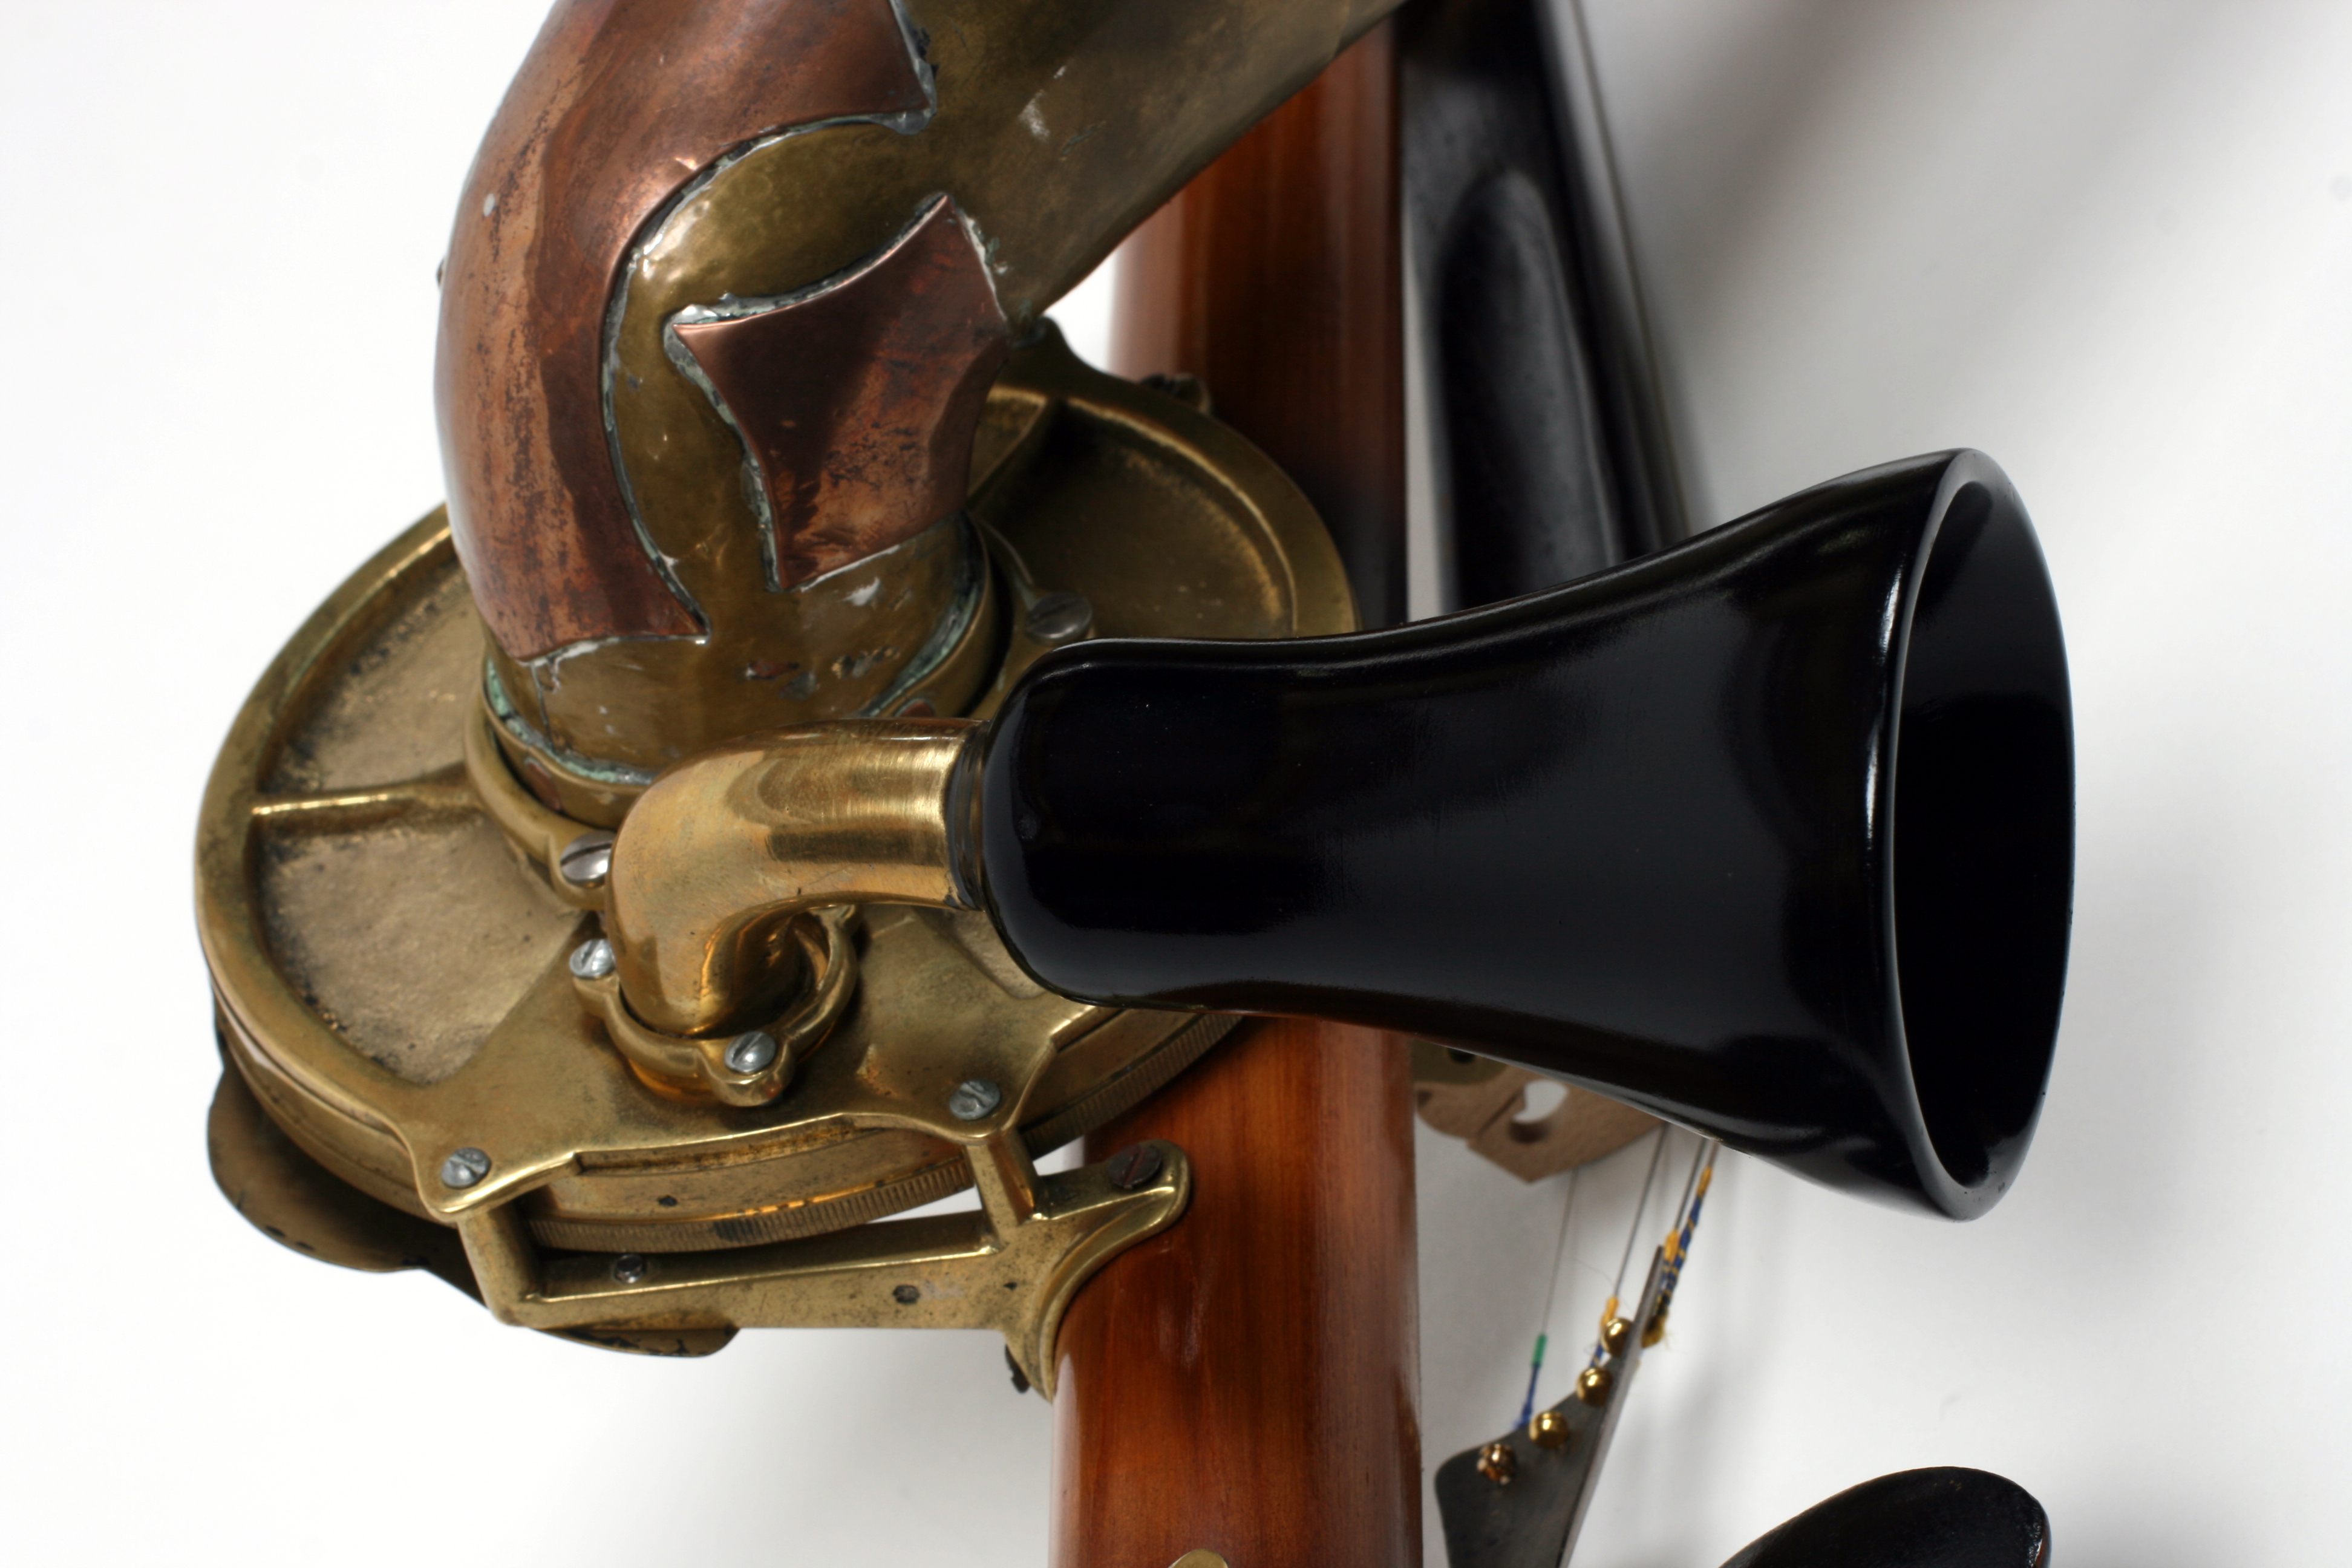
This particular Stroh is named Augustus. Augustus came to me with a crumpled main horn, a missing monitor horn, and a damaged diaphragm linkage. The owner also requested that I make some decorative enhancements which you’ll see a little later.
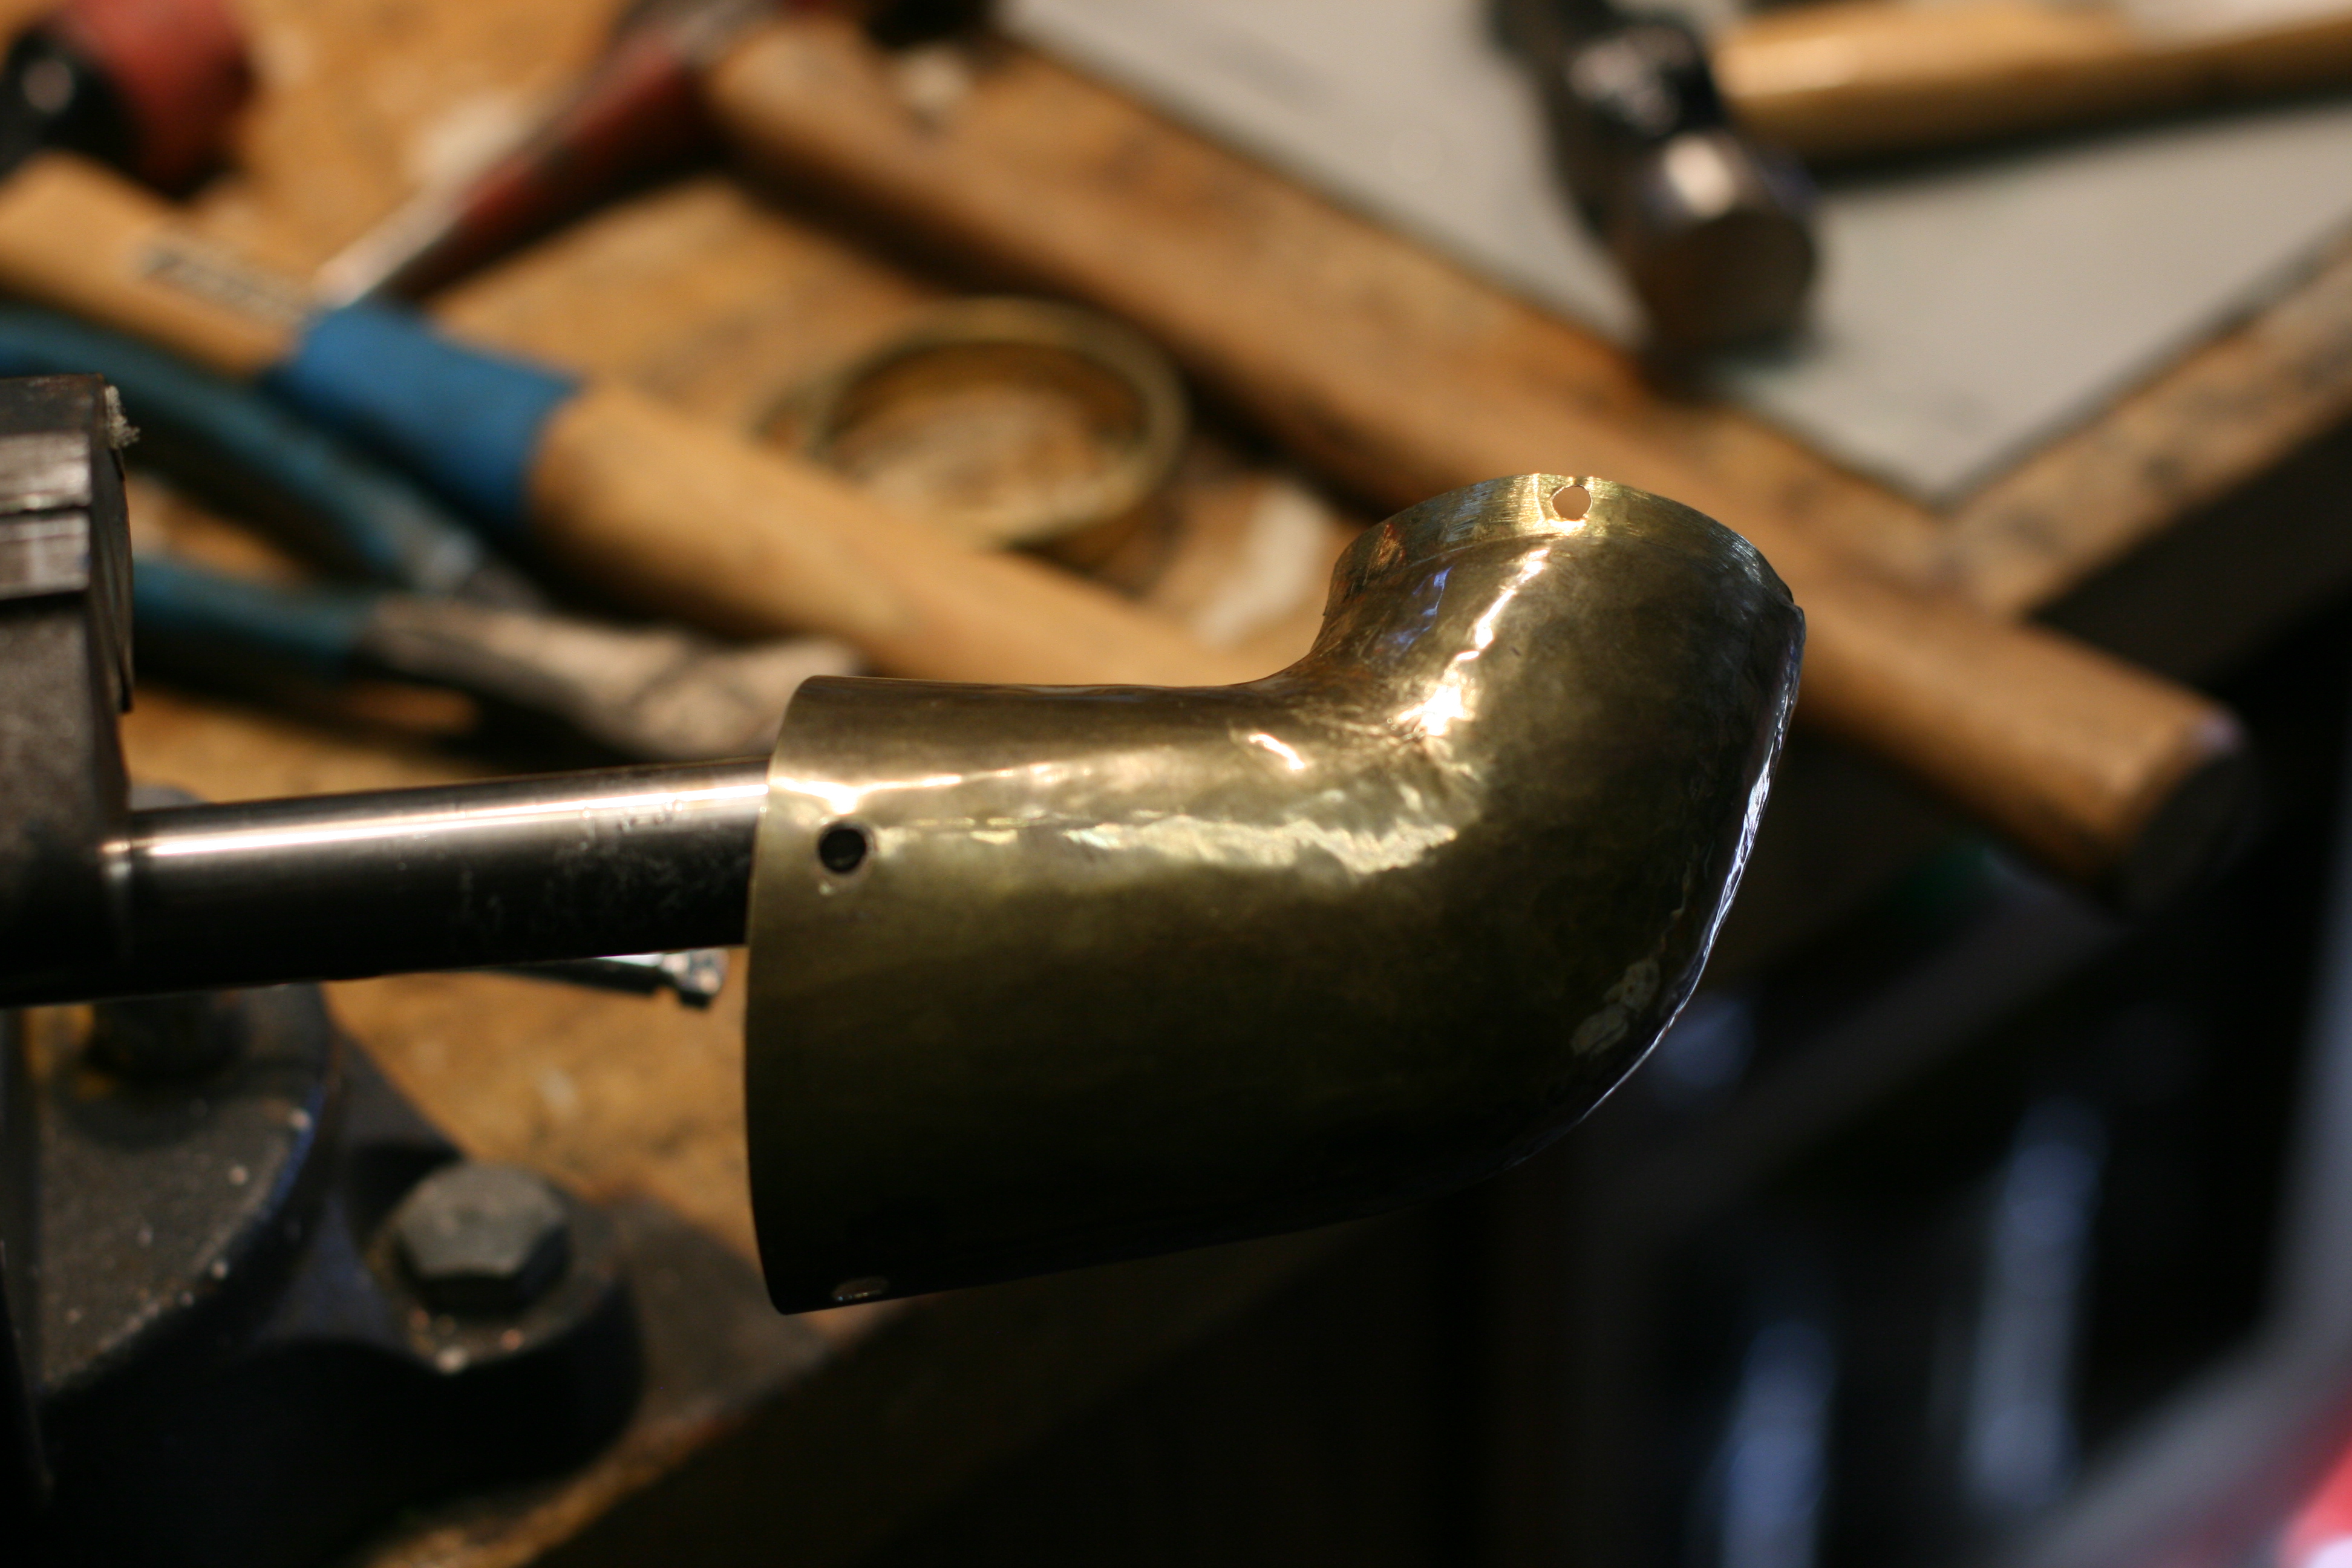
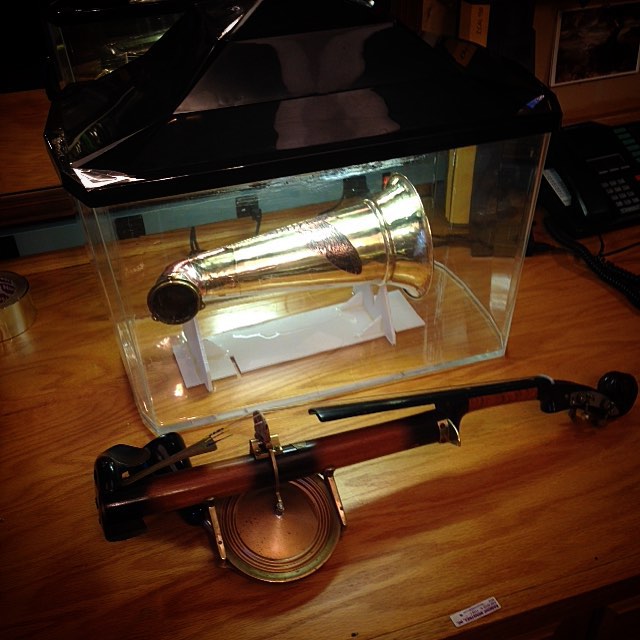
The first step was to straighten the crush horn. I drilled out the rivets that held the horn elbow to the main body of the horn, carefully straightened the crimp, and tapped out the dents.
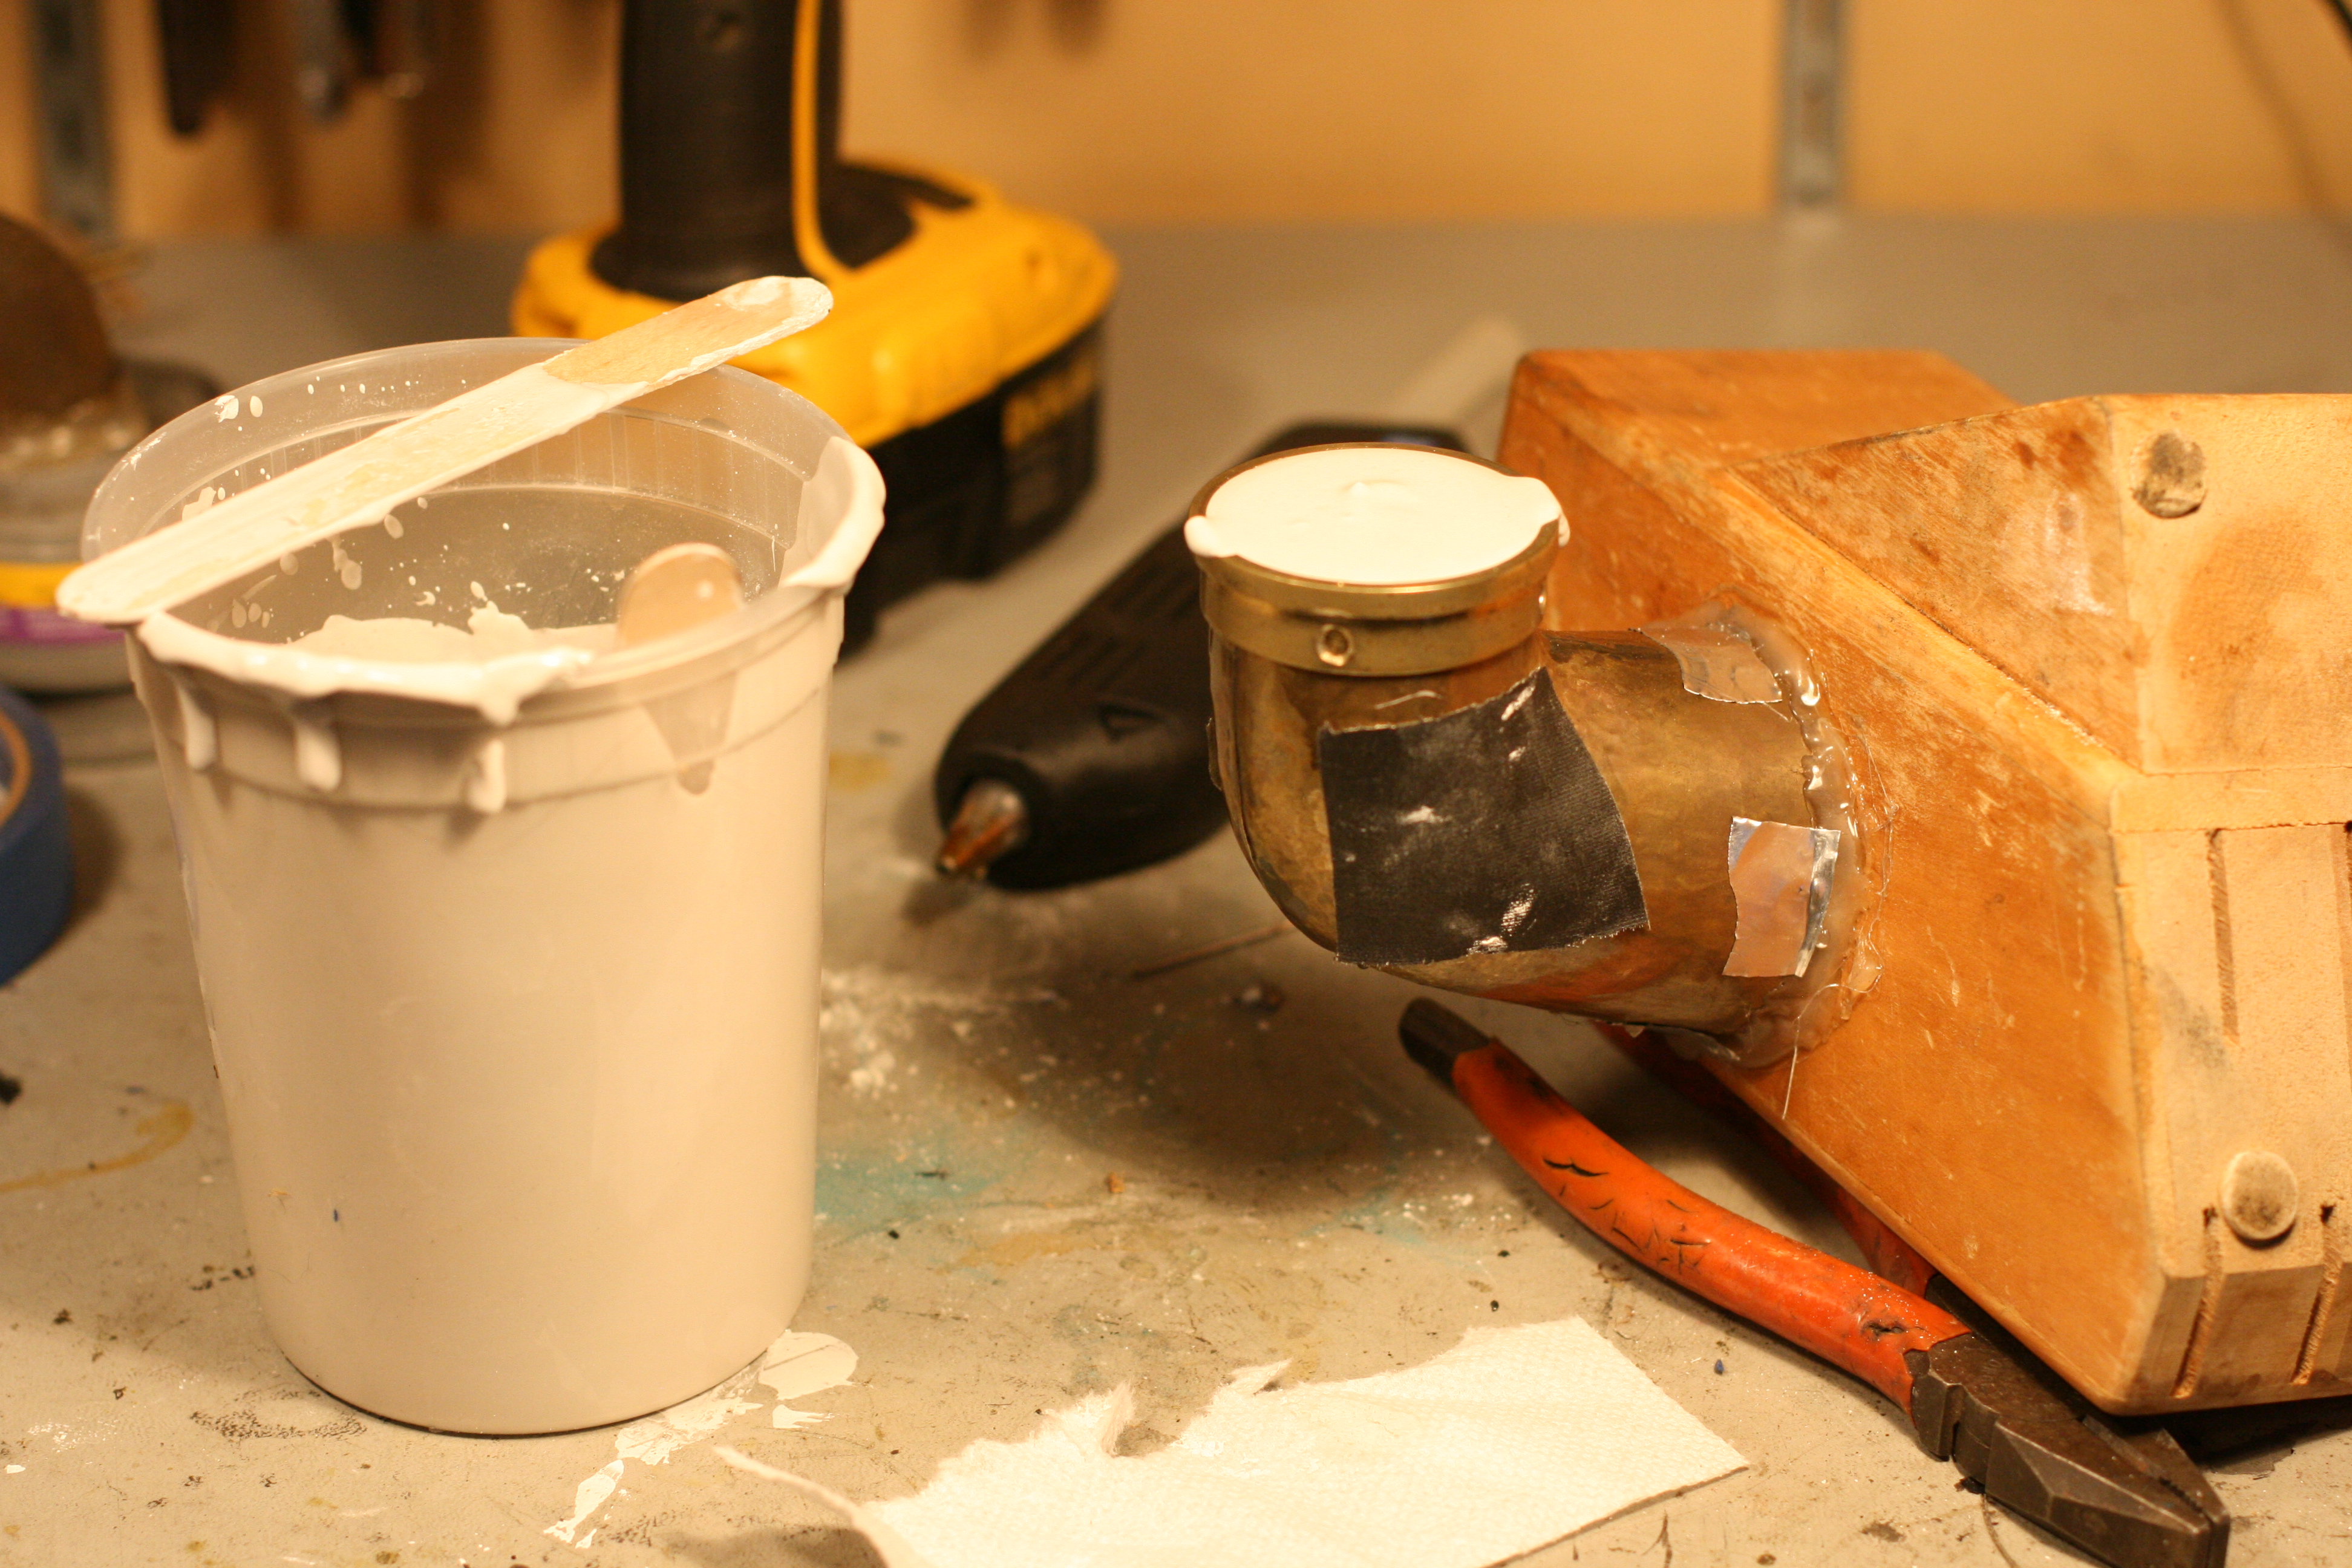
However, once I was finished the brass of the horn was fatigued and cracked in several places. The horn would need some strengthening before it was serviceable. I glued the elbow to a block of wood with hot glue and then filled it with plaster of Paris so that I could dap some copper reinforcements in place.
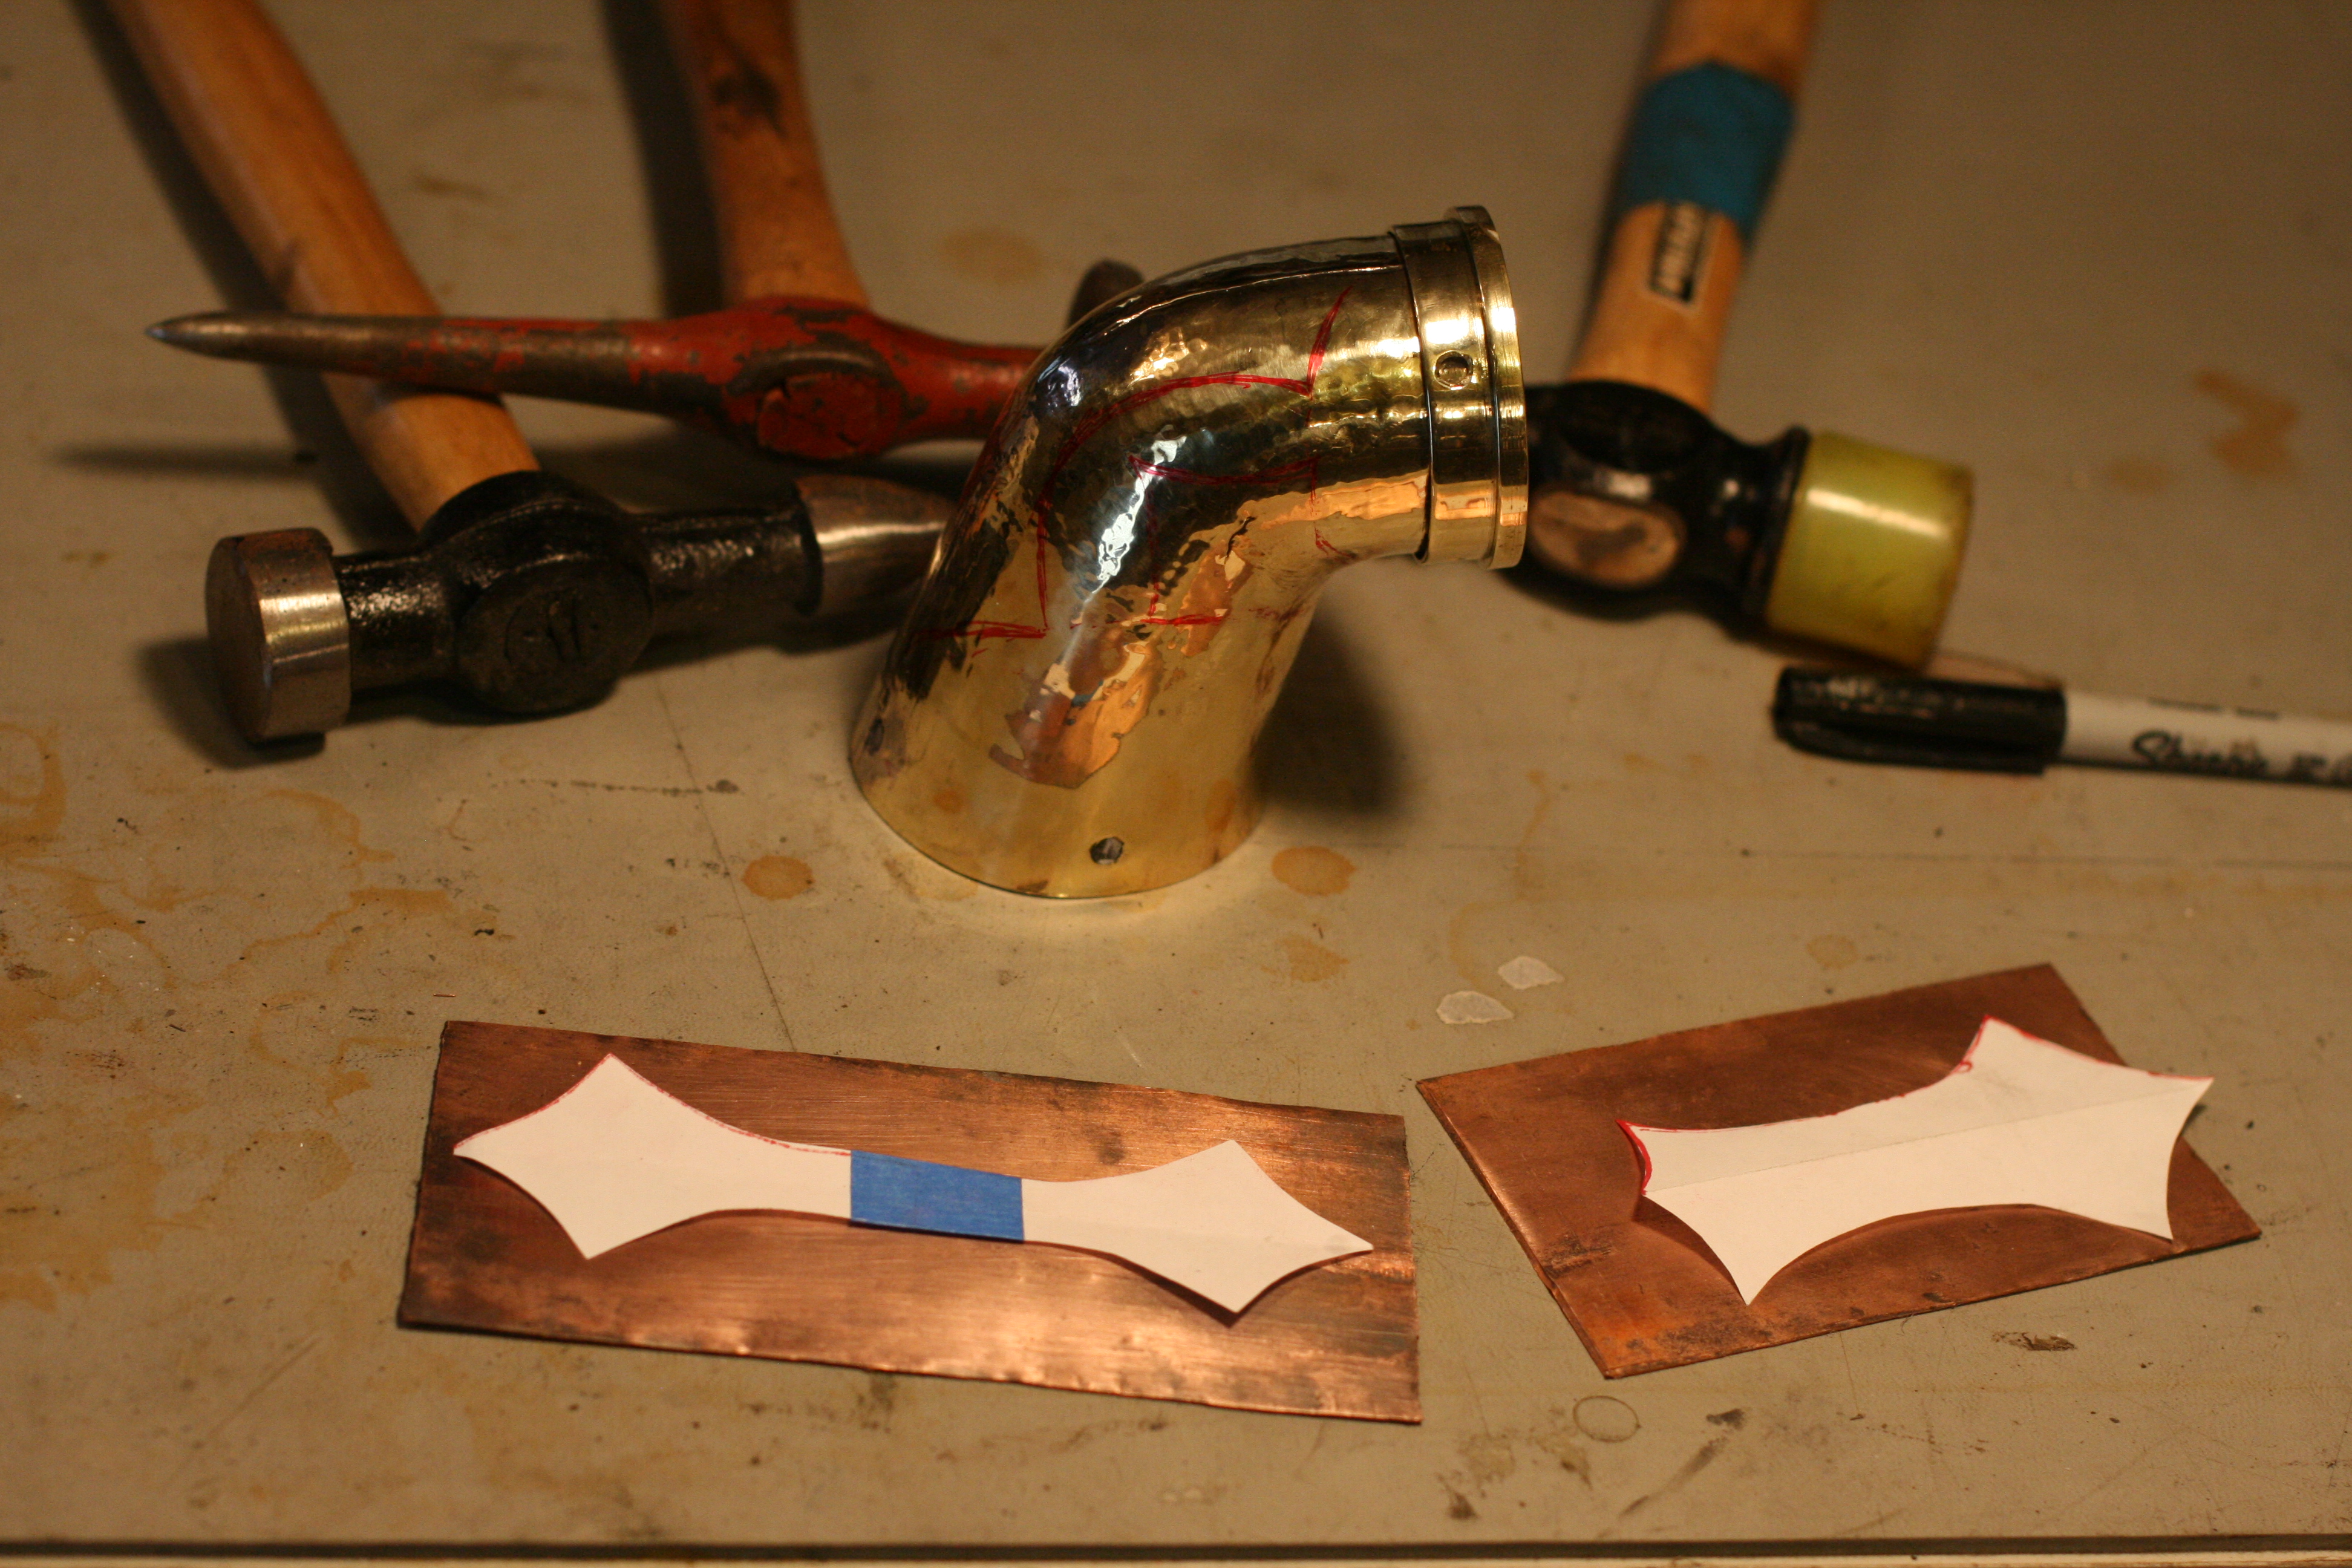
I cut two pieces of copper to strengthen the cracked areas of the horn.
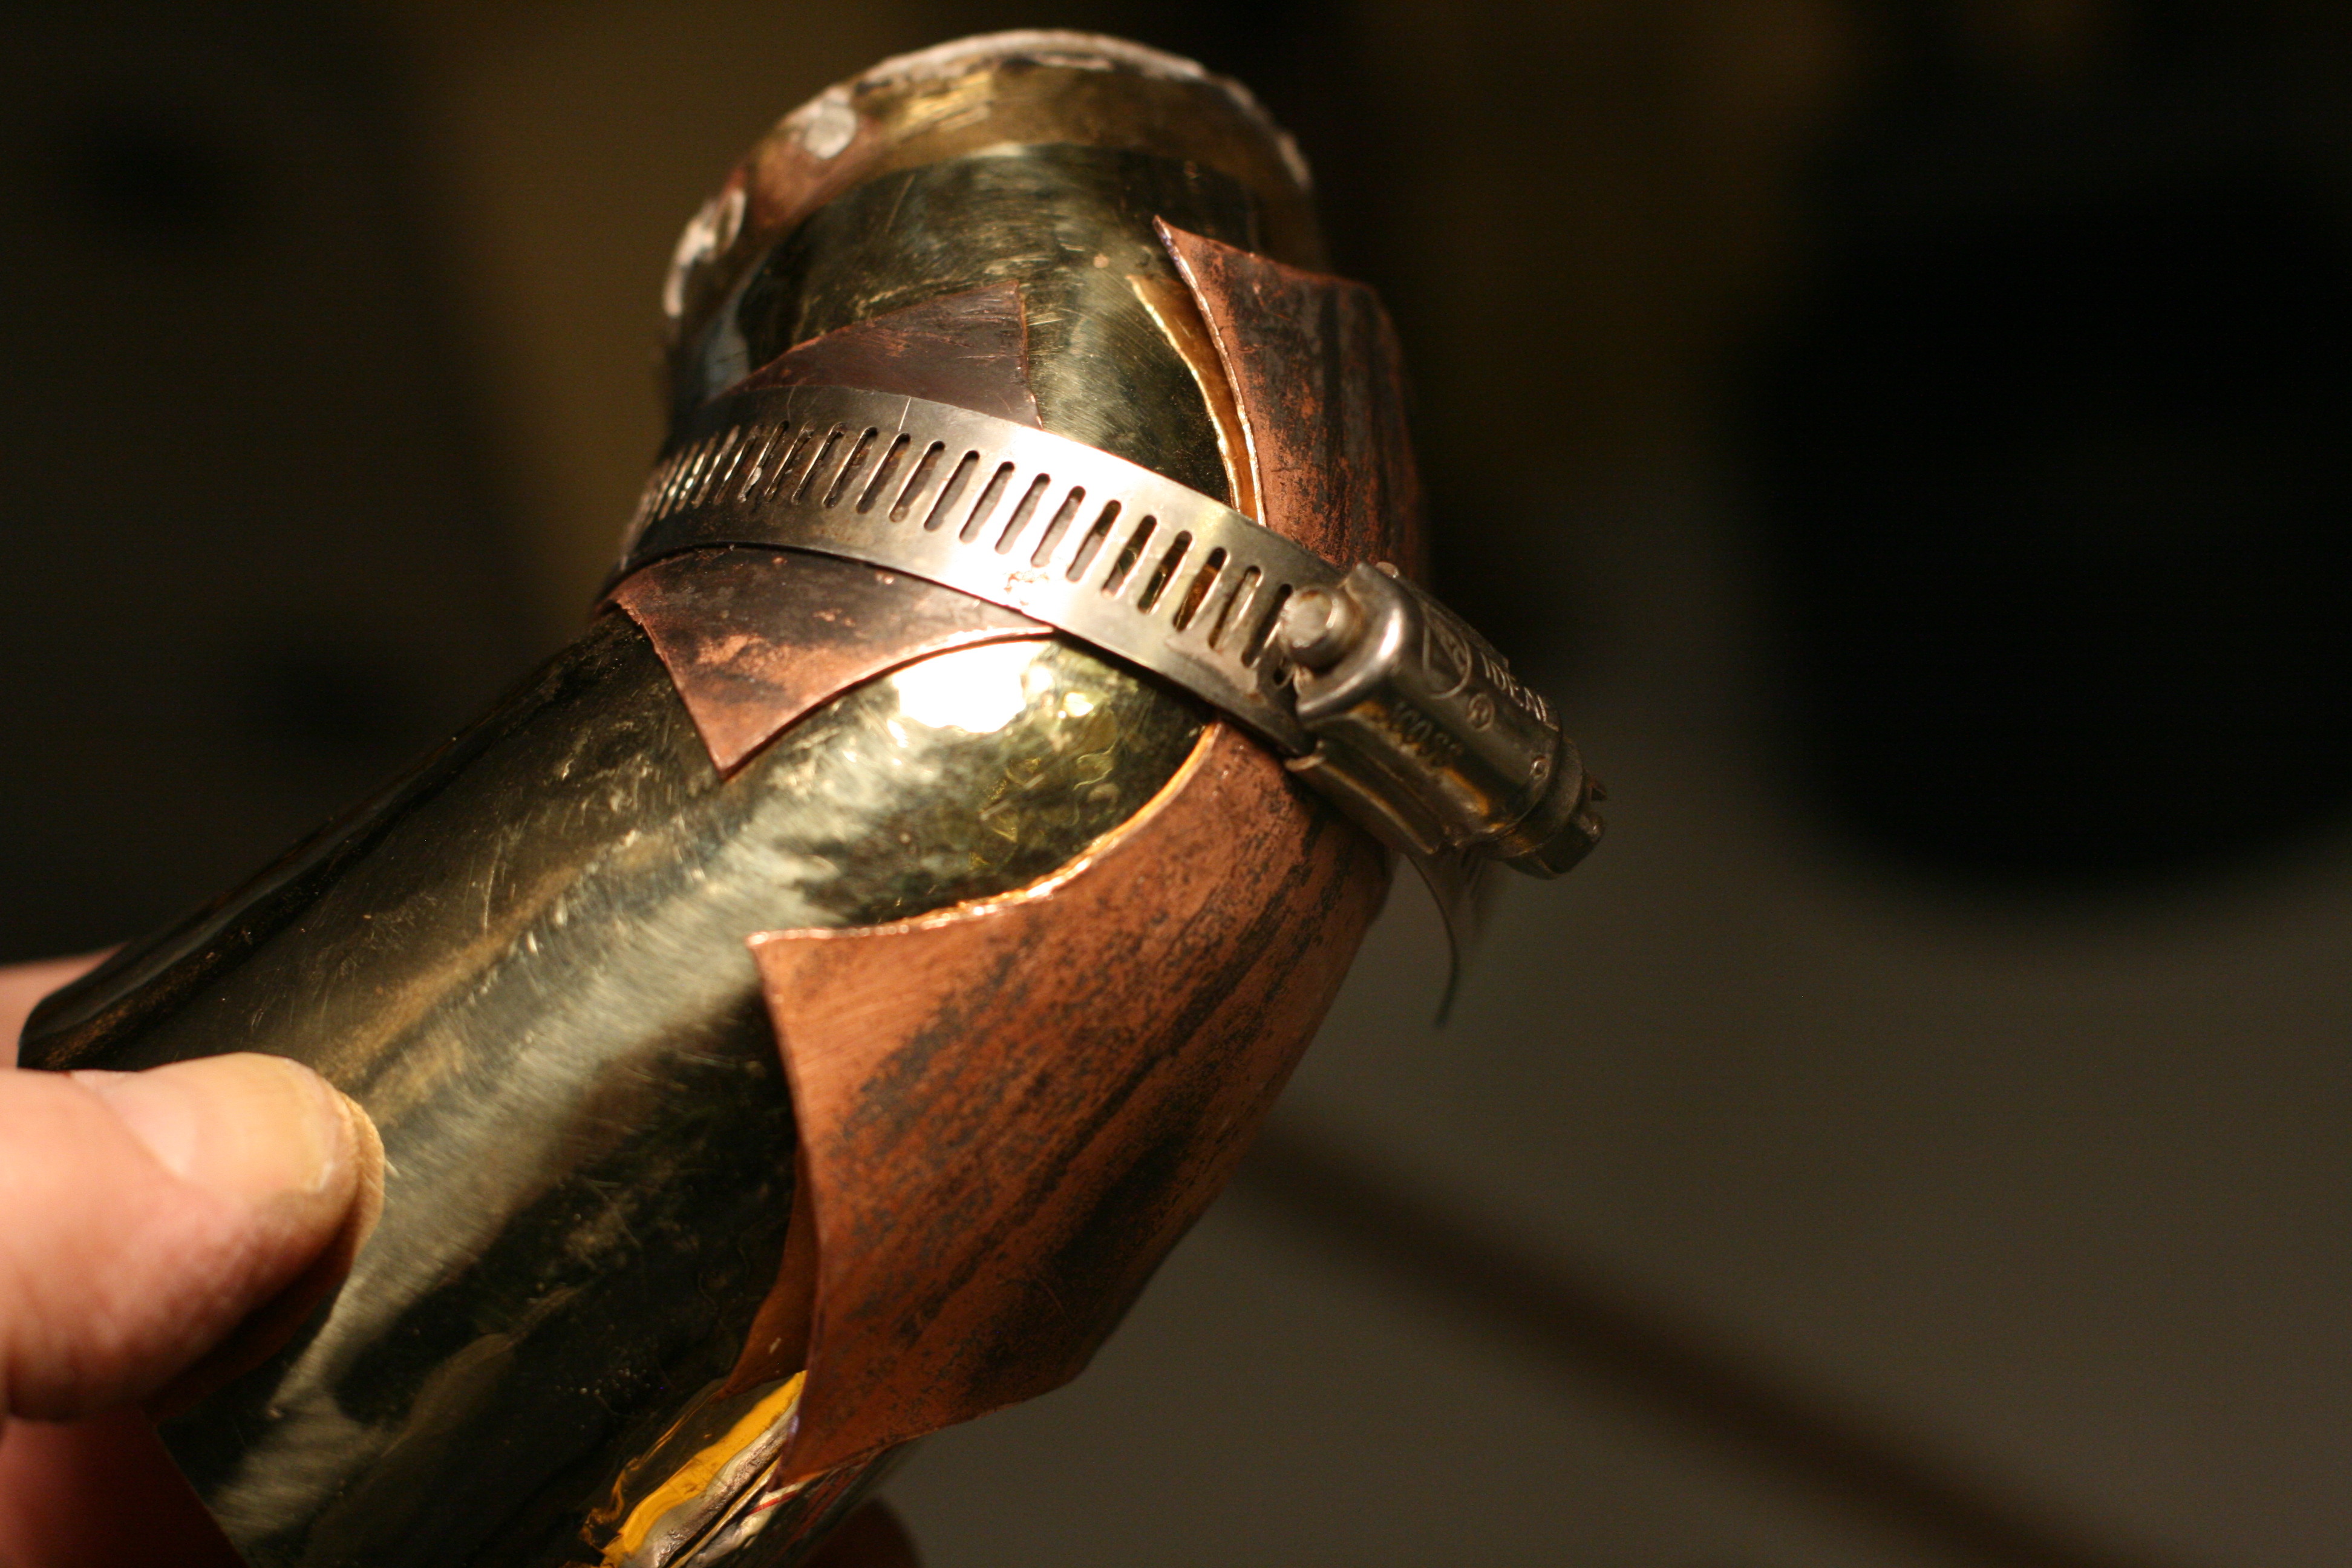
After tapping them with a hammer to match the contour of the elbow, I held them in place with a hose clamp while I soldered them.
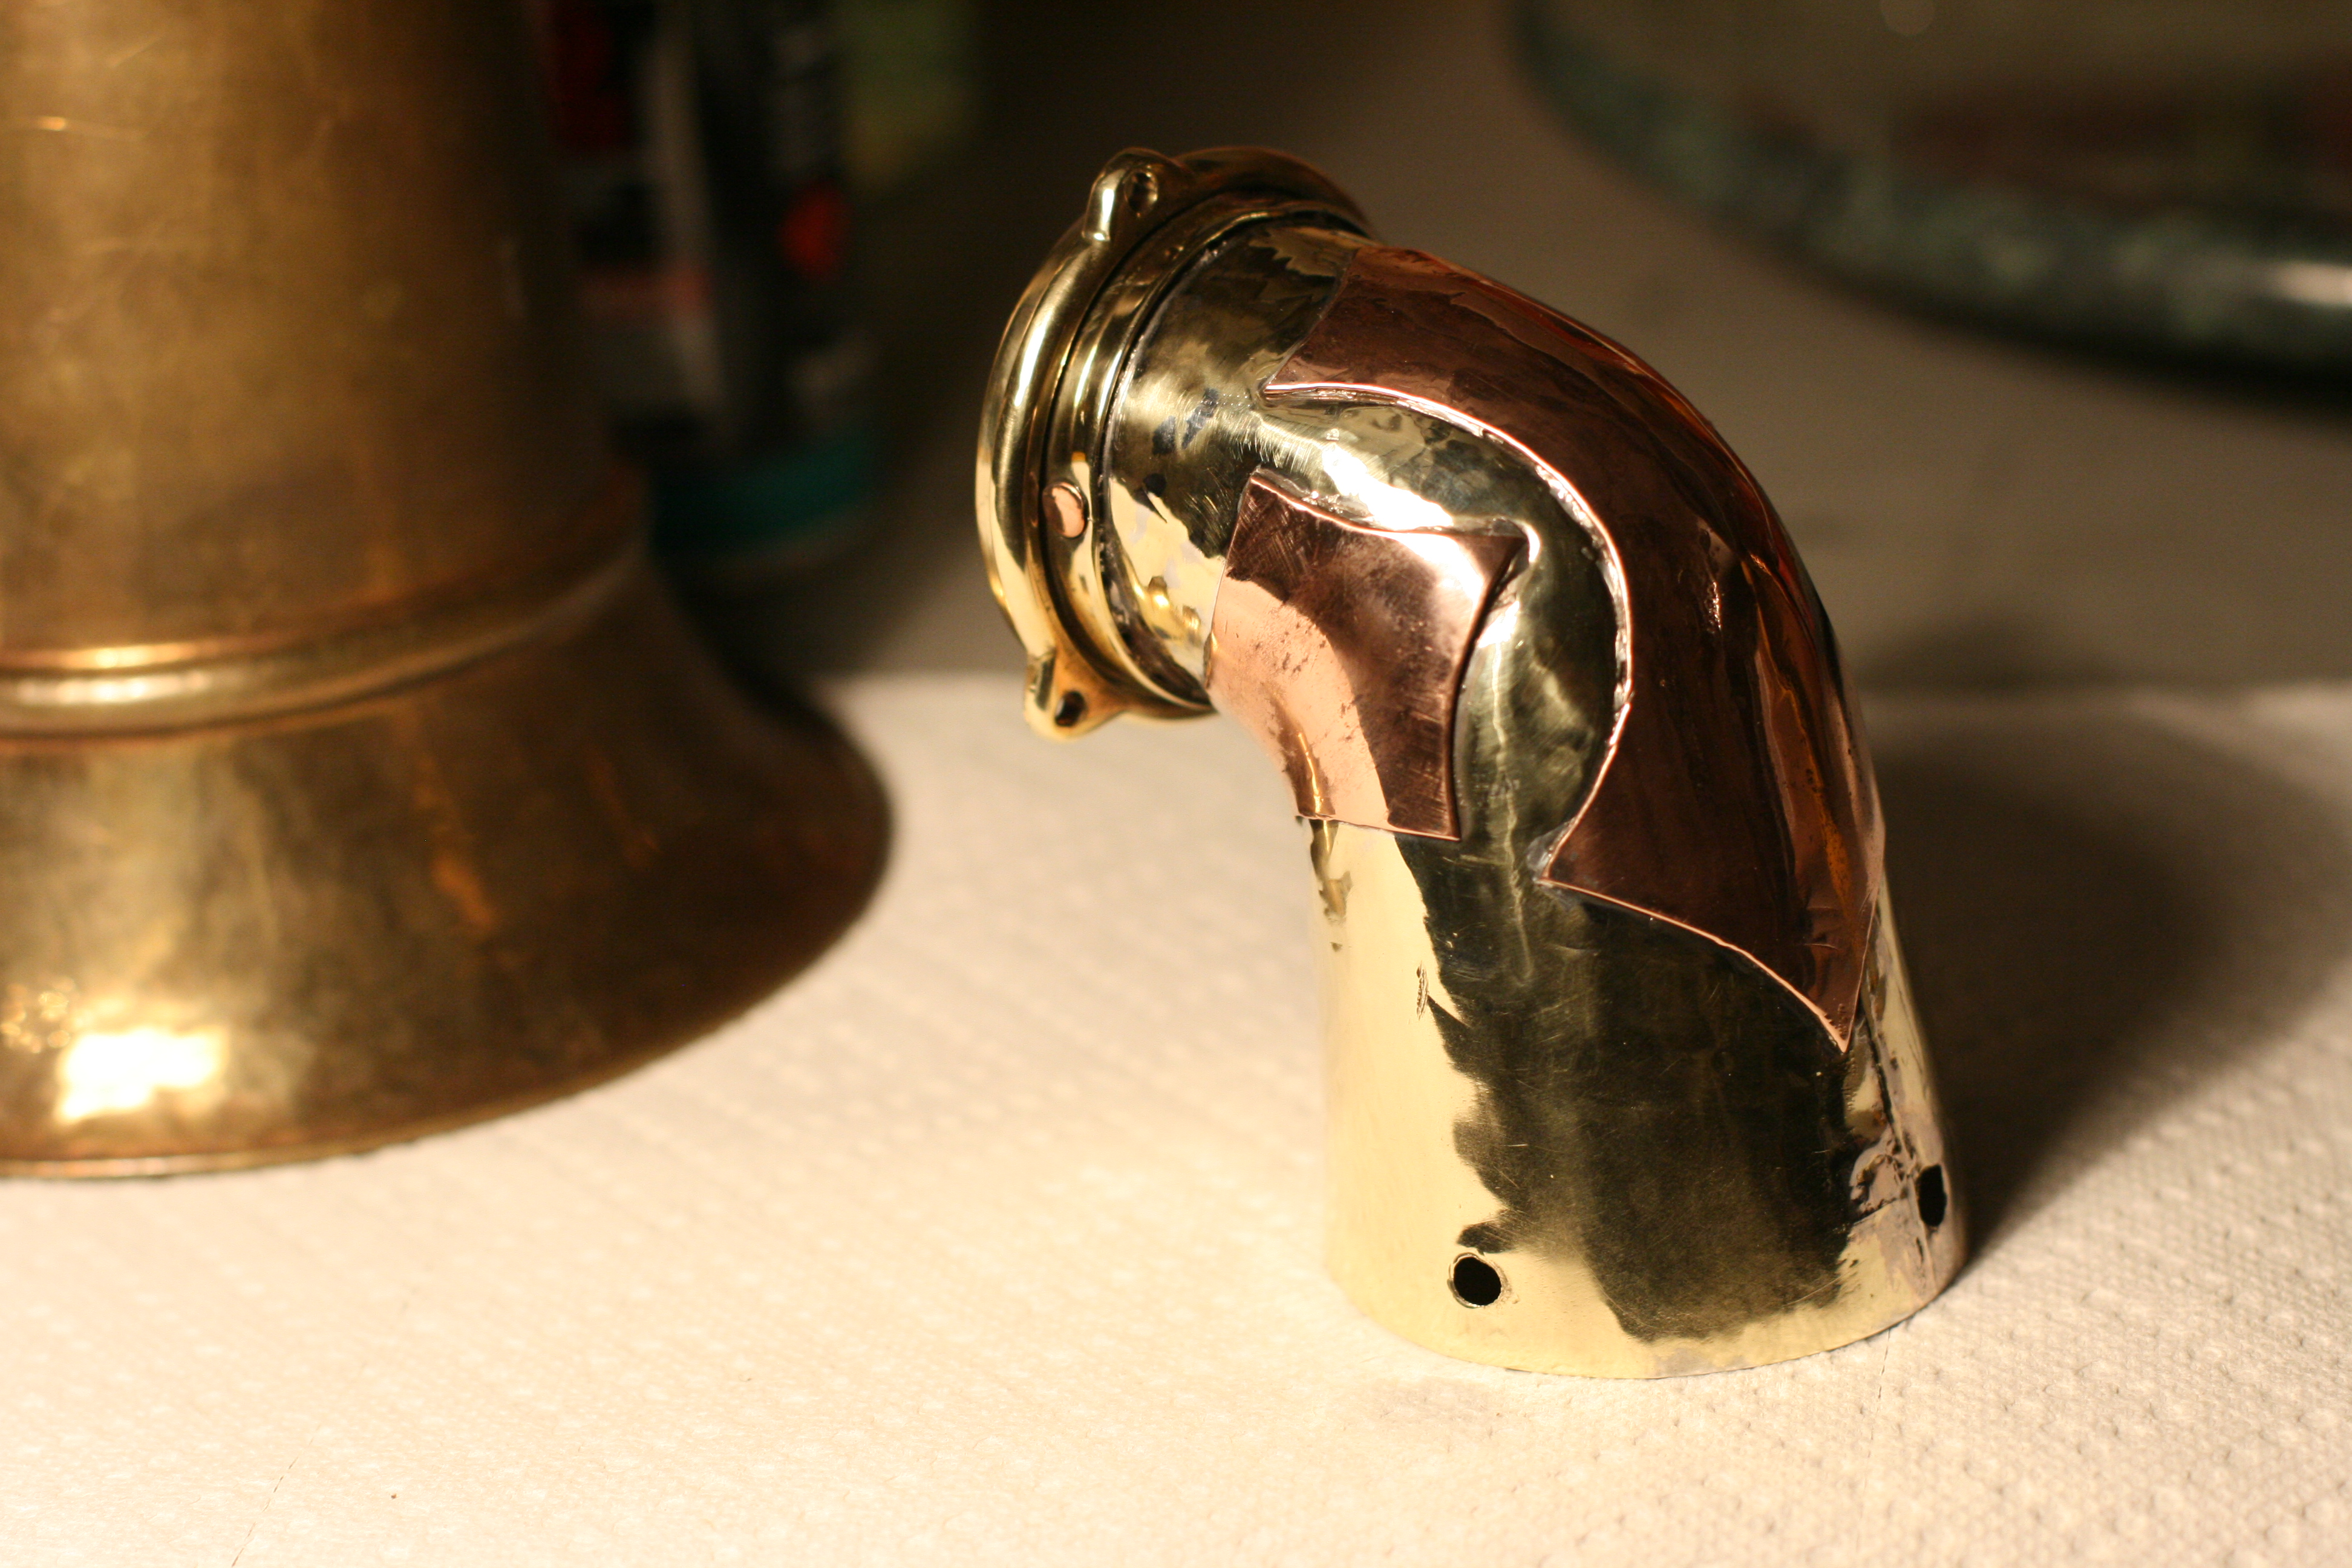
The repaired elbow is much stronger than the original and the copper plates add a nice touch of decoration.
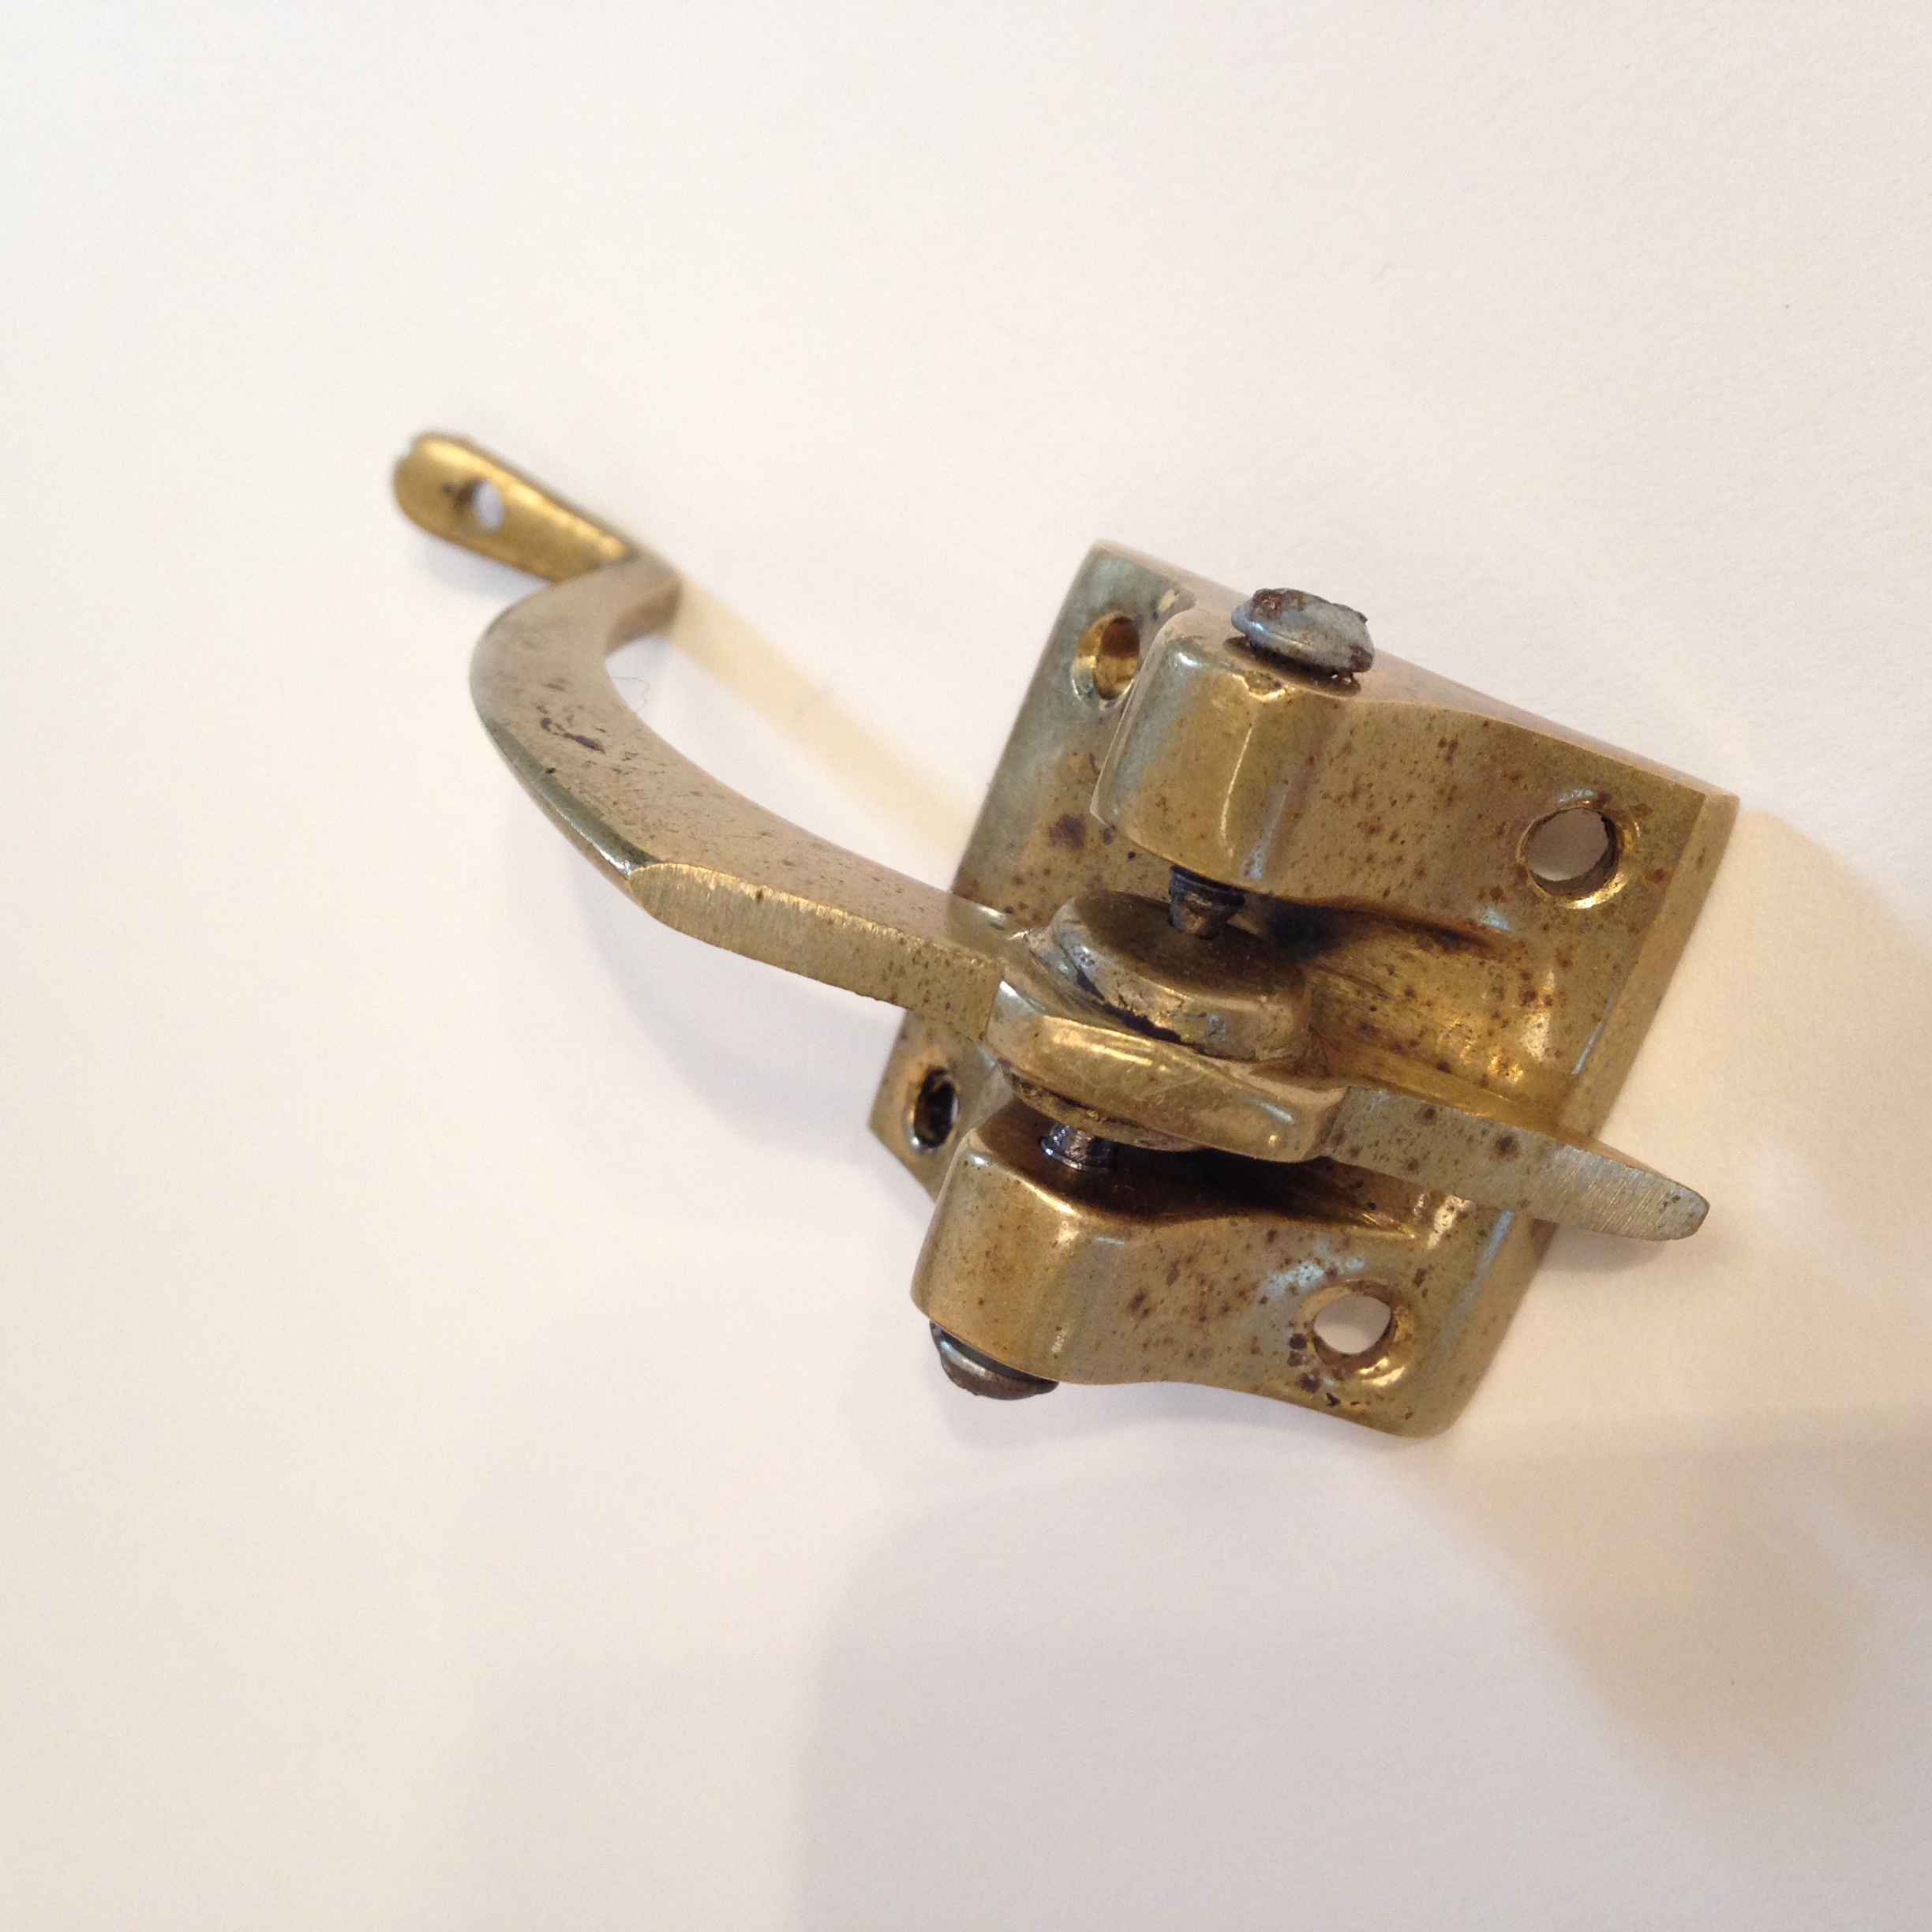
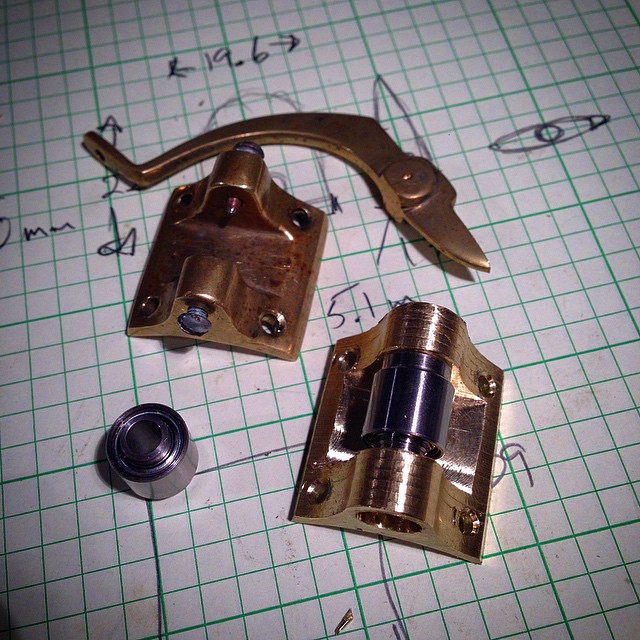
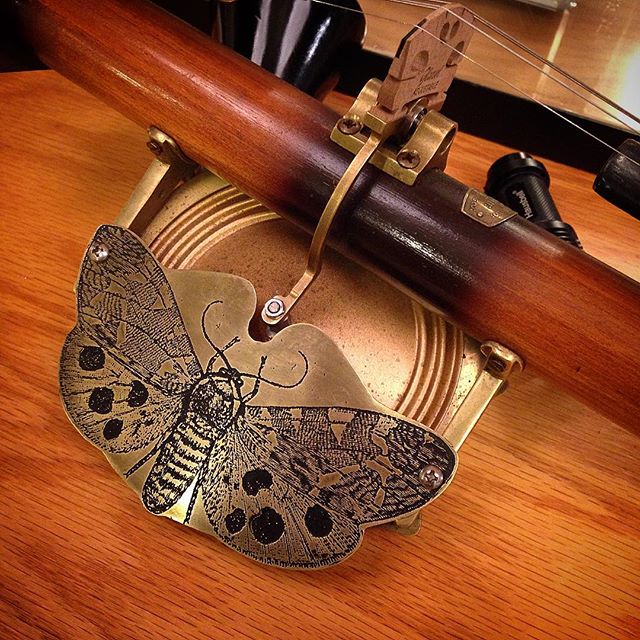
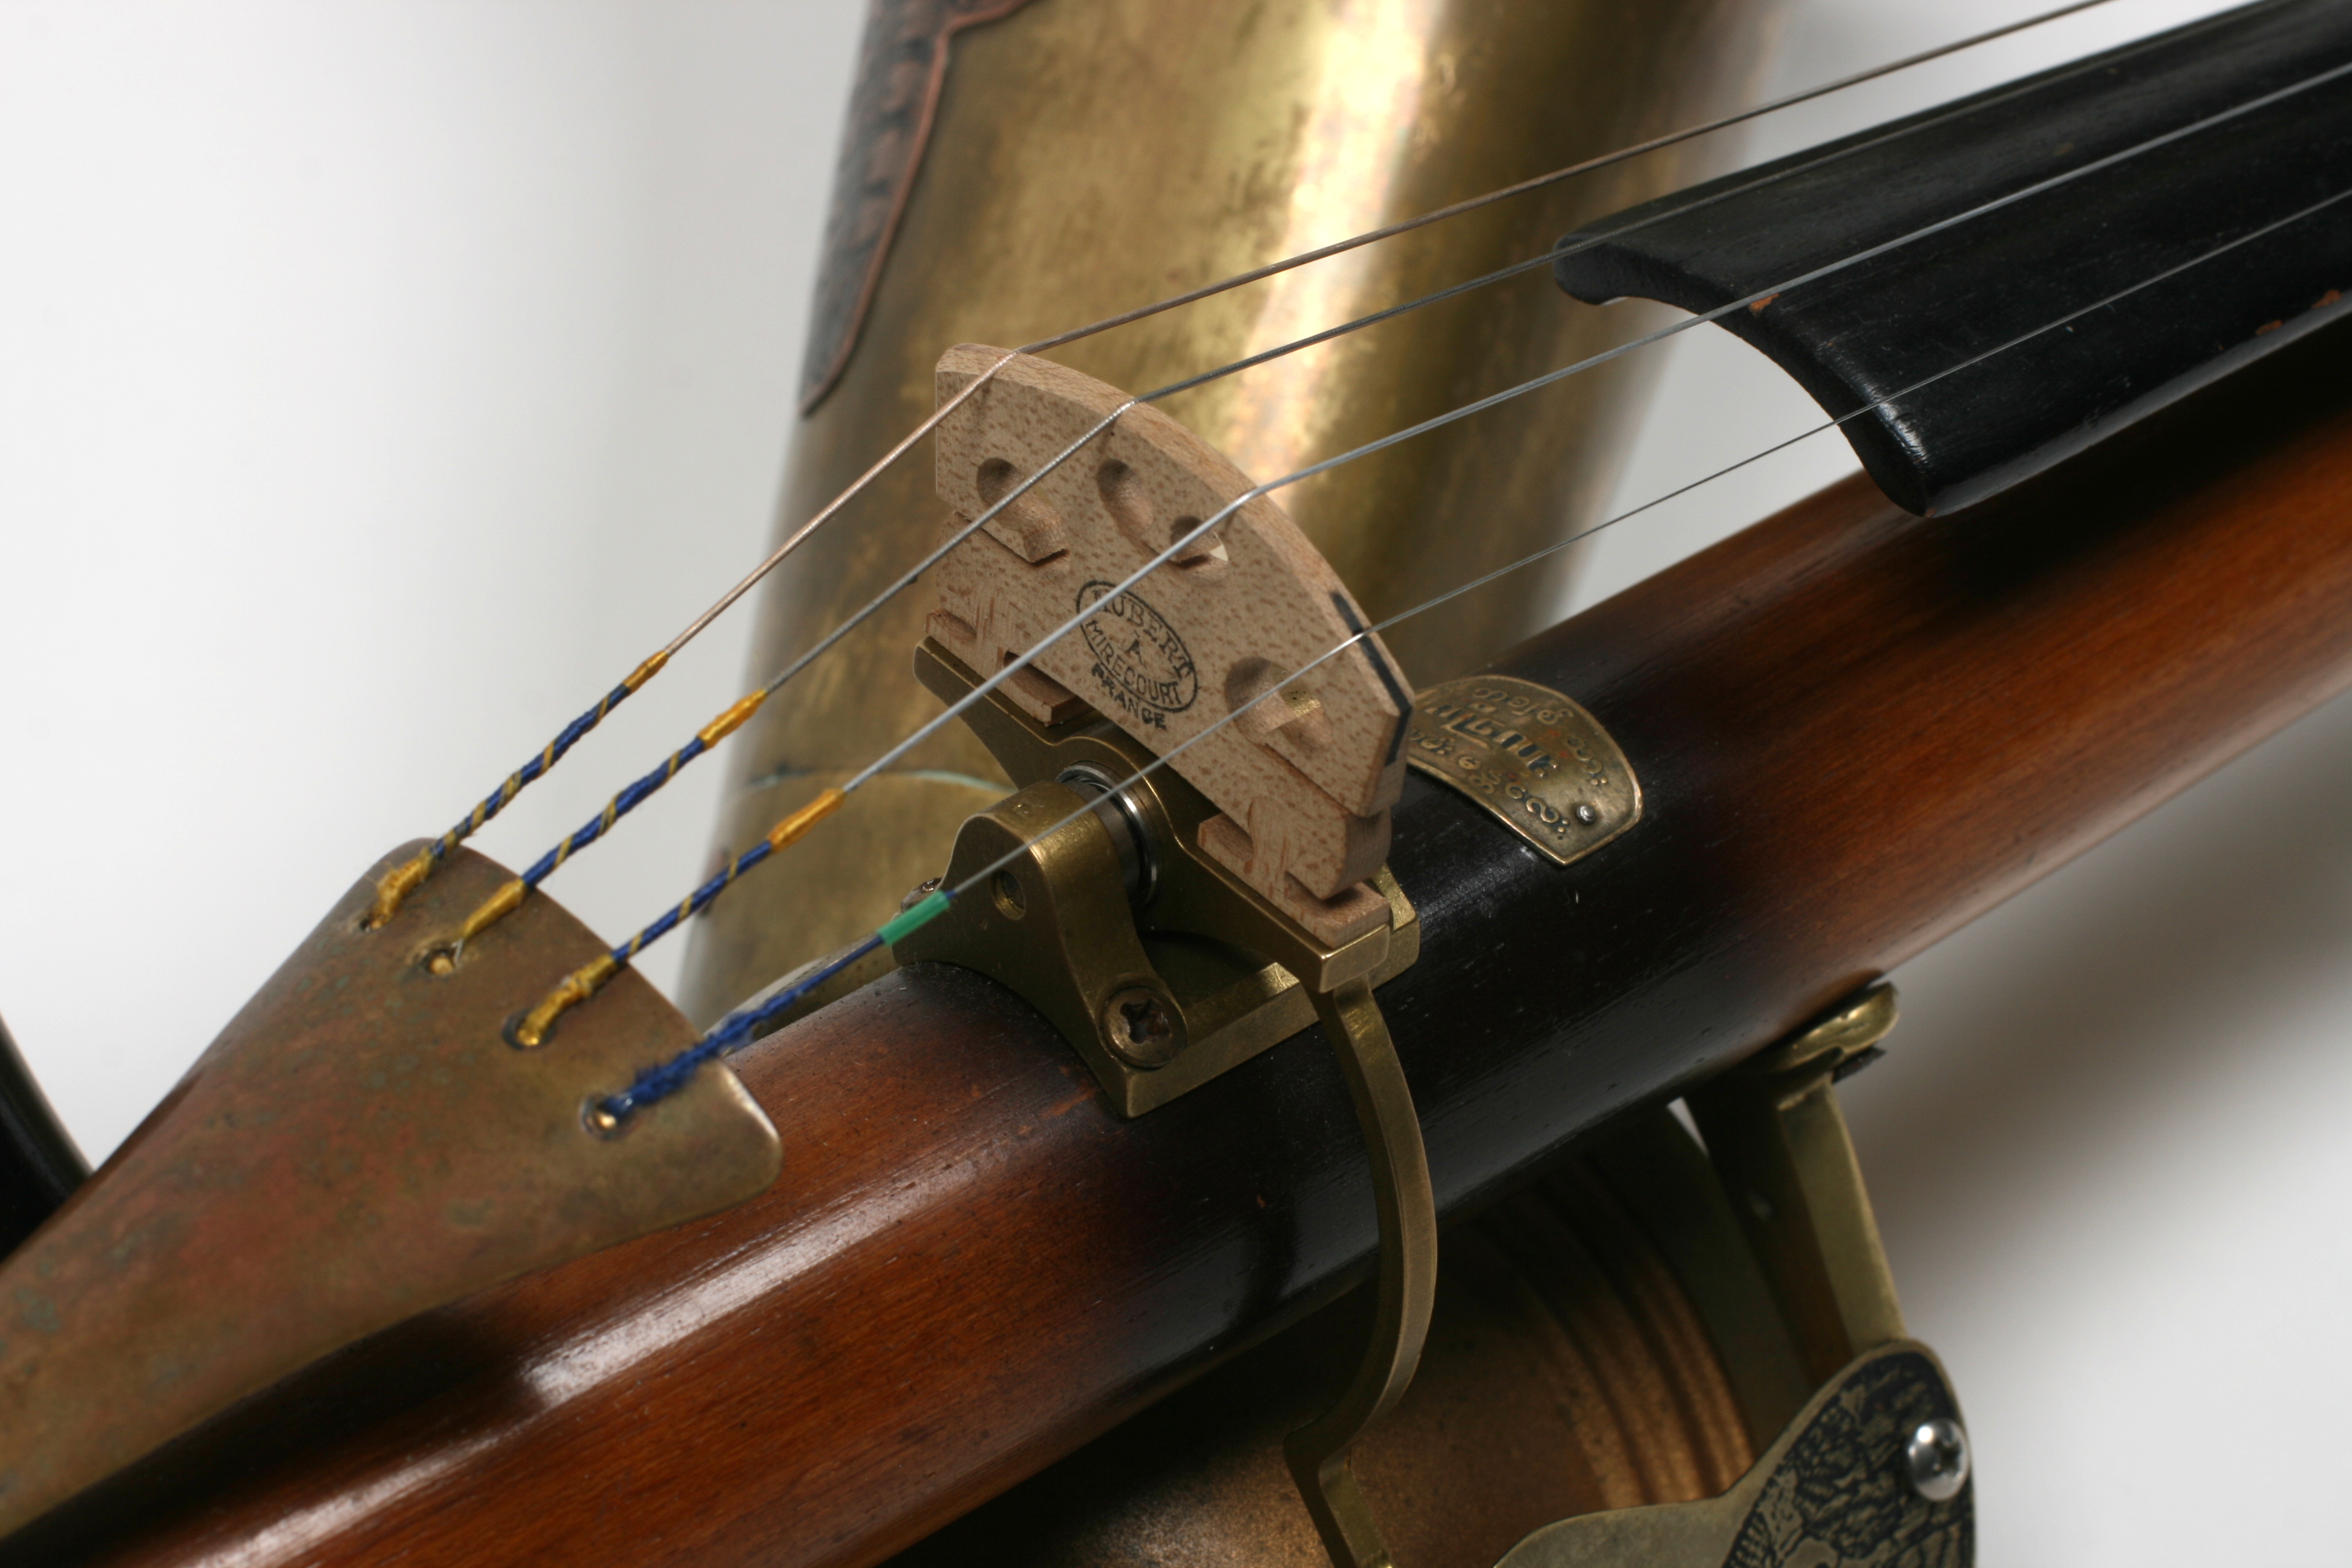
The next issue was the missing linkage components. The bridge of the Stroh violin was supported by a brass lever that pivoted between two pointed screws. It was finicky and needed to be re-tightened periodically. Also it appeared to me that the arm that connected to the diaphragm was not correct, the diaphragm linkage would’ve been at an angle had the link not been missing. Since I was going to have to re-create the linkage anyways I decided I would make a new bridge pivot as well using a more sophisticated bearing.
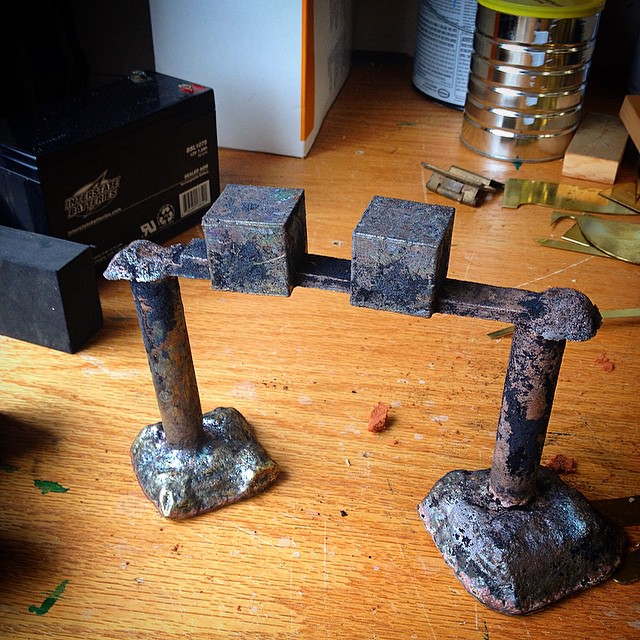
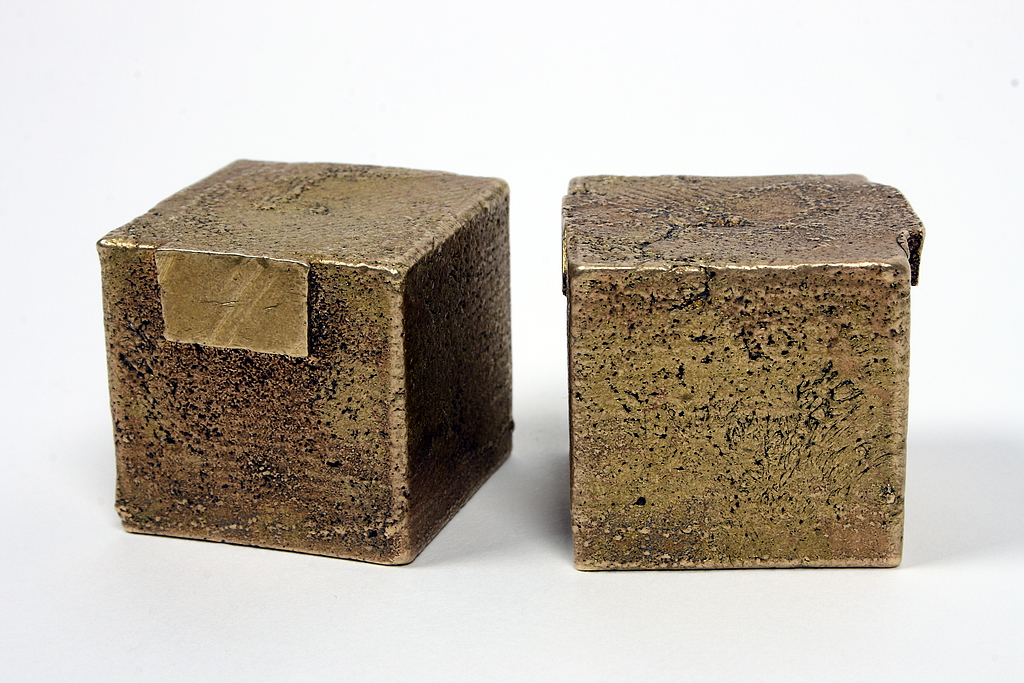
But of course things here at the workshop are never that easy. When I looked for brass stock to make the new bridge pivot I found that I had no billets of brass that were large enough. But I did have plenty of scrap brass. So I decided to cast some billets using my foundry furnace.
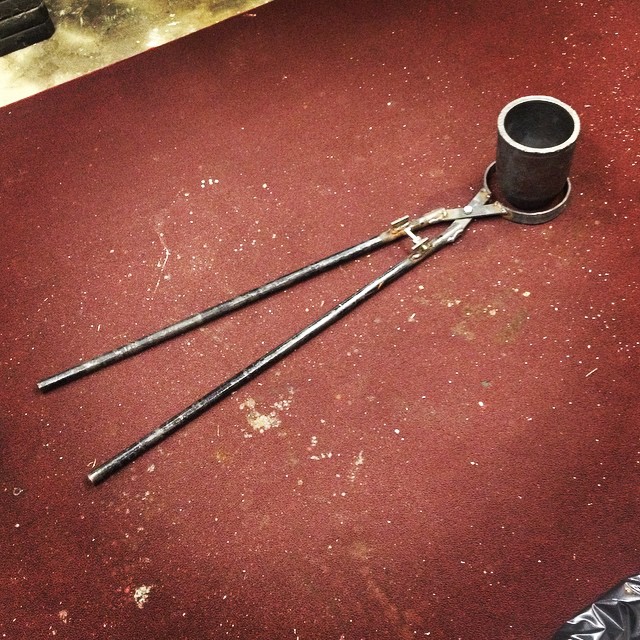
Previously I’ve only cast aluminum in the foundry furnace so I had to buy a crucible in which to melt the brass. Of course that meant that I had to fabricate a pair of tongs to hold the fragile graphite crucible.
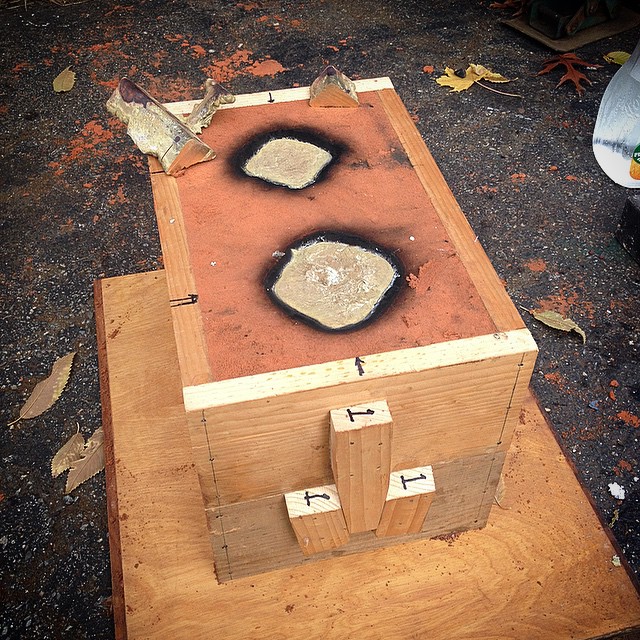
I use the 3-D printer to make a couple of cube patterns for the billets and then cast them in Petrabond sand.
The casting went smoothly and I ended up with a nice pair of cubes of brass to mill the new bridge from.
I drew the profile for the bridge in CamBam and then milled it on my Bridgeport Series II CNC mill.
Thinking about the design of the new bridge, it occurred to me that the read-write heads on a computer hard drive move back and forth at essentially audio frequencies and that a bearing from one of these heads would be perfect for the Stroh.
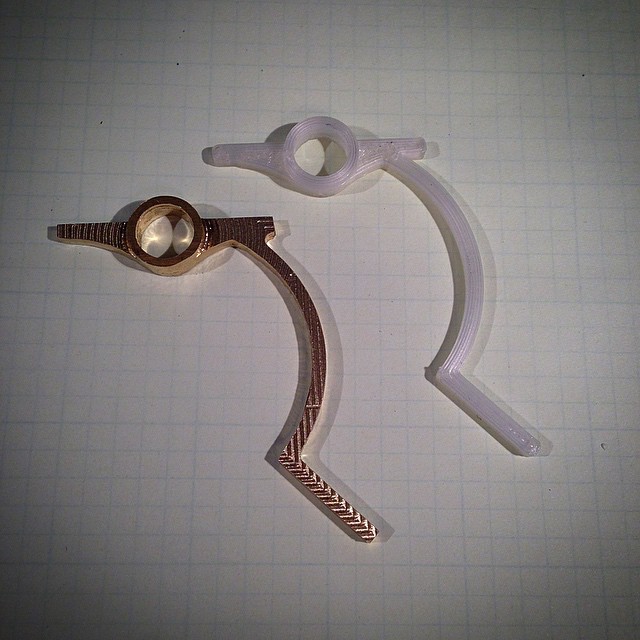
I took some measurements to figure out the linkage from the bridge to the diaphragm, and then printed out a plastic part to verify the fit.
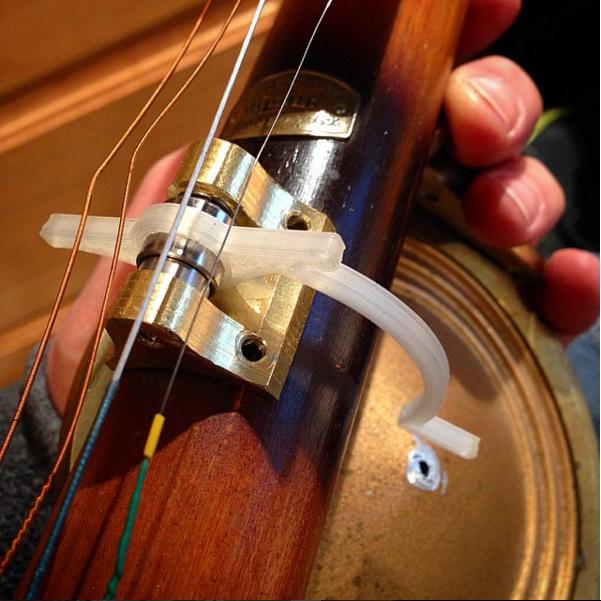
Once I had the fit correct, I transferred to the STL file from Autodesk 123D Design into CamBam and milled it out of brass.
As you can see, it worked quite well.
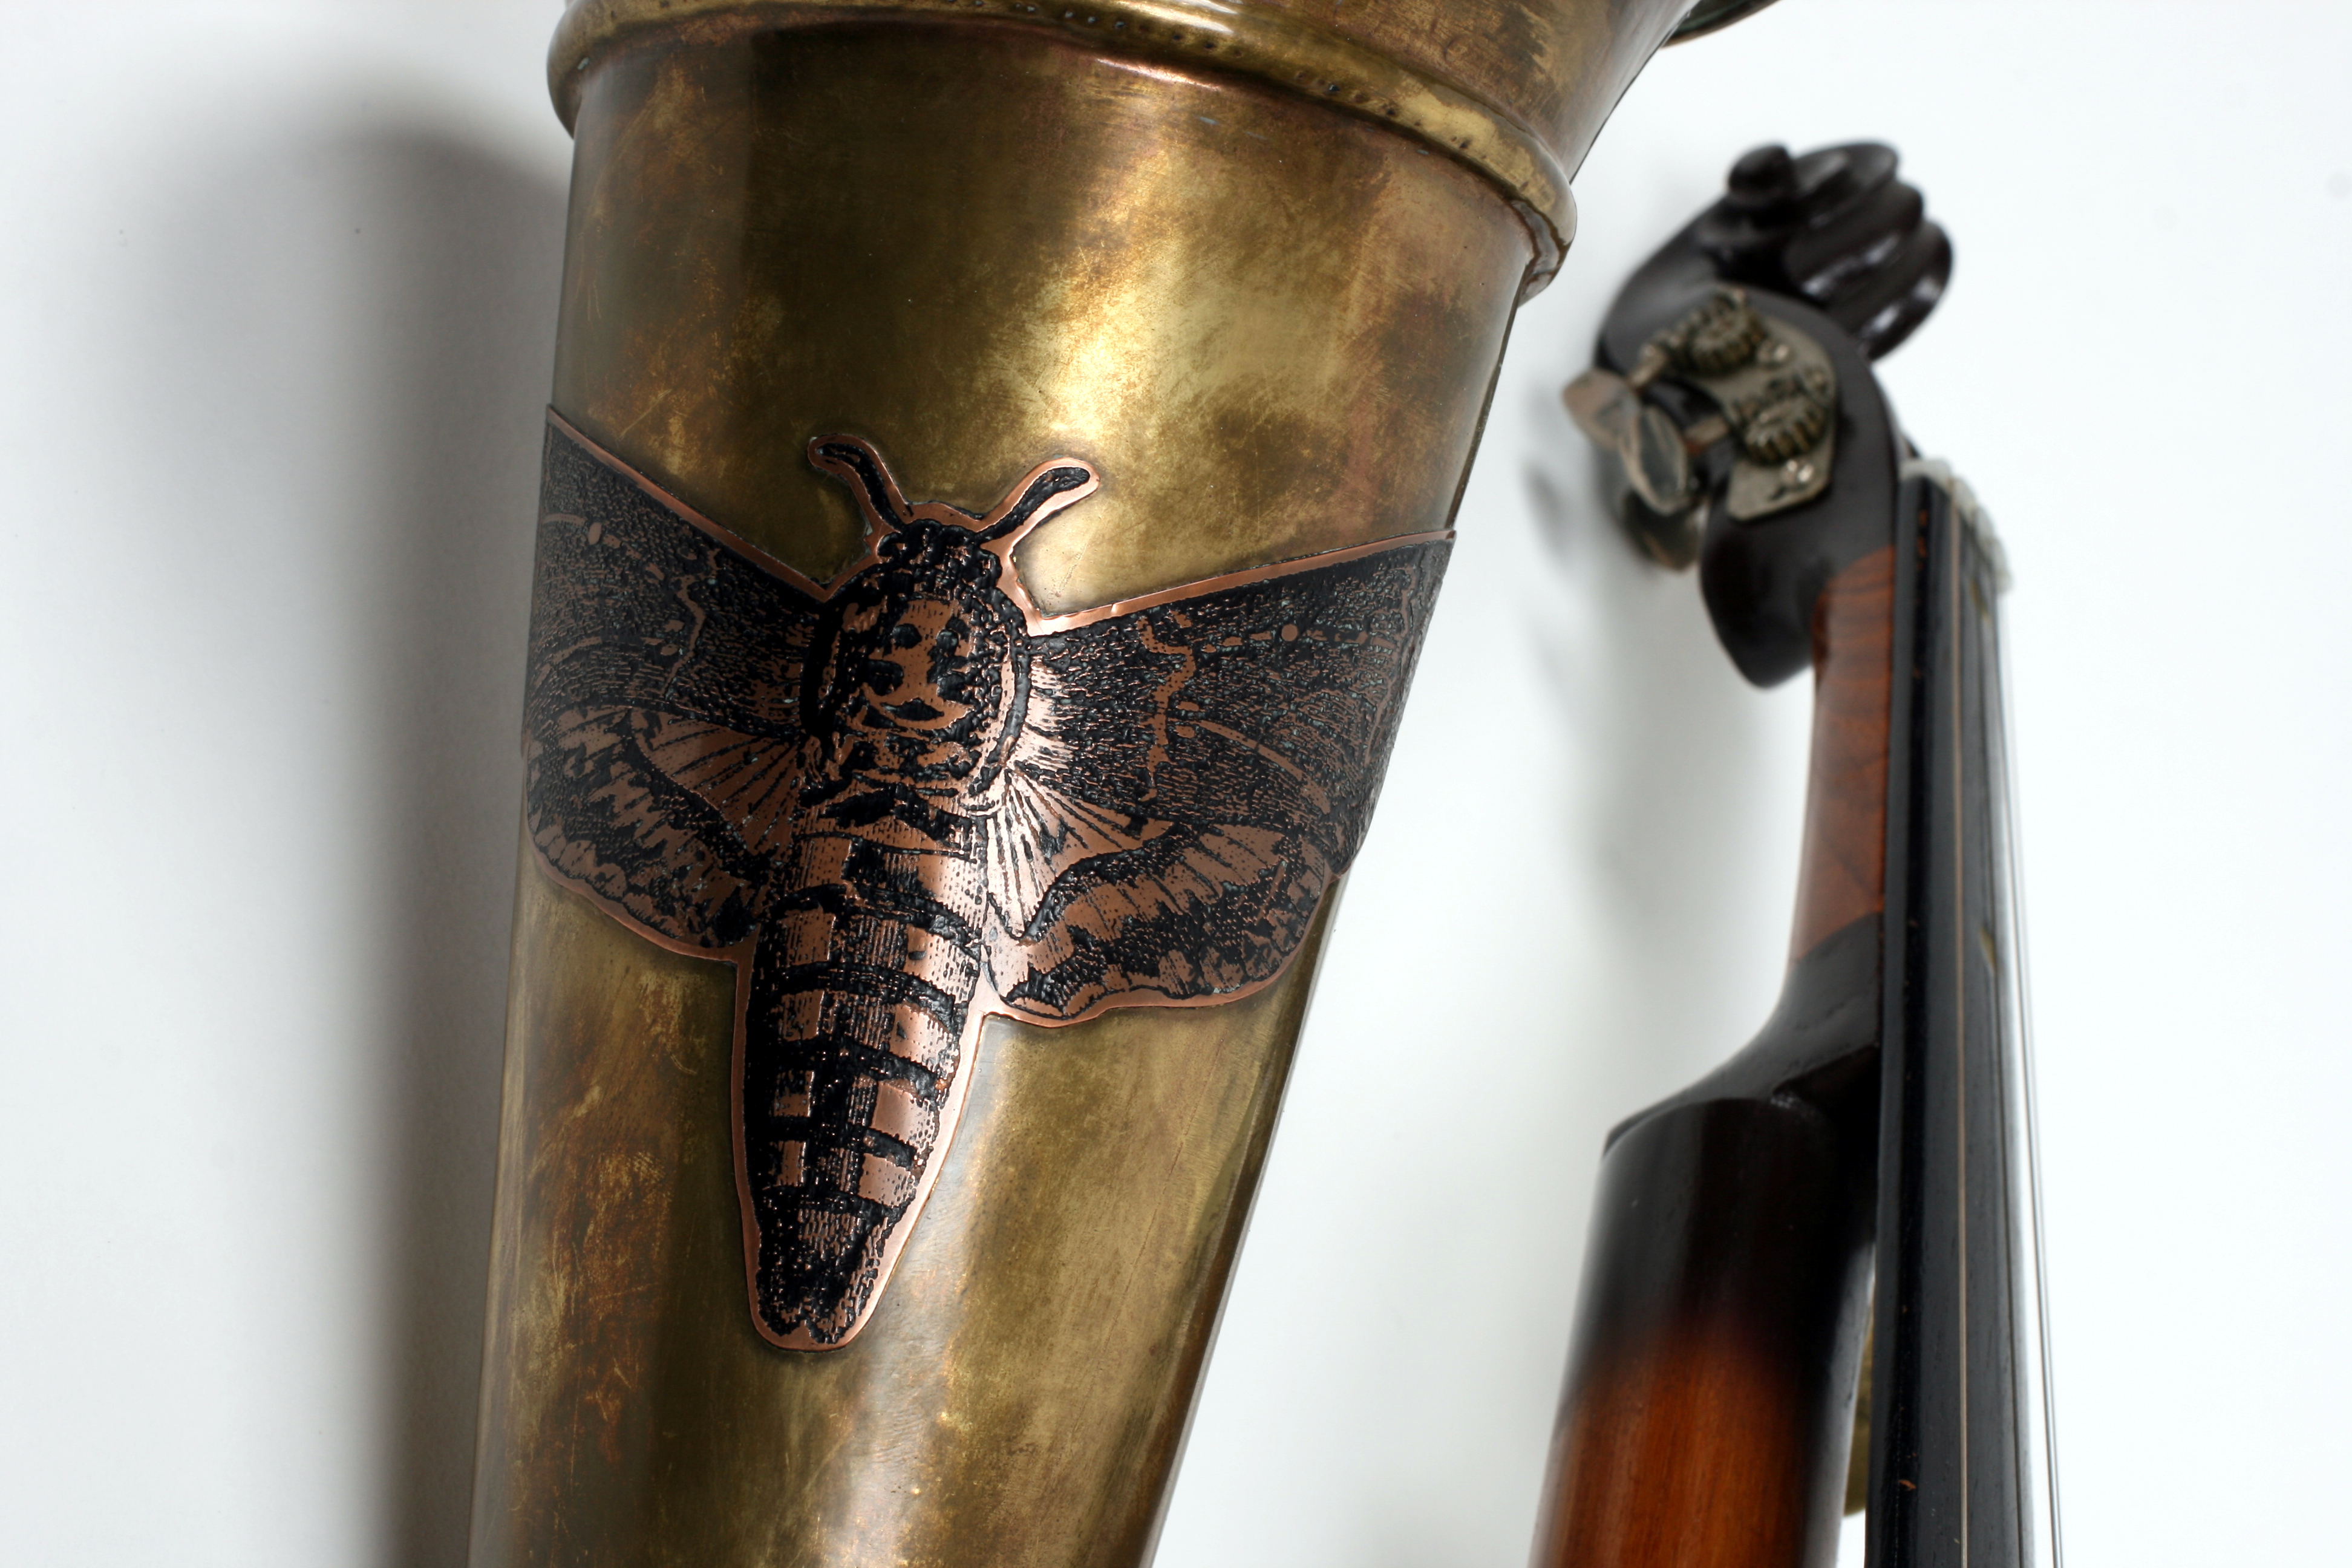
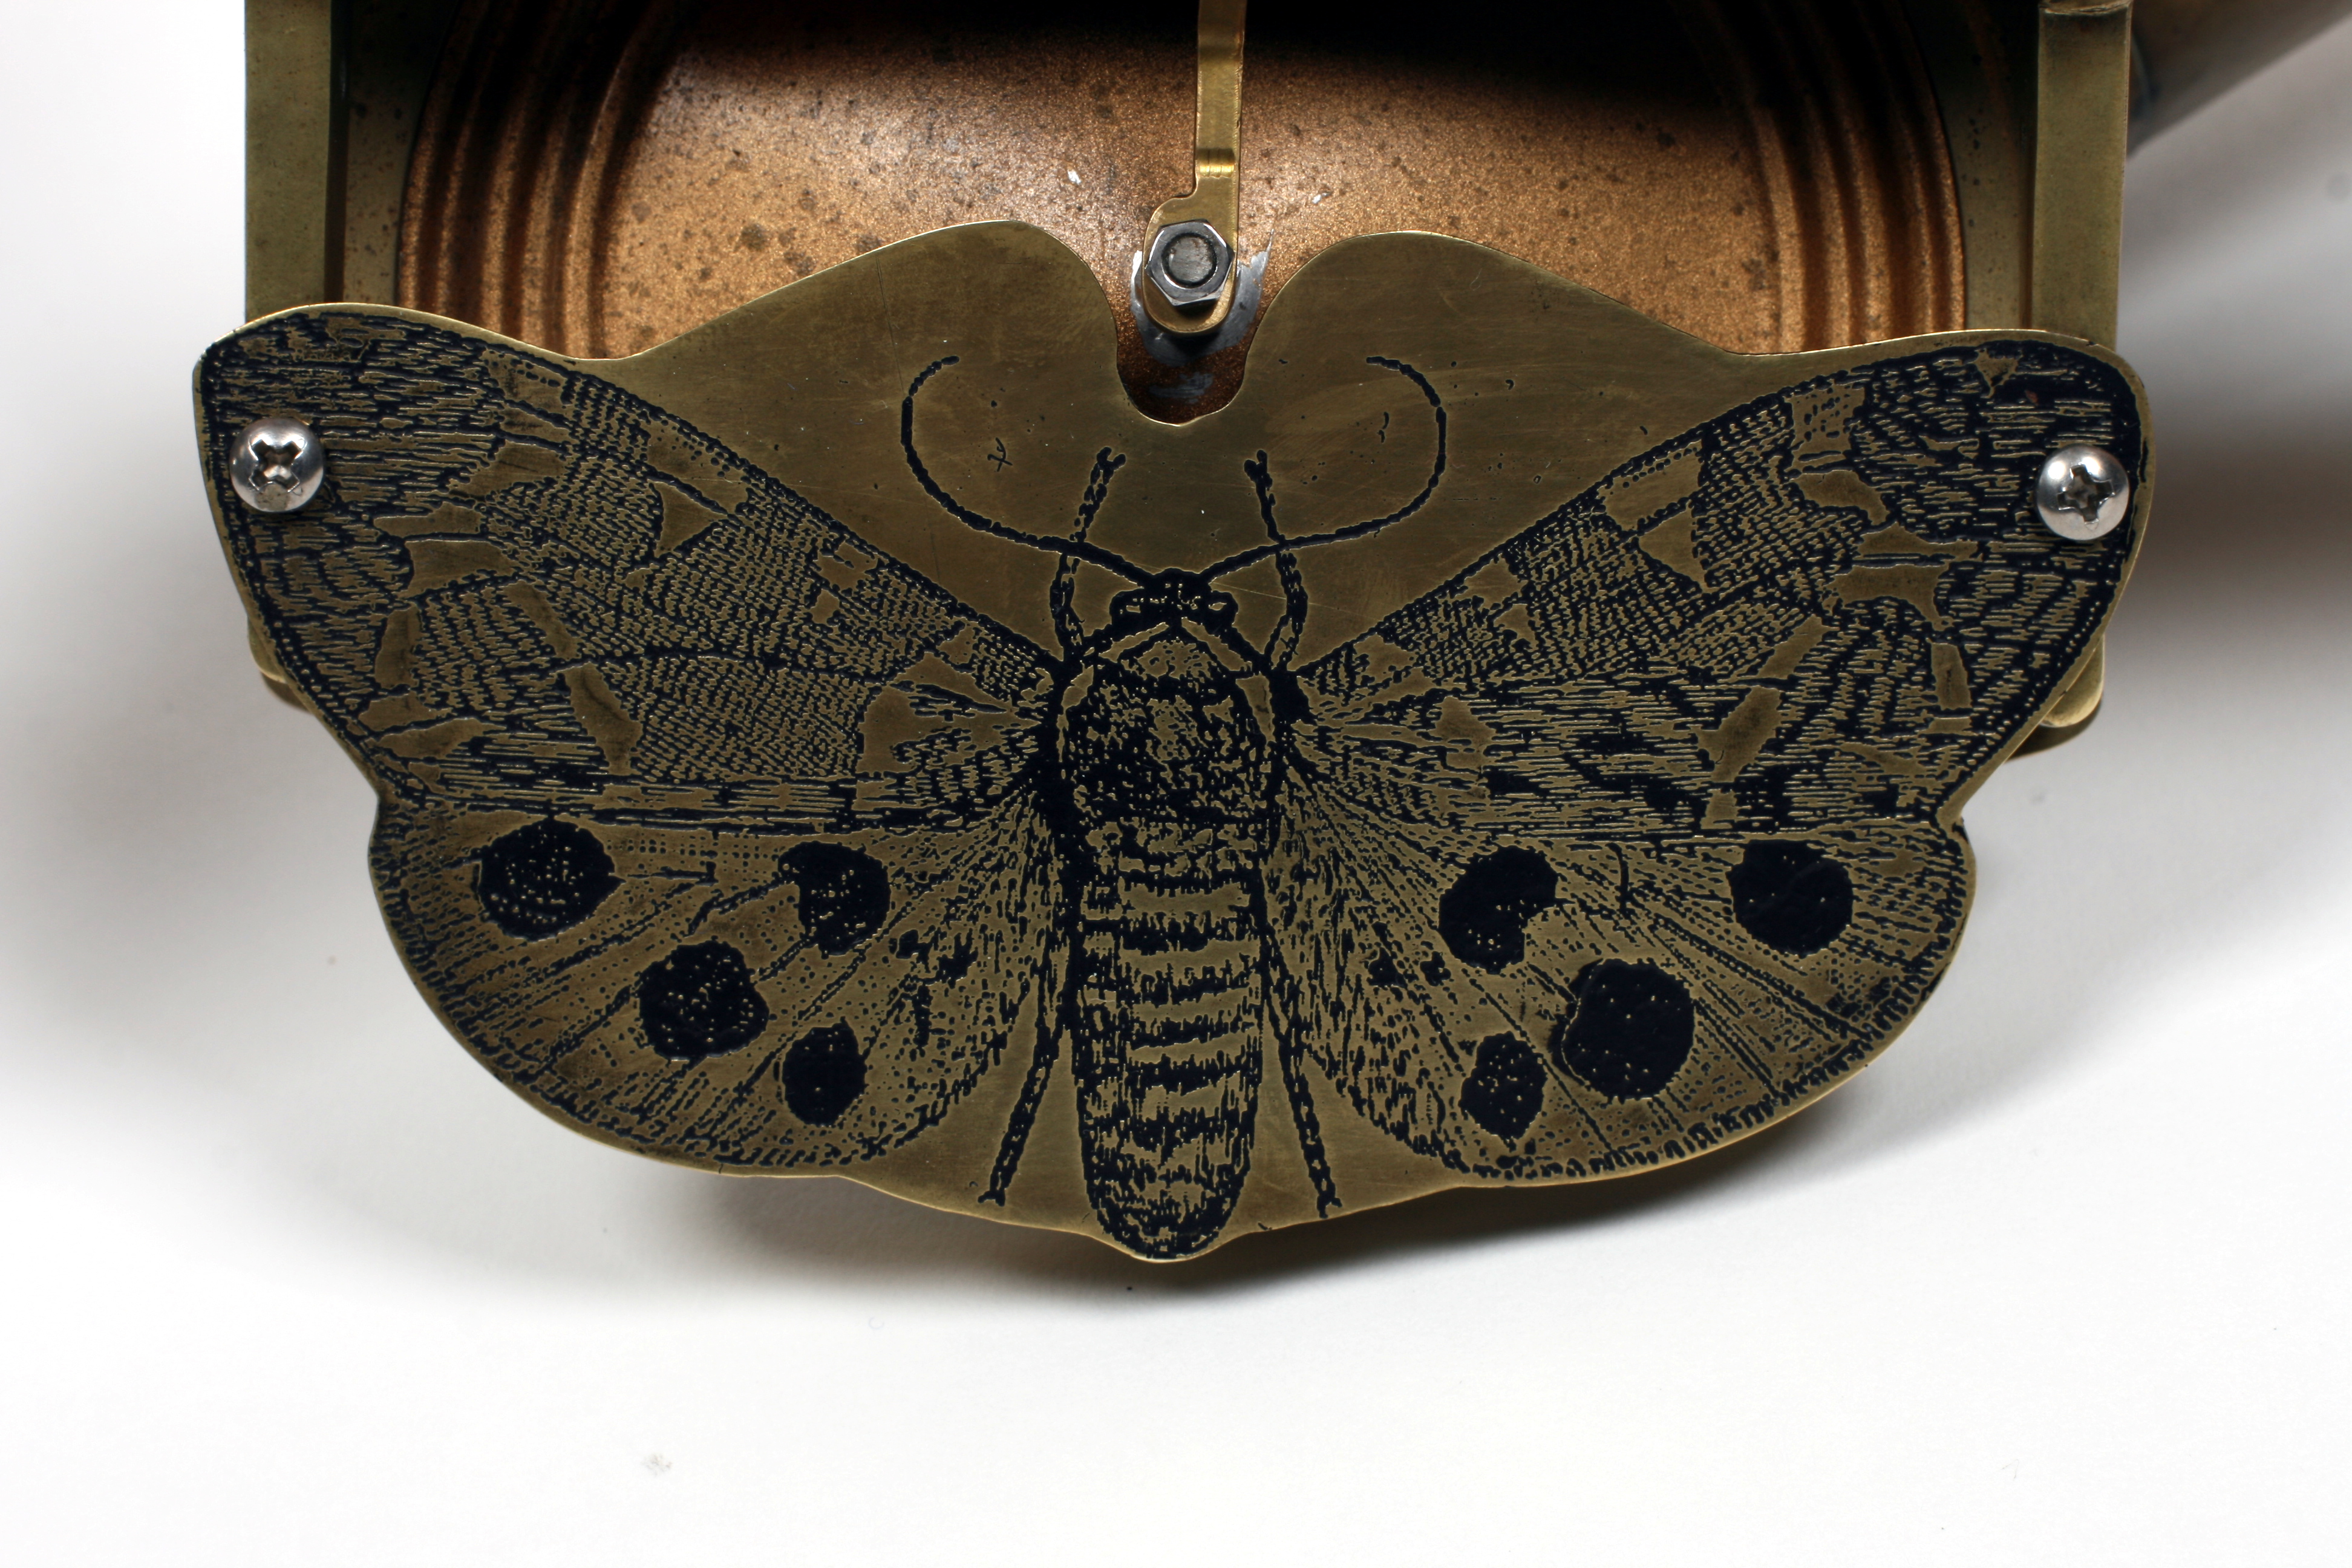
The next step was the decorative elements. My client had sent me several pages of graphics and from them I chose these two moths as being the best fit for the diaphragm cover and the horn.
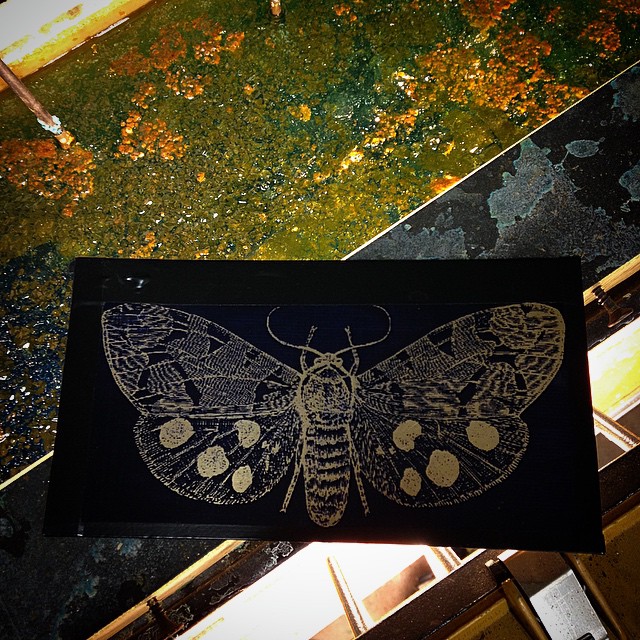
I printed out the resist mask and transferred it to the brass with some Press-n-Peel blue transfer film. There is a lot more information about that process here.
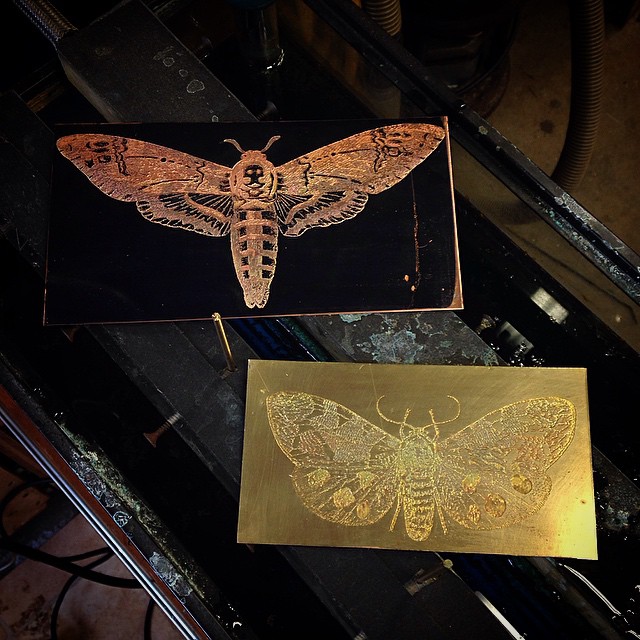
Then the moths went into the etching tank for about half an hour. The etched moths were then finished with a bit of paint to bring out the etching and affixed to the horn with 3M bonding membrane tape.
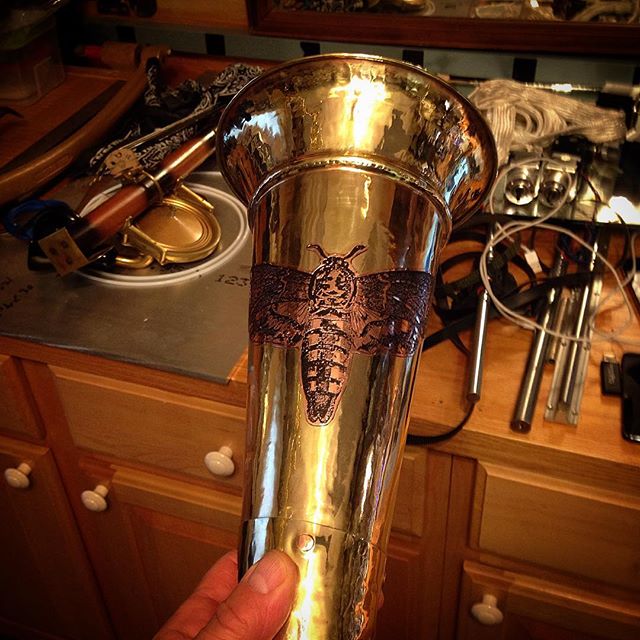
The metal working on the horn required me to clean off the original, beautiful, patina so I prepared an ammonia vapor tank to restore the horn to the same appearance as the rest of the brass on the instrument.
Four hours in the ammonia tank gave both the brass and the copper on the horn a nice aged patina.
The diaphragm cover only required about two hours.
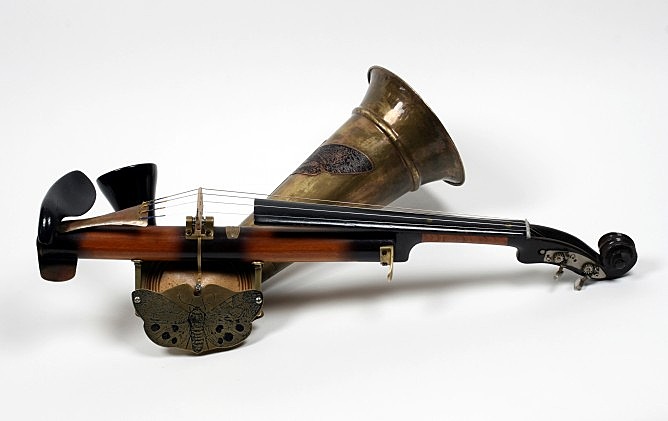
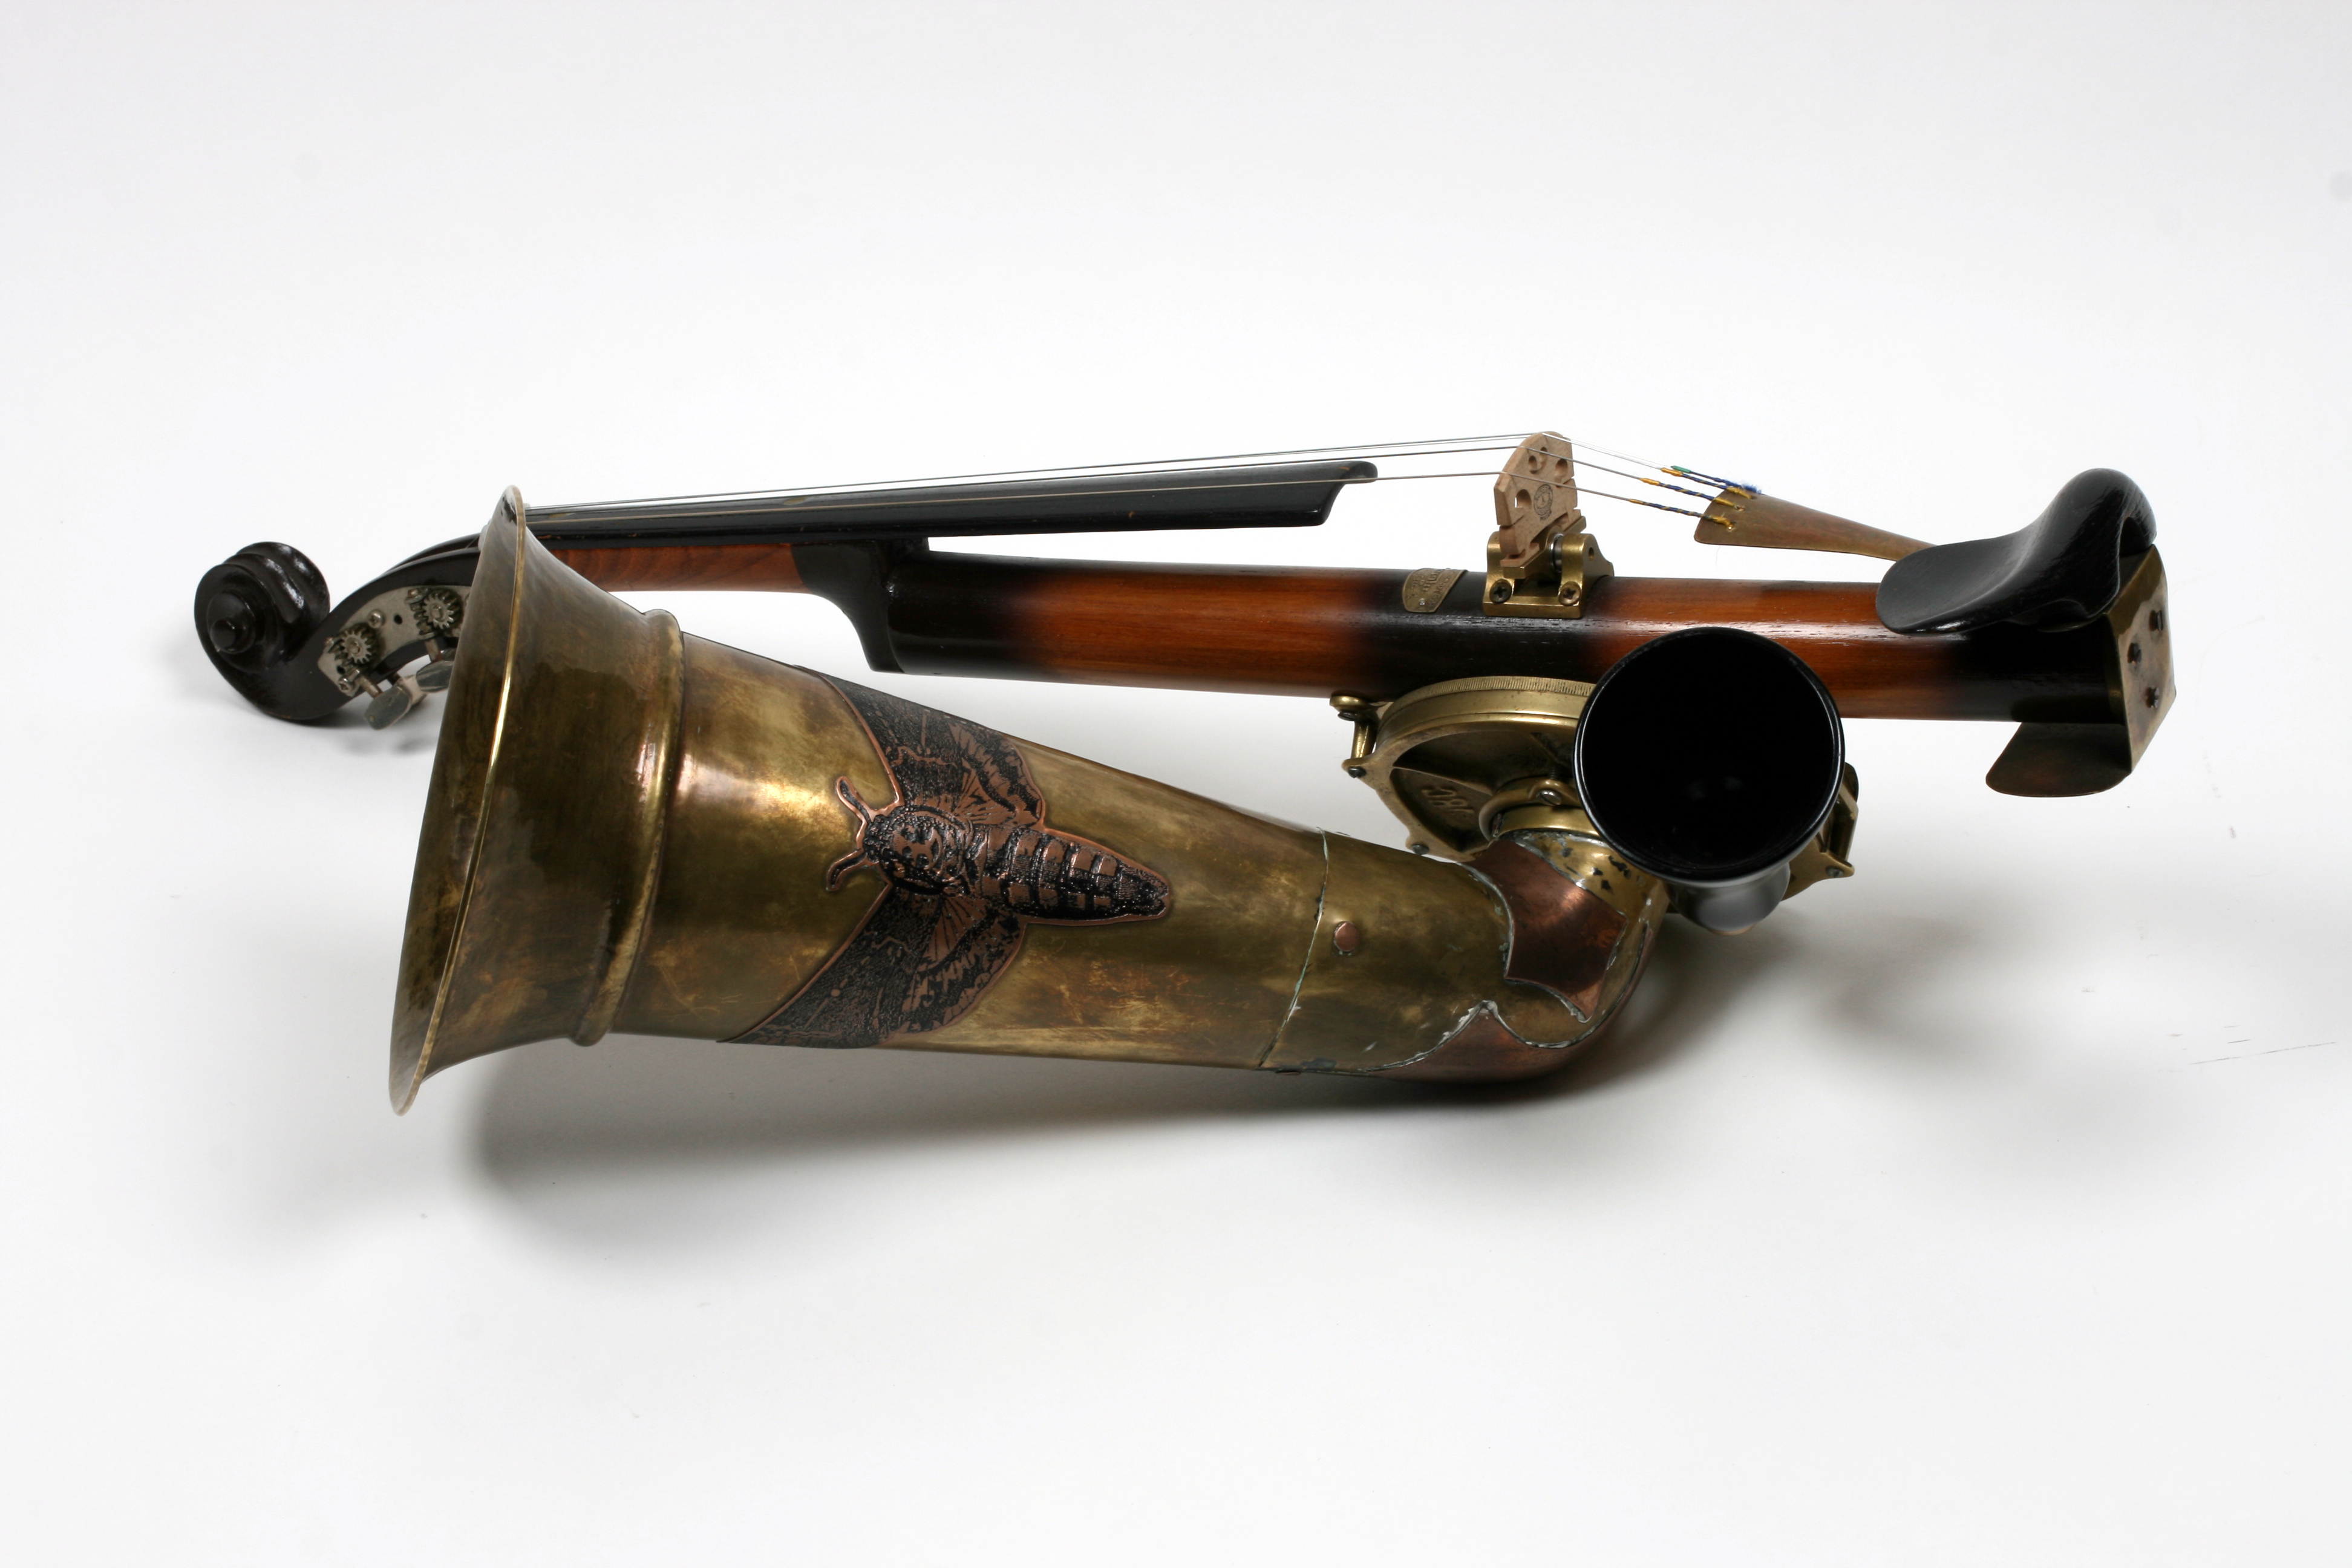
And here are several shots of the finished instrument.

You’ll recall I mentioned that the monitor horn was missing, the monitor horn is a small horn that points directly at the musicians ear and gives them a better idea of the timbre of the instrument. The original monitor horn was made from brass but I asked my father to turn a new one from basswood which I lacquered black to match the fingerboard and chin rest.
The copper moth and patina-ed horn were finished with a thin coat of automotive wax to give them a little bit of a shine.
The bridge needed to be trimmed slightly to set the string height above the fingerboard correctly.


Hi Jake,
Beautiful work. I am amazed. You definitely have a talent for this kind of thing.
I am currently restoring a Stroh Violin as well. I don’t have a bridge or a good template. Do you have a template? Or did you buy one from someplace? Thanks for sharing!
I purchased one of these: Glaesel Self-Adjusting Full Size 4/4 Violin Bridge http://amzn.to/1nVv2Ji
Very nice wort!
Of course to bake an apple pie (or fix a violin) once must first invent the entire universe…
Hi, Jake, Nice work! You may find it interesting that I had featured one of these violins in my 2008 Steampunk exhibit in Bridgehampton- and it was featured right next to your famous Steampunk Fender Stratocaster!
Thanks Art!