Foundry Furnace – Part 3 – Casting the Refractory
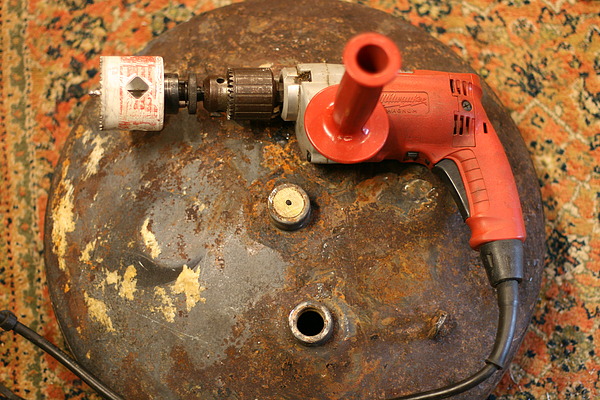
This is the top of the furnace, it needs a 2" hole to let the hot gasses escape so I hammered a tapered dowel into the pipe fitting and used a hole saw on my Milwaukee Magnum Hole-shooter (The most powerful hand drill known to man – use the side handle even if you do feel lucky.)
To create the forms for the interior cavities I cut strips of sheet metal from the water heater's exterior on my band saw using a method called "friction cutting." My band saw is an inexpensive model made primarily for wood, but if you install a fine tooth blade (around 12-18 teeth per inch) you can use it to cut sheet steel up to about 16 ga. This, of course, ruins that blade for cutting wood. Friction cutting is a speedy process too, I zipped the length of the water heater shell in seconds.
.JPG)
The center cavity is 10 inches long and 9 in diameter. I cut some plywood rounds and stapled the sheet metal in place to shape the core pieces. The vent hole for the top was simply rolled on the sheet metal roller and tack welded in place.
.JPG)
To keep the water heater tank round as I filled it with the refractory cement I cut some plywood forms to go around the outside of the furnace body. I also welded some re-enforcing rods inside the body to strengthen the castable refractory and hold everything together. A pair of brackets hold the body to the bottom piece of plywood to keep the cement from escaping.
.JPG)
More re-enforcing rod tacked into the top.
.JPG)
The base was the most complex piece with the flame tube entering at a tangent. I cut the hole in the tank with the oxy/acetylene torch and the welded in a muffler fitting that is a mate to the muffler pipe I'm using for the burner.
.JPG)
I mixed the Plicast 2600 castable refractory from Cutter Atlantic to a stiff consistency and then rammed it into the molds. The folks at Cutter Atlantic were incredibly helpful! I walked into their offices in Woburn, MA and their engineer sat down with me and helped me figure out exactly what and how much castable refractory I would need and then walked me through the steps to get a good cure. It is so rare to find a company that treats the lone DIYer with the same respect and courtesy as a power plant contractor building a furnace chamber for a five story high boiler.
The results you see below.
.JPG)
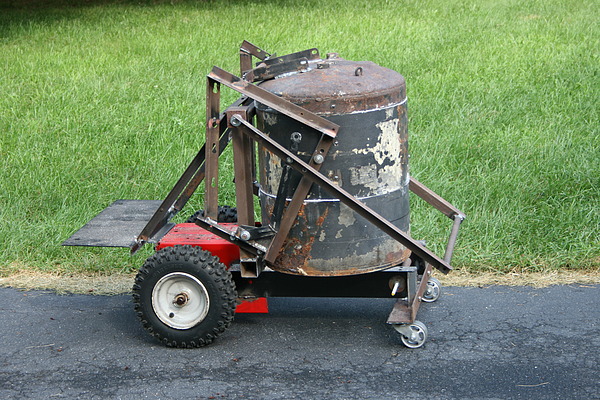
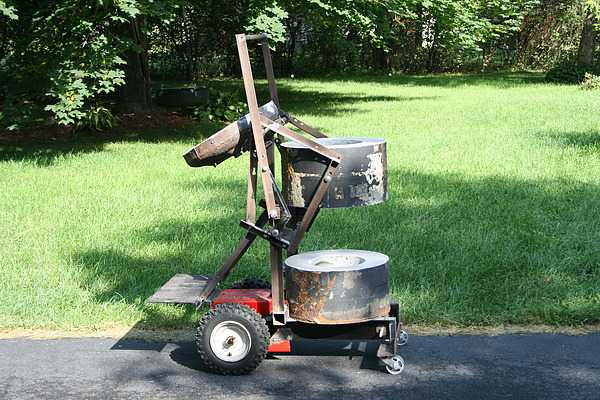
And here is the furnace body assembled with the newly re-enforced lifting mechanism in place. I'm still a little nervous about where I'll need to stand to lift the body, so there are probably further tweaks in the offing.