Home

Main Menu

  • Projects
  • Fashion
  • Music
  • Books & Reviews
  • Events
  • Features
  • Upcycling
  • Videos
  • Steampunk Labs Project
  • Kerosene Lamp Project
  • Technical Resource Links
  • Steampunk Links
  • Ephemera
  • Site Search

Steampunk Car Update - Catalytic Converter on an Aircooled VW Motor

Jake von Slatt — Tue, 07/08/2008 - 13:24

STMPNK
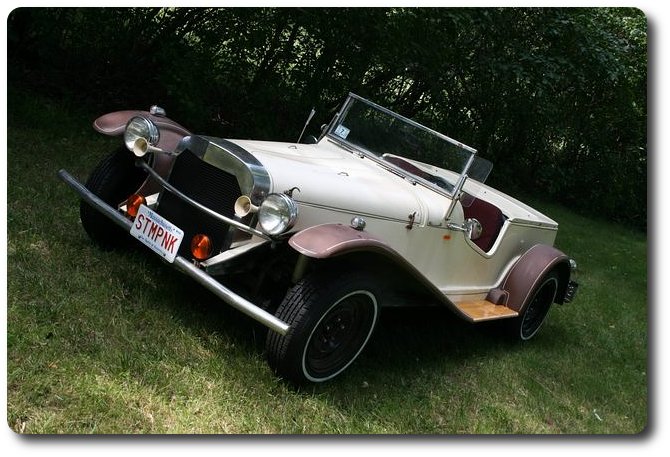
Lots of progress!  She's on the road, registered, inspected, and passed, including emissions which is pretty cool considering that she's basically a 1972 VW Beetle that was re-titled in Ohio as a 1985 "assembled vehicle."  A close read of the Massachusetts auto emissions law would seem to indicate that a kit car of this type should be tested under the make, model, and year that the chassis was manufactured.  However, the test station can only test to the make, model, and year the vehicle is registered. 

Since this vehicle was titled as a 1985 in Ohio that's the only thing that our RMV would let me register it as.  They told me I'd have to go to Ohio's DMV to get it changed - but under Ohio's rules, it's correct!  Classic Catch-22.  Read on to see what I did.

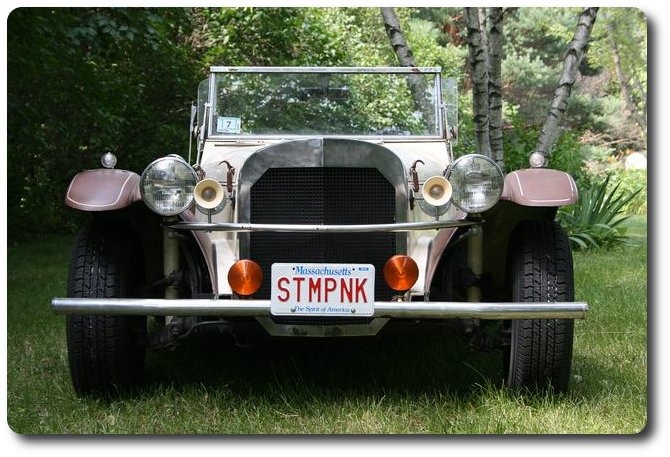
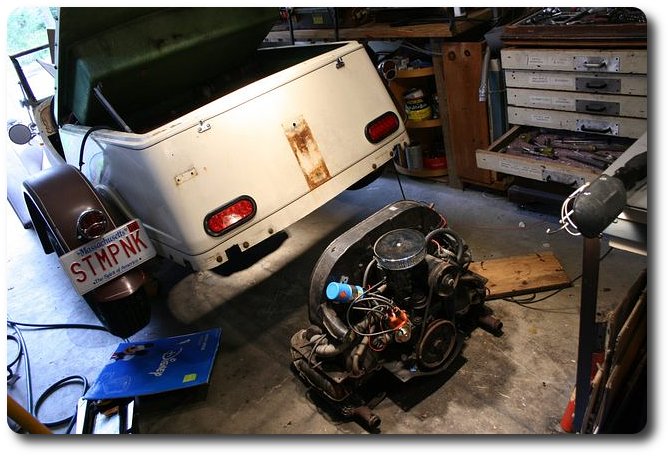
Oh yes! and I got Mass plates STMPNK no less!

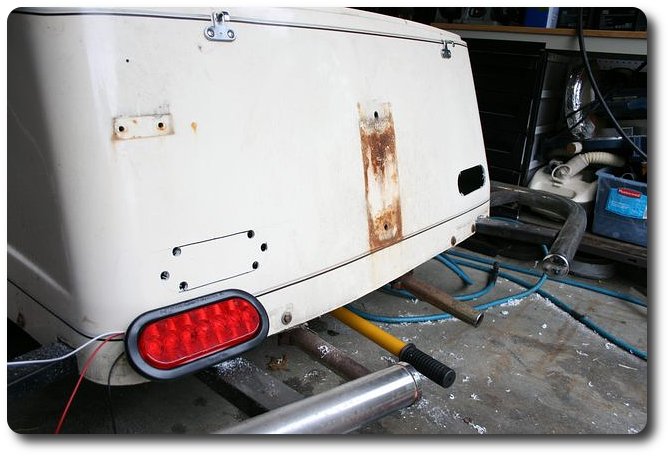
As I mentioned earlier the reproduction Ford Model "A" tail lamps I bought were not Department of Transportation (DoT) approved so I added a pair of these LED truck tail lights to the rear valence.  They are very bright and since they're LEDs they come on a bit quicker then the incandescent tail lamps and that 1/10 second could mean the difference between a scare and whiplash!

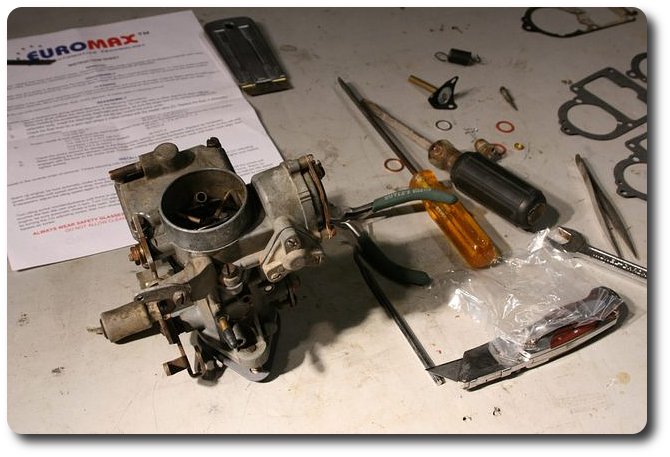
My earlier efforts with the carb got most of the gum out but there were still some bad gaskets so I got a re-build kit from AirCooled.Net and completely rebuilt the carb.

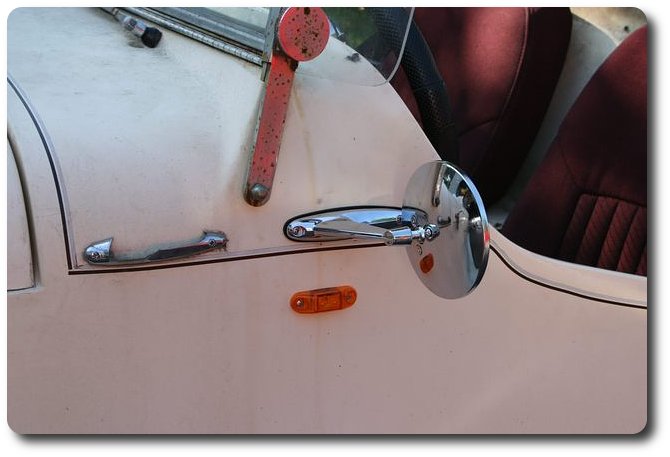
I also picked up a side mirror from my awesome local auto parts place.  The original mirrors were badly placed. In fact, the driver could not even see the right side mirror!  Below the mirrors are the LED side marker lights I added and the spot where the old mirror was mounted is now reserved for a brass coach lamp.

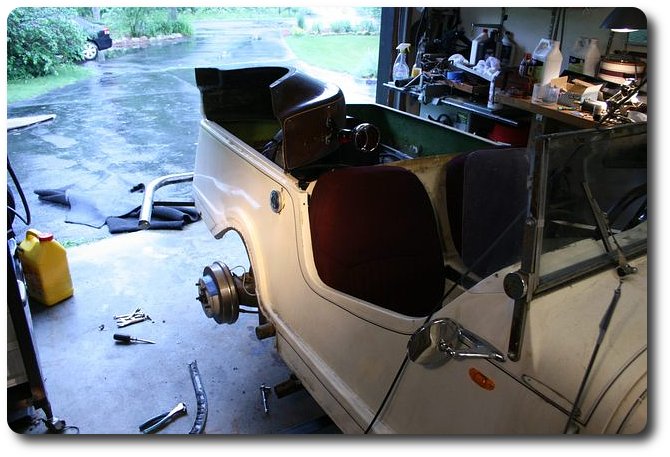
Even with the correct wheel offset the fender clearance on the right side was tight.  Some careful measuring and I discovered the the right side fender was not centered on the wheel!  I drilled the pop rivets and relocated the fender solving the interference problem.

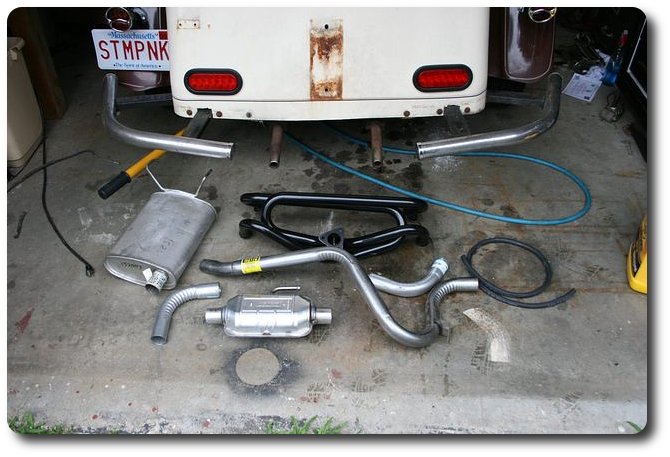
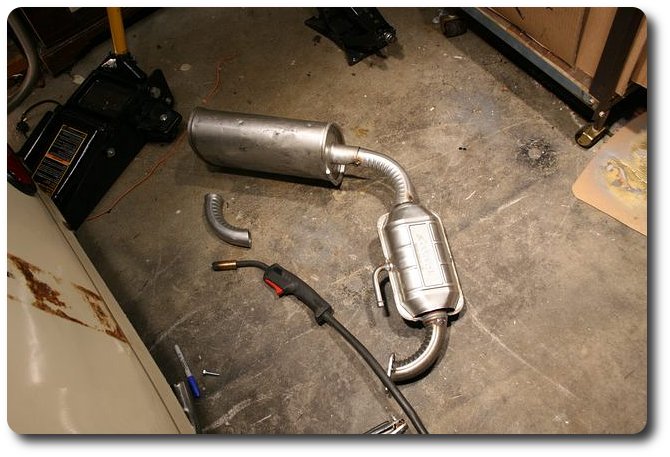
And now we get to the emissions fix.  By 1985 cars had a host of gadgets and do-dahs to clean them up but the most critical component was the catalytic converter.  I did some research and found that universal three-way cats were available for less then $100 from places such as J. C. Whitney.  I ordered one along with a BugPack exhaust header and then dropped by my awesome local auto parts place (Acton Auto Supply in Acton, MA) where they let me wander around the warehouse choosing a likely muffler and bits of pipe to cannibalize for my custom installation.

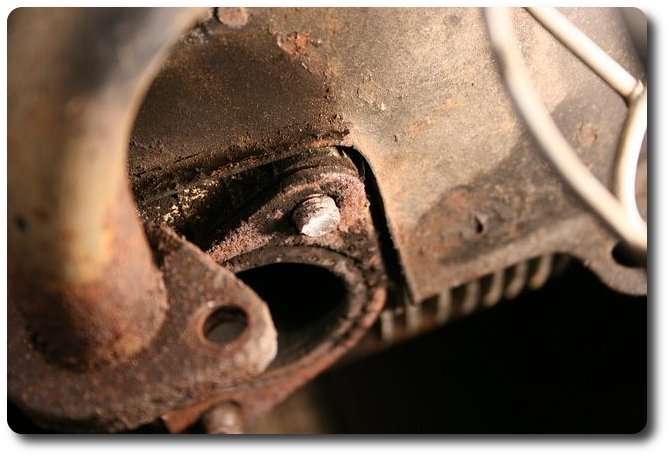
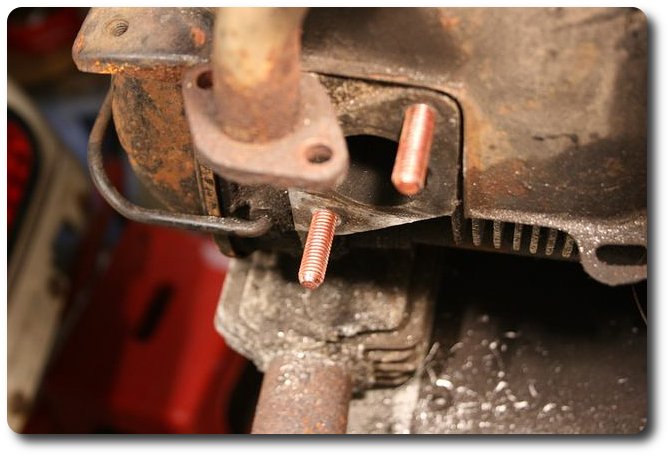
 Of course when I went to remove the old exhaust all of the exhaust port studs broke off!  Ah, VWs, It's all coming back to me now.

It is simply not worth it to try and drill exhaust studs with the engine in the car.  You'll break your back and likely muck up the heads.  I pulled the engine in about half an hour, woefully short of the 12 minutes it used to take me when I was in form!
 

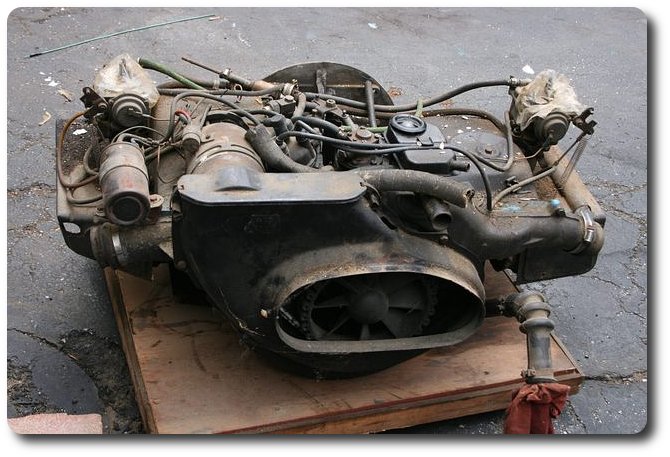
Oh!  Here's a VW Type III motor from a Squareback that my father-in-law gave me.  It has a pair of Solex carbs which I may put on but I would much rather trade them for a set of Type III fuel injection components which I would run with the open source Megasquirt engine computer. 

Write me at jake@vonslatt.com if you have any old Type III FI stuff kicking around!

Fresh exhaust studs installed!  Basically you cut the stud off close to the head, center punch EXACTLY in the center and then drill the stud out with larger and larger drills.  However, you do not want to use a drill with a diameter larger then the threads.  Once I clean out the hole I use a CV joint bolt from an old VW Rabbit that has three 'V' grooves cut in it with a file to chase the hole, unlike a  tap if you break it off in the hole you can drill it out.  If you break off a tap in the hole . . . just don't, OK?

Since I had the engine out I also took the oppertunity to replace the rear main seal since it was leaking. 
 
Here's the BugPack header on the engine as it goes back into the car.
 

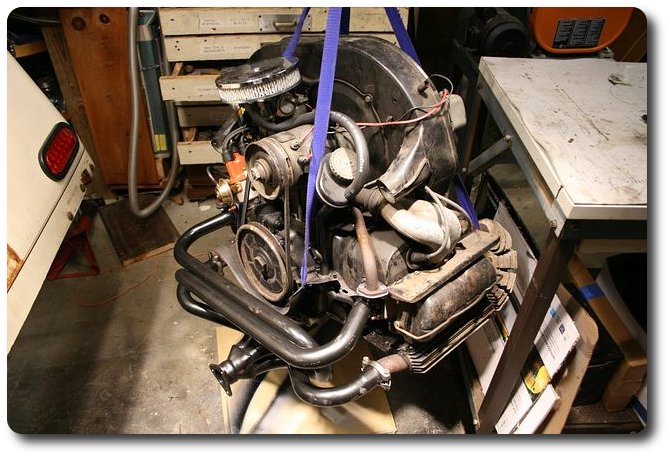
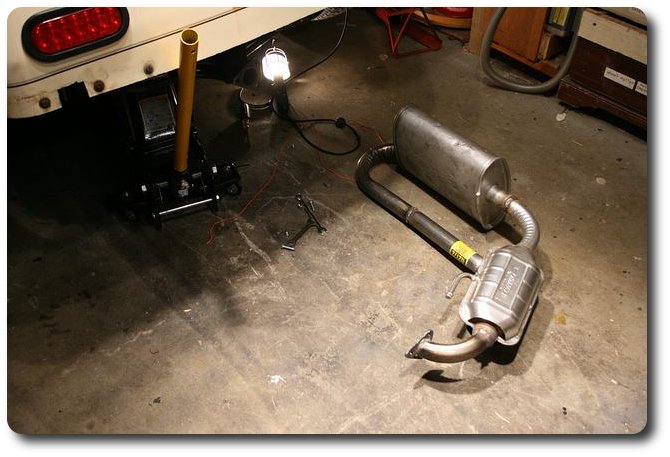
I made up the new exhaust system piece by piece.  I set each component on a scissors jack and then cut and trimmed bits of pipe to connect them, tacking them with the MIG welder.

Once everything was fitted I took the assembly out and welded up all of the joints.  The tailpipe runs along under the right side heater box and its strapped to it with a couple of hose clamps so the muffler sits just inside the body but completely supported by the motor.

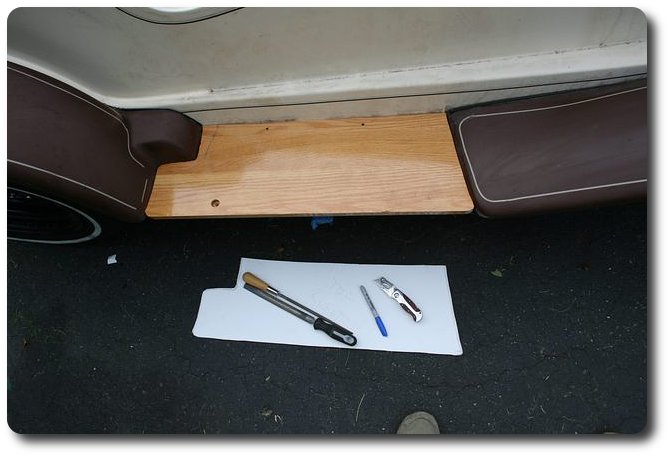
 The last thing I needed to do was fit some new running boards so I made a template with foam board and cut some out of 3/4" oak.

And here are some shots of the car at the completion of Phase I.

Phase II begins shortly and will consist of paint (black I think) and a whole bunch of brass bits and baubles including a fabricated brass radiator shell and some other features including a Jacobs ladder (or maybe a pair!). 

Of course Phase III will be the ultimate conversion to steam power which will likely utilize a monotube boiler with a forced induction gasoline/diesel burner and a Stanley style twin cylinder dual acting engine coupled directly to the differential.  I need to acquire and gut a VW transmission to see if my idea for the engine frame is going to work. 

Stay tuned!

STMPNK Car


STMPNK


STMPNK Roadster


  • Car
  • Jake von Slatt
  • Projects
  • Steampunk
  • Vehicles
  • Login or register to post comments

Steampunk VW kitcar

hienz1 — Sat, 10/31/2009 - 12:20

Dude, I believe you're going about this all wrong!!! I have restored a small handful of remaining antique automobiles and horseless carriages and usually begin with taking the vehicle completely apart, such as removing the body from the chassis, removing the motor, etc. I've noticed from your photos ("occular diaspora" in steampunk vernacular) that you have an overabundance of rust, almost everywhere. The only way to remedie this problem is to isolate the offending mandible and expose it to a rust treatment solution of a chemical nature. Then detail and repaint and-or brass plate the various metal structures and substrata. Sandblasters play a huge part in this step. Then, and only then, do you reassemble your personal conveyance carriage. During re-assemblage, you may desire to redesign various parts according to steampunk design rules. Projects like these usually end up in junk yards or for sale on eBay, due to the owner giving up on it. And they give up mainly because they go about it all wrong. Quality machines take a bit of time, linear time to be exact. I strongly suggest (but you may object, since it is your car) that you disassemble the whole thing, set aside a work space and storage space for all the parts, and slowly meticulously de-rust/sandblast every stinkin bit of it. Then paint away, plate away, whatever. And that's my take on this.

  • Login or register to post comments

Not my style man! Immaculate

Jake von Slatt — Sun, 11/01/2009 - 11:04

Not my style man! Immaculate examples of automotive perfection bore the piss out of me!  True Ratrods (not the faux Ratrods you see at most shows) are what rings my bell.  Smooth running efficient powerplant in a solid sturdy body with massive character is what I'm going for.  In the case of this car the visual rust is all on fiberglass parts and was left by steel parts that have since been removed.  The pan is very solid with zero rust through so it will get some clean-up and a coat of rustoleum and chip seal. Next steps are a Megasquirted Type III pancake motor to open up the back and a paint job - 'prolly from a can or perhaps rolled on!
 

  • Login or register to post comments

1977 Steamin' Demon

Pixel — Sun, 07/12/2009 - 10:09

I saw this and thought of your project. The land speed record for a steam powered vehicle is held by a VW Kit Car powered by a steam turbine.

http://www.oiccam.com/reno/car_museum/racecars/1977_steamin_demon.shtml

  • Login or register to post comments

Further 'Punking Plans

KlokWorker — Thu, 01/15/2009 - 23:15

Other than lighting and the engine, do you have any plans for how you're going to Steampunk the car?

Might I suggest getting brass gears to protrude through the body and possibly spin slowly while the engine's running?

  • Login or register to post comments

Possible Alternative Energy?

JSwoff — Sun, 07/20/2008 - 12:01

Jake, if your really feeling adventuresome you may try to either convert the motor currently in the car, or work out way to make electrolysis HHO gas as a fuel source. Its a bit of a stretch but the science behind it seems sound enough, and really, that maybe the future of steam punk in my view, cars that create gas from water and spray steam out pipes, brilliant and beautiful. Take a look, see what you think, it maybe worth of bit of tinkering. Another thing you might play with, bio diesel, that is if you can get a diesel boiler. Anything to avoid the god awful gas prices. That car needs to be driven, not left in the garage begging for a sip of gasoline.

Amazing work on the car, love all your projects Jake. I've honestly grown an appreciation for steam punk. I'm currently gathering parts to make a steampunk keyboard, and maybe a custom case. I'll be sure to email photos when they get done.

  • Login or register to post comments

It takes precisely the same

Jake von Slatt — Sun, 07/20/2008 - 12:38

It takes precisely the same amount of energy to split water into hydrogen and oxygen as you get out of the reaction when you re-combine them - and you can only access a fraction of that energy for use in powering a car.

Producing hydrogen with electrolysis only make sense as a way of packaging and transporting energy, it's not a way to MAKE it.  The people selling plans for such systems are snake oil dealers.

I'm getting close to 40 MPG out of the car now and I usually bike to work a few days a week so gas price is not much of an issue for me even if it went to $6/gallon.

  • Login or register to post comments

Thanks for the updates!

Professor Fate — Sat, 07/12/2008 - 15:52

Can't wait to park my steampunk VW van next to your "mercedes" sometime and get a photo.

  • Login or register to post comments

Been lurking for some time...

Jeebee — Fri, 07/11/2008 - 12:10

Love the car! I used to work in the Hot Rod industry. Something you might want to check for cool retro accessories that could be further Steampunked.

King Bee headlights with turn signals already included

http://www.rjays.com/Rjays_electrical/headlights-01.htm

I'm not the biggest fan of this company, but their website has some cool tail lights that are all dot approved (in most states) and are LED might give you some ideas.

http://www.southernrods.com/categories/hot-rod-exteriors/lighting/southern-rods-1.html

I had a question, why change the radiator shell? Why not strip the chrome and re plate with brass? Keep in mind I admire your work and think your fabrication is awesome! I have turned many a gear head into a Steampunk fan by showing them your site.

Cheers!
-Alan in Chicago

  • Login or register to post comments

The grill is kind of a focus

Jake von Slatt — Fri, 07/11/2008 - 12:34

The grill is kind of a focus point and I think the stock Gazelle grill is kind of, well, cheesy.  I want to fabricate something special, maybe along the lines of Nemo's car from LoEG.

Also, this is going to be kind of a Ratrod - all of the brass fittings will not be clear coated, I'll let them age to add nice patina.

[Photo linked from: www.autocult.com.au/tag.aspx?t=Nemo]

  • Login or register to post comments

Wow Jake! Great photos and

Phog Allen — Wed, 07/09/2008 - 19:47

Wow Jake! Great photos and great work. i have been dropping by your site since i discovered it a couple of months ago. Your projects are the best. I have seen these old kit cars a number of times and often thought it would be nice to get hold of one and trick it out. You are doing just that. A few questions.

About the tail lights. I know you are trying to stay DOT compliant but those Ford lights are the stuff! The LED lights you installed are doubtless MUCH better for intended purpose but is there anyway to stick with something more classic? What made the Ford lights non viable? I live near Kansas City which is home to Peterson Lighting. http://www.pmlights.com/ Look over their catalogue. They make QUALITY lights.

Steam power. Are you familiar with the Doble cars from the 1920's? They had condensate recovery for the boilers, thus keeping water use to a minimum. It sounds like you have a plan well in grasp. Do keep us posted on that.

License/registration/insurance; Was this a trouble spot? Most states have some provision for home built vehicles but did it cause any headaches for you? I really wonder about insurance. When you are done you are going to have a vehicle with a significant investment of time and money. Anything special on that front? Thanks again and best of luck on your car. The League of Extraordinary Gentlemen may come calling on you to be a member!

  • Login or register to post comments

Oh I'm keeping the Model A

Jake von Slatt — Wed, 07/09/2008 - 22:48

Oh I'm keeping the Model A lights in place, the LED lights are in addition, BTW: they are Peterson.  I'm also going to add kerosene coach lamps and acetylene head lights, the car will be a sort of homage to automotive lighting of the past 100+ years.

Massachusetts has no special catagory for kit cars, the SEMA legislation has been stalled for a couple of years now.  Basically you have to pass emission for the year in which you complete the car or in which it is titled if brought in from out of state.  I don't really mind having the cat on there as the current system provides more power and a nicer sound then before along with being a cleaner car. 

As for special insurance, Ha!  I build with junk, I take pride in it, in fact!  I will be very surprised if my total investment here goes much over $4K.  I'll be putting all of my money into the machine tools I'll need for making the steam engine and the TIG welder for the boiler construction!  ;-)

  • Login or register to post comments

Good Show, Sir.

fireinsyde — Tue, 07/08/2008 - 22:25

Good Show, Von Slatt.

Post highlights: RMV adventure, exhaust creation, engine removal to drill out one stud. LOL

I'll be keeping eyes peeled for this machine, hah. You MUST bring this to the show at Kimball Farms, in Westford, on Thursdays. A great classic car show, (as well as some wonderful family agritainment on their expansive grounds) and a status-quo-mundanity just waiting to be shaken up with a steampunk contraption/contraptor. It would be a sight to see, there.

And if you happen across a dark green '57 Chevy, you'll be sure to wave hello.

  • Login or register to post comments

actually it was six studs.

Jake von Slatt — Wed, 07/09/2008 - 09:35

actually it was six studs.

  • Login or register to post comments

studs

Punkerpan — Sun, 07/27/2008 - 19:53

the vw aircooled 4 cylinder engine has eight studs securing the exhaust system. i know this, as i have owned and modified a whole passel of them for various projects.

  • Login or register to post comments

Only six of the eight broke.

Jake von Slatt — Mon, 07/28/2008 - 14:05

Only six of the eight broke.

  • Login or register to post comments

Catalysis

fireinsyde — Wed, 07/09/2008 - 11:45

Ah, right. They ALL snapped! (Yikes!)

Also, congrats on passing emissions, sir, it's very green of you. Is it manditory in MA for an '85 registration, or just a responsible choice on your own part?

  • Login or register to post comments

Both!

Jake von Slatt — Wed, 07/09/2008 - 13:24

Both!

  • Login or register to post comments

Oh I will!  But only after

Jake von Slatt — Tue, 07/08/2008 - 22:40

Oh I will!  But only after she's all 'punked up!

  • Login or register to post comments

Looks great! You've been very

Datamancer — Tue, 07/08/2008 - 18:26

Looks great! You've been very busy I see. Glad to see you've got a fun little summer cruiser. I need to finish my '56 F-100 so we can race!
:P

-~D~-

  • Login or register to post comments

Search

Projects

Keyboard

LCD Monitor

Light Switch Plates

Wimshurst Machine

MAC Mini Mod

Altoids Tin Etching

Lightbox

Guitar Amp

Lyra's Lamp

Shop Respirator

Etching Brass

Flash Diffuser

Bus Conversion

All-in-One PC

Motorbike

Etch Machining

iPod Etch

Headphone Mod

Steampunk Strat

Telegraph Build

Steampunk Car

Trilobite Etch

Kerosene Lamps

Trailer

Community

  • Twitter:  Jake |  Meredith
  • More projects: www.vonslatt.com
  • Jake is on:  LiveJournal & Facebook
  • Jake's Shared Google Reader Items
  • Email Jake: jake@vonslatt.com
  • Email Meredith: satiredun@gmail.com
Creative Commons License
Designs by Jake von Slatt on this site are licensed under a Creative Commons Attribution, Noncommercial, Share Alike 3.0 United States License.
Permissions beyond the scope of this license may be available here.
 
Subscribe to our Announcement List:

Your email will never be divulged and we will only make an announcement when there is a genuinely interesting new thing.

Login

What is OpenID?
  • Log in using OpenID
  • Cancel OpenID login
  • Create new account
  • Request new password

Subscribe

Subscribe to our Announcement List:

Your email will never be divulged and we will only make an announcement when there is a genuinely interesting new thing.