Electrolytic Machining of Brass, a Clockwork Trilobite
I have been having great success etching brass plate with a solution of copper sulfate and an electrical current. The depth, quality, and speed of the etchings have been quite controllable and it seemed to me that I might be able to etch completely through a piece of brass. This capability would allow me to make pieces of several layers of brass, so I devised a design for a test case.
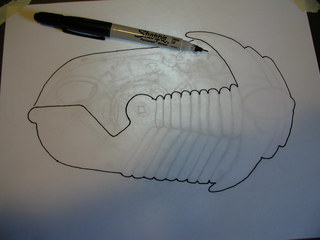
For my first experiment I took inspiration from the Girl Genius online comic, of which my daughter Ada Elizabeth and myself are fans. I began a sketch of a clockwork trilobite brooch, the result you see below.

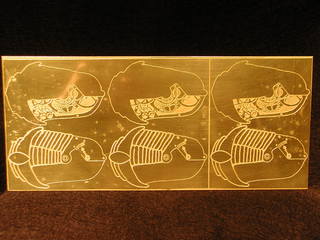
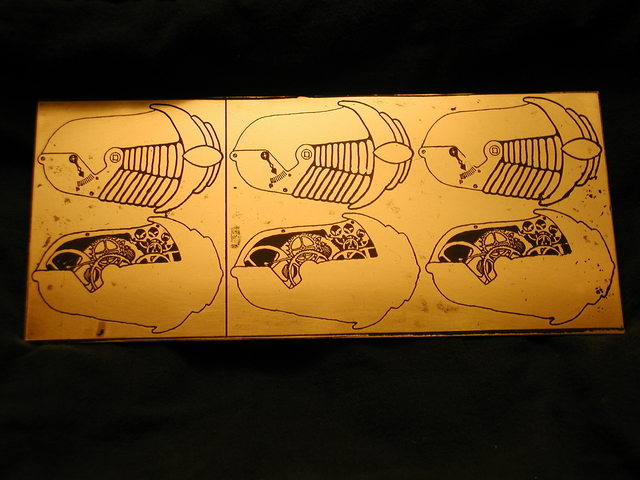
Once I was happy with the design, I jury rigged a light-box so that I could trace the three separate planned layers and inked each onto it's own sheet of paper. The original was drawn on a full sheet of letter size paper but the piece itself will be about 2 3/4" long.
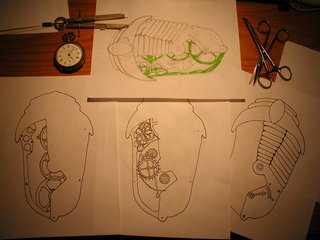
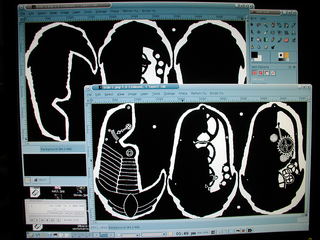
Once the three layers were completely inked I scanned them into The Gimp using Xsane , combined them into a single image, cleaned them up a bit and filled in the areas in and around the clockwork elements. Once done, I filled in the rest to reduce the total area to etch. Finally, the colors were inverted to produce the mask..
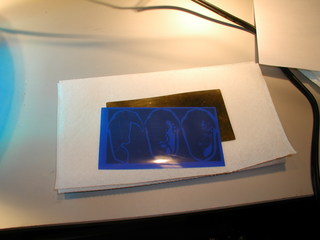
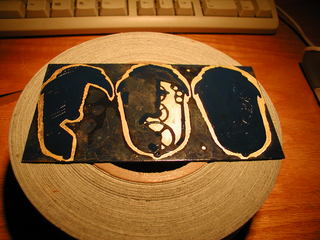
The next step was to print them. I have been experimenting with Press-n-Peel blue, a toner transfer film made for printed circuit board fabrication. It works very much like the inkjet paper method outlined in my earlier article . However, it is very much easier to peel off of the piece after the transfer.
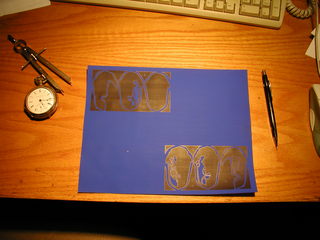
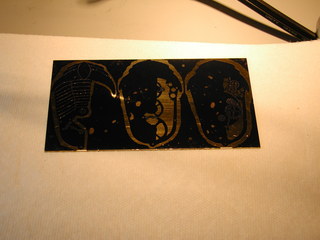
The Press-n-Peel Blue simply irons on. Technique and temperature are critical to your success here. As you can see from my poor attempt, I have not yet acquired the knack. A correspondent Dauvit has described for me an alternate method of ironing on the toner which I have not yet tried, but hope will improve my results.
The voids you see here are caused by bubbles of air trapped between the film and the brass plate. Sometimes you can pierce them with a pin and get the film to lay down, sometimes you just have to paint over the void after removing the film. Fortunately this particular type of flaw seems to only occur in broad areas of toner, finer detail is almost always reproduction flawlessly.
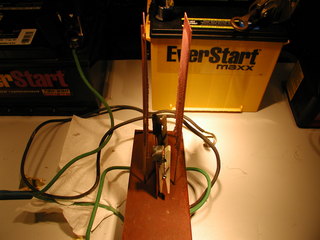
Since I'll be etching both sides of this piece I needed to build a jig that would have cathode plates on either side. I made this by soldering brazing rod to two pieces of brass and inserting the rod into a wooden top piece.
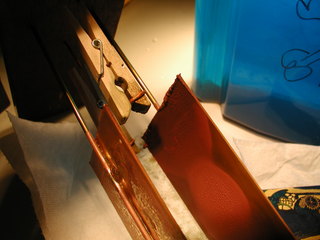
I also used 14 gauge copper wire and a pair of clothes pins to fashion clamps for my plate. You will want to be sure to leave a bit of brass on the top of your work piece so that these clamps are out of the electrolyte. Otherwise the copper wire will be etched away and your piece will fall to the bottom of the tank.
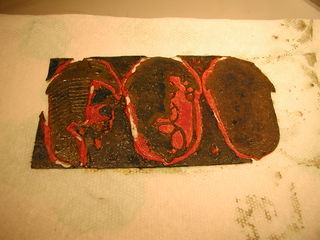
I first placed the piece in the tank for about ten minutes to etch the designs on the top and bottom layers of the trilobite. Once those were etched I remove the piece and painted over the lines.

Once the paint was dry the piece went back into the tank. I have been experimenting with the limits of voltage and current. For this experiment I used two 12 volt car batteries in series, I estimate the current to have been between 50 and 100 amps at 24 volts which is well in excess of a kilowatt of heat input. Needless to say it was not long before the electrolyte began to boil.
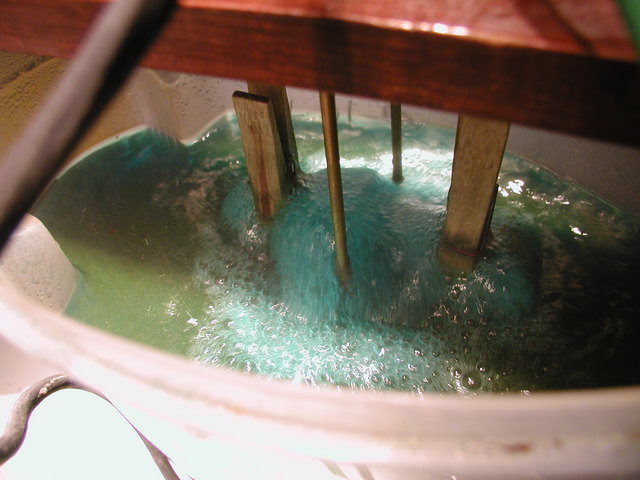
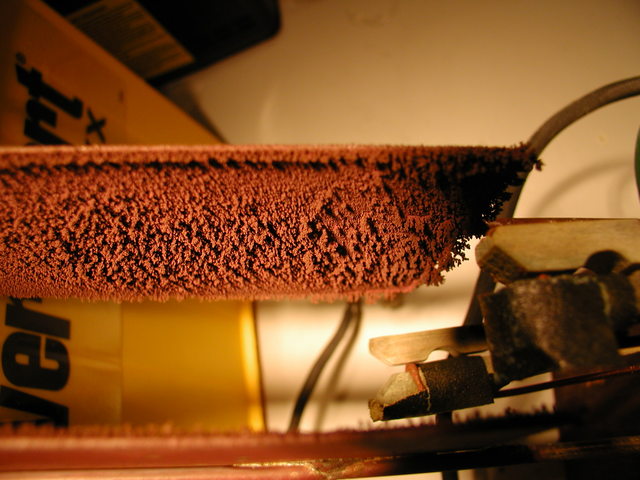
At this point a reddish sludge began to form on the piece and I decided that it had been etched sufficiently for my purposes. In my next trial I will reduce my current by going back to the single car battery and I will monitor temperature to keep it below the point were the red gunk begins to form. It seems to me that a temperature of 100 to 140 degree Fahrenheit is ideal.
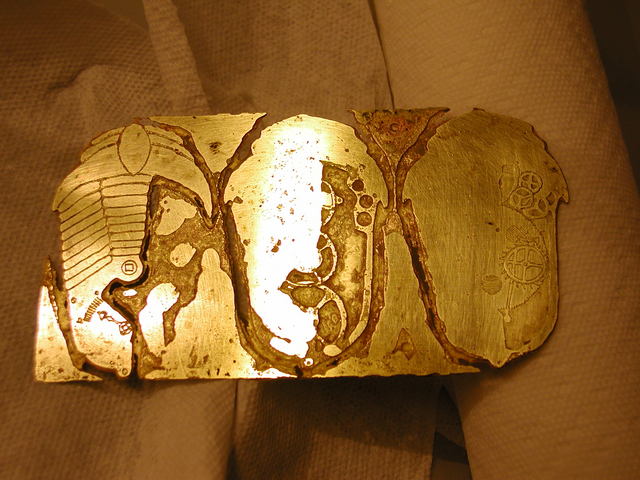
Look at all of the metal that was removed !
Here is the fully etched piece, you can see that material has fallen off at the top and the bottom. In the future I'll be sure to plan for tabs to keep from loosing the piece into the tank.
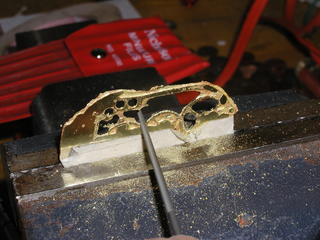
Jewelers files were used to clean up the edges around the outside and within the cutout area of the center section.
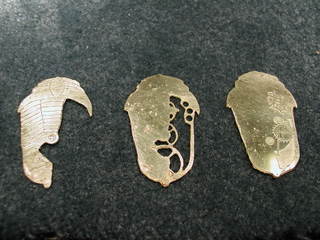
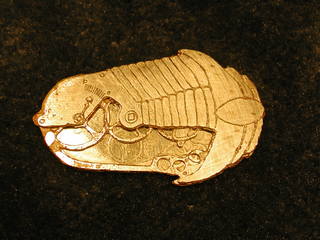
Once the the pieces were cleaned up I wiped them with black paint to fill the cracks and assembled them with epoxy. The edges were quite rough due to undercutting so I filled the edge with a bead of epoxy which I later painted gloss black. Finally, the whole piece got a coat of lacquer.
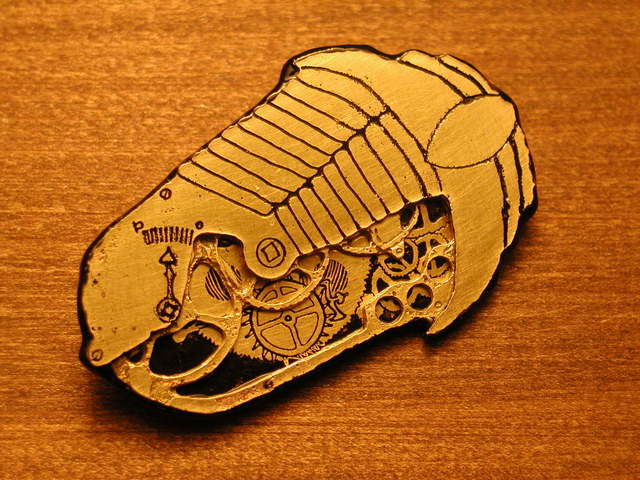
Overall, I am quite happy with the piece, especially considering that I fully expected the technique to fail utterly! The structures in the center layer in this piece are really too small to withstand the under-cutting without loss of definition.
Since my daughters Ada and Fiona immediately wanted Clockwork Trilobites of their own upon seeing mine, I will endeavor to make a few dual layer versions which I will cut out on the band saw rather then attempt to etch clear through.
For more on electrolytic machining please see the next article in the series where I attempt to make more jewelery from somewhat thinner sheets of brass.
Please note that several aspects of this article include dangerous compounds and energies. Copper sulfate is poisonous and the used solution needs to be disposed of in an environmentally sound manner. Car batteries can also be particularly dangerous, accidentally shorting the poles can lead to fire, explosion and flying hot acid – very bad, that. This article makes no attempt to comprehensively address these risks. The responsibility for your safety and the safety of those around you – should you decide to attempt similar experiments – is your own.