Chandelier Candle Retro-fit
When we moved into our house there was an electric chandelier in our dining room. It was an adequate enough fixture but incandescent chandeliers are terribly inefficient, six 25 watt bulbs actually put out a fraction of the amount of light as a single bulb of half the combined wattage, and while they do make candelabra base compact fluorescent bulbs, I find their light cold, harsh, and they are not very dim-able.
Besides, nothing beats real candle light for a romantic dinner at home.
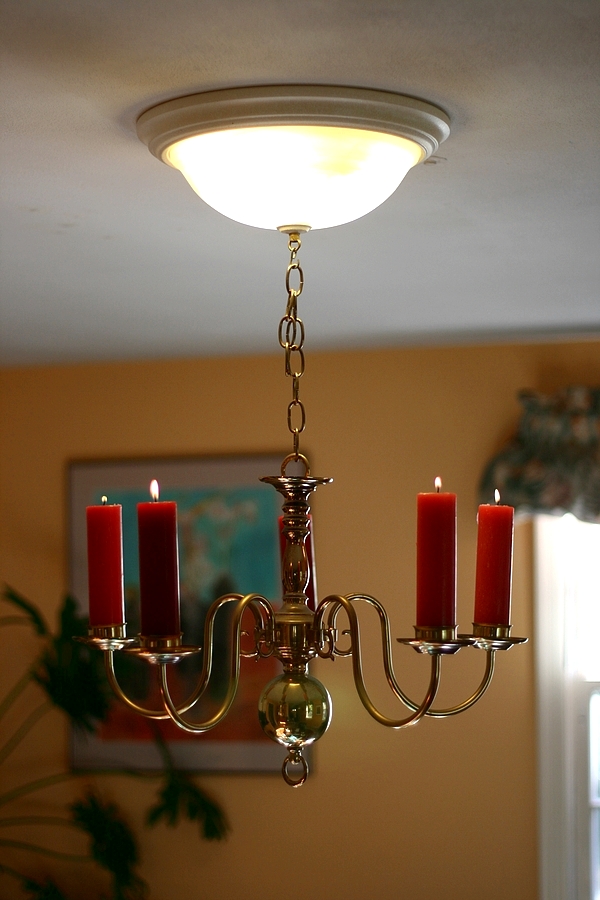
We removed the chandelier and installed a simple, clean, light fixture which we fitted with a par of 23 watt (100 watt equivalent light output) compact fluorescent bulbs. The glass shade attached to the fixture with a threaded cap which I replaced with a loop fitting from a swag lamp. I then converted the electric chandelier to a candle chandelier and hung it from the center of the new ceiling lamp.
So now we have a nice bright and efficient overhead light for daily use and an elegant hanging chandelier for special occasions.
I have a stack of chandeliers from the dump. Some of them are pretty, and some are pretty awful. It's interesting that some of the really awful electric ones are transformed into things of beauty when converted to candles. Others, however, can't be saved. I fear this example is one of those, but lets go ahead see what happens!
.JPG)
Step one, remove the chain and extract the wires, just cut them off and pull them out.
.JPG)
I like to remove all of the wires so I completely disassembled the lamp. In the center section there is usually a junction where everything is connected, just cut away all of the wire you can reach with your cutters.
.JPG)
This lamp, like most, is held together by sections of 3/8" threaded tubing – this is one of the things that makes lamp hacking fun. The standardization of electric lamp parts means that you can mix and match freely among all of the lamps and lamp parts you can buy or find.
Interestingly, many of these parts were originally developed for gas lighting systems and some are components originally design to mate gas lamp parts to electric lamps. For instance this bent and threaded piece of steel connects two lengths of pipe and make a place for the wires to exit. I don't know the origins of it's name, but it is called a 'hickey.'
.JPG)
Next remove the plastic sleeve around the base of the light bulb sockets and cut the wires there. This lamp had sleeves that were actually dipped in wax for a more authentic appearance!
.JPG)
Once the wired are cut at each socket you'll be able to pull the rest of them through.
.JPG)
Unscrew the sockets from each arm and break off the 'nut' part by bending back and forth with some pliers.
.JPG)
Screw the 'nut' back on and tighten.
.JPG)
That's all there is to it! The shells that surround the fake candle come in various sizes, 1" and 1 3/4" seem to be the most common. With a little shaving of wax, or application of masking tape, standard candles can be made to fit fairly easily.
.JPG)
However, I've been collecting old candles from the dump for some time and I have a stockpile of old ugly pillars and blocks that I periodically re-melt into molds I've custom made to produce candles that fit my chandeliers.
.JPG)
This is about 5 pounds of wax re-melted and poured with a little red dye added. The Altoids tin candles are great for camping and emergencies, I just bend a little circle of the wire-core wick material to make a little stand and then drop the wicks in the liquid wax after pouring it into the tins.
.JPG)
This is a chandelier in my office. As an electric light fixture, it was pretty hideous – but with candles it's transformed!
.JPG)
As I said, light fixtures use standard hardware allowing the mixing, matching, and mashing-up of different elements. While I'm not sure this particular combination of our chandelier with a table lamp makes a worthy candelabra, it certainly makes a fine, fine Hallowe'en prop!
.JPG)