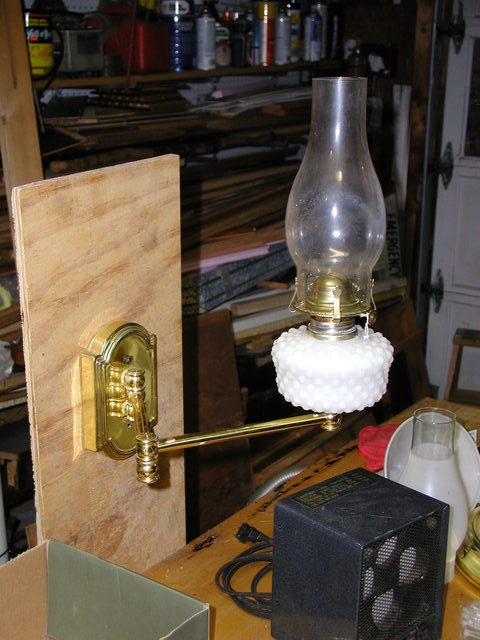
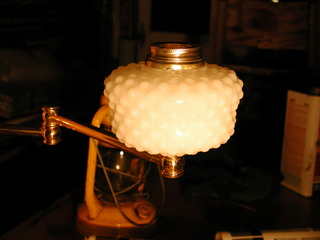
Swing-arm Kerosene Wall Lamp
Here's another real quick project, the two donor lamps are below, both came from our town dump this past weekend. This will be my first lamp with a glass font. Furthermore, this font has a hole in the bottom so I will be making liberal use of the non-traditional material; GE Silicon II Sealant.
| |
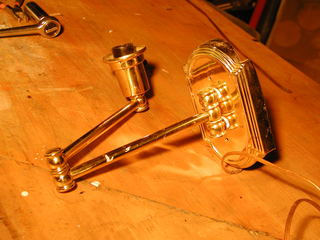
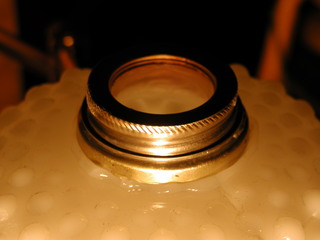
The first step was to dis-assemble the two lamps. I didn't strip the lacquer off of either because I won't be soldering anything but the #2 burner collar.

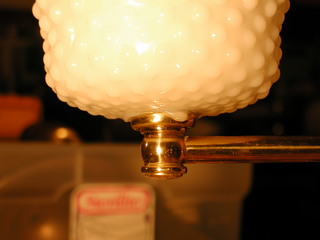
I used the lower brass cap from the floor lamp and a conical piece from the junk box to sandwich the bottom of the glass font. I used lots of silicon seal and tightened this very gently.
![]() | ![]() |
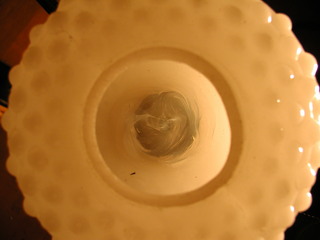
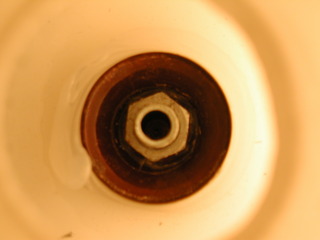
Then I piled silicon seal all around and over the 3/8" threaded pipe that holds the font to the swing arm. Update: this worked for a while but the silicon eventually failed do to the constant contact with the kerosene.
![]() | ![]() |


.png)

Comments
Glass Font Swingarm Kerosene Lamp Repair
Good Day,
I have read of your problems with leakage due to the silicont RTV failure.
As you have found, ordinary silicone sealants are NOT a cure-all.
May I suggest the following materials and/or techniques:
Since the font is connected to the swingarm base with a standard electrical nipple, consider hard soldering a cap to the nipple, along with a largish washer. This will provide a larger surface area for sealing to the glass, and would perhaps spread out any pressures from assembly.
Some electrical lamps have a shallow stamped washer that is placed on or under the lamp assembly where it meets a larger diameter portion of the lamp (I regret not having a digital camera to photograph this). In the original designs it is used as a centering washer, but the shallow lip can serve as an O-ring retainer.
If the washer is soft or thin, a heavier washer can be soldered to it as reinforcement.
Then use one or more of O-rings under the washer, between washer and glass. This SHOULD provide a good and more permanent seal.
I'd further recommend using a fiber or similar washer under the glass font, to allow a lower-friction tightening of the font to it's base. This is similar to the common design of sink drains etc., and permits higher tightening pressures, and the fiber washer would tend to even out any off-center loads on the glass.
As for sealants, I highly recommend the RED RTV as used for sealing higher-temperature automotive surfaces. This is meant for contact with petroleum substances, and has the added benefit of temperature resistance.
It's drawbacks are an unpaintable surface (but perhaps can be coated with a paintable RTV), and the garish red color.
So, to reiterate:
on the nipple is a cap, heavy washer and lipped washer, all hard soldered to the nipple. This retains an O-ring or two, with the nipple/washer assembly tightened to the glass font with a fiber washer, metal washer and nut underneath.
On my 'lampage front':
I had acquired an automotive headlamp circa 1918, but it is missing the burner assembly. Attempts to find the burner have at present have been futile, leading me to modify another burner assembly for this purpose.
So far, so good, but more work needs doing to make it complete.
Hoping this helps,
Ryan Grimm AKA Sgt. Mustache
P.S. I found the Doctor Steel website through yours, and have since been proudly enrolled in the Good Doctor's Toy Soldiers.
Yours In Global Domination,
RG
Hi Ryan, Great advice!
Hi Ryan,
Great advice! Thanks!
I'd love to see pics of the headlamp, I want to make/acquire a pair for my car.
Jake.
Union Headlamp repair
Hi Jake,
I have been catching up on 'other' outdoor projects, what with the decent weather. I JUST got busy in the unheated shop with the lamp's repair.
Since I can't find the font/burner, I'm going to make one out of scrap brass and copper, modifying a cheapo kero burner assembly as it has a threaded base. The orginal had likewise, to allow relatively leakproof operation.
So:
Brass and/or copper can base, threaded connector from donor, burner, extended wick support tube, extended wick adjuster/knob, in that order. The wick support tube is needed due to the lamp's design.
I'm surprised that the original lantern used a 3/8th inch wick, rather small!
The first order of business is soaking the original metal lamp parts in Pepsi (ready to hand), as the phosphoric acid is recommended for gentle corrosion removal. Coke can also be used.
Once I have the parts cleaned it's time to repaint saticn high-heat black, maybe add some brass highlights, polish the reflector if possible, it's nickle plate and may not come back.
I was gifted some grandfather clockworks a few months ago, and a small gear from one will suffice for the extended adjustment knob on the burner...the stem needs to be longer than normal to fit. The gear teeth will provide good grip when adjusting the flame.
More (with pictures) later.
BTW, I've seen the lamps on Ebay for less than $20 each.....
TTFN,
Ryan AKA Sgt. Mustache