Microwave Motor Flying Crank Ghost
This is my cheap and easy version of the classic Phantasmechanics Flying Crank Ghost and it utilizes a carousel motor from a discarded microwave oven and some bits of scrap wood for the armature.
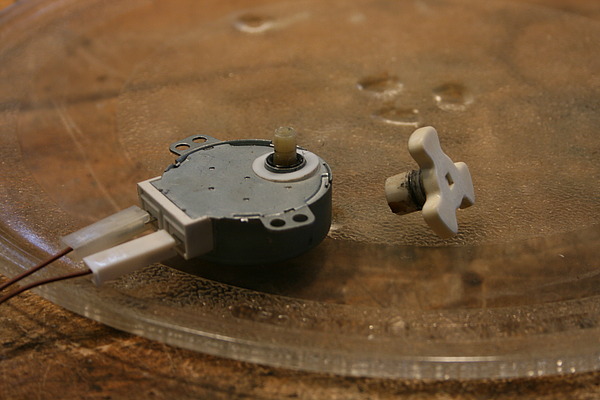
Most modern microwave ovens have a small 110 volt synchronous motor that rotates the carousel, these are often easily removed through an access panel in the bottom of the oven. Be sure to grab the little knob that engages the platter, this you'll have to remove from the inside of the oven.
.JPG)
I ripped several 1" x 2" planks from some pieces of scrap pine, the long ones are about 2' long and the short ones, 18".
.JPG)
The knob will need to be glued to the motor's shaft, I like JB-Kwik epoxy for things like this.
.JPG)
Next I used 1 1/4" drywall screws to construct the armature. I used a pair of scews at the center cross and pre drilled holes and used a single screw each for the two arm supports so that they can be adjusted.
.JPG)
The motor has a pair of ears that can be used to mount it to the center of the cross. I drill three pairs of holes in a piece of lath and used three ty-wraps to secure it to the motor.
.JPG)
I made the pivot from a #8 screw and three nuts which loosely secure a 1/4" x 20 capture nut in which I've drilled three holes and to which I've tied three lengths of mono-filament fishing line. The mono-filament is then threaded through brass screw-eyes at the end of each arm.
.JPG)
The craft store had a lovely skull for $6 and I made up some claws from Styrofoam and 5-minute epoxy.
.JPG)
I rough cut them on the bandsaw . . .
.JPG)
and uglied them up with a soldering iron – don't breathe the fumes!
.JPG)
The ghost's 'skeleton' is made from coat hangers and a bit of electrical tape. The arm sections are linked with loops and loops are formed on the ends of the two arms after they are pushed through the hands as well as the 'neck' after it pushed through the top of the skull. These loops are where we'll tie the mono-filament line that attaches the ghost to the armature. A but of 5-minute epoxy will help hold the foam pieces in place.
Because the motor is fairly week, I would seriously consider substituting aluminum welding rod for the steel coat hangers here.
.JPG)
Before attaching the ghost to the armature I screwed it to the ceiling. The relative lengths of the mono-filament lines and the positions of the armature's extension will make the ghost move in various ways, experiment! The microwave motor is not very strong so the weight of the ghost is important, keep it as light as possible! If you do have trouble with the motor stalling you can move the pivot point in towards the center to improve the leverage.
.JPG)