Steampunk Car Project – Dashboard, Wiring, Lights
Dashboard, Wiring, Lights
This car sat out in the weather for many years, as a result the interior is shot, the side panels and carpet are terribly mildewed and the spores have been giving me a headache so I put on the powered respirator and stripped it all out.
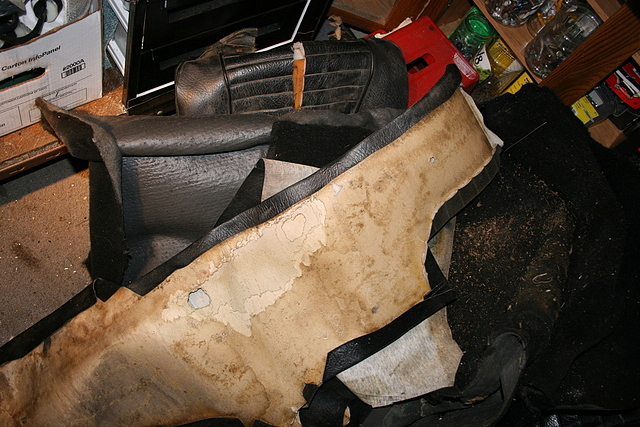
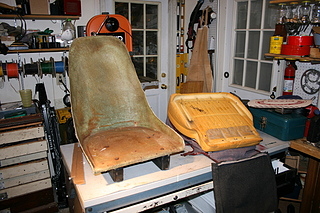
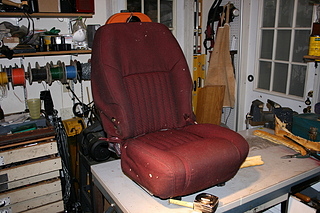
I also pulled off the side bolsters and removed the seats, the foam in them was rotten and pretty nasty!
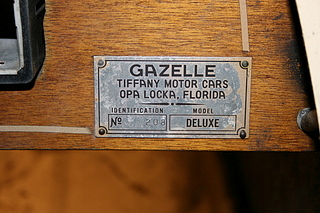
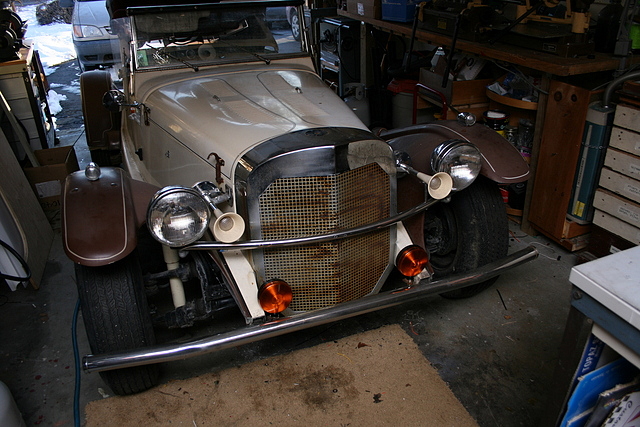
It turns out that this car is older then I thought, it was likely assembled in the early to mid 70s. It was a kit made by Tiffany Motor Cars which was bought out by Classic Motor Carriages in 1976. This explains some of the differences I noticed such as the lack of doors on my car and the fact that it is the only two seater I've ever seen.
The base of the seats were made out of wood and it was rotten to so I cut up an old router rack and made new aluminum bases for both seats.
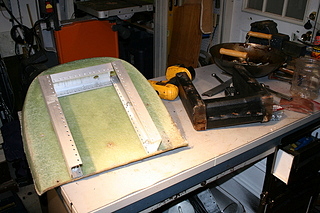
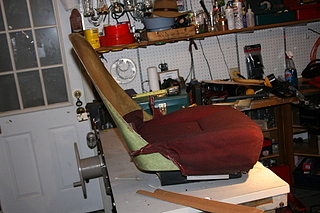
Since the original foam was shot I went out to the shed and grabbed a couple of the seats from my old Oldsmobile Silhouette minivan. I skinned them and made a template so I could trim the foam down to fit the Gazelle's fiberglass shells.
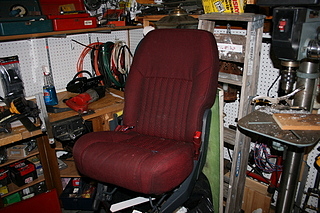
I pulled the fabric tight and attached it with self drilling sheet metal screws.
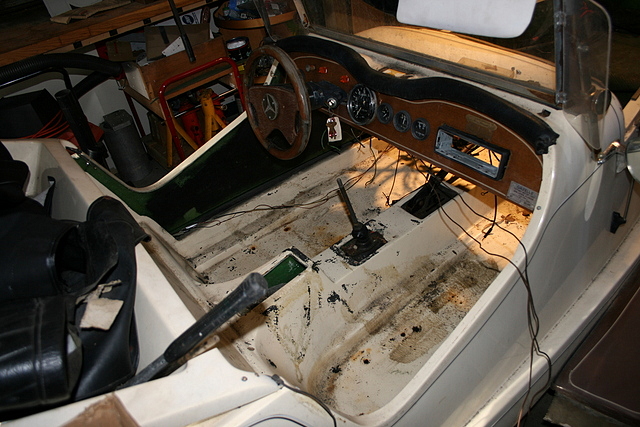
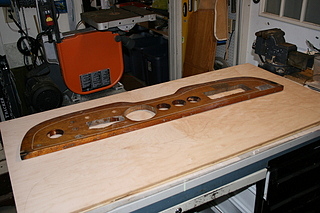
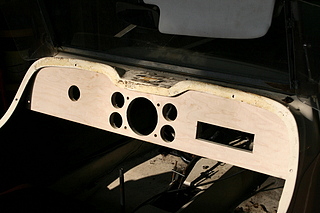
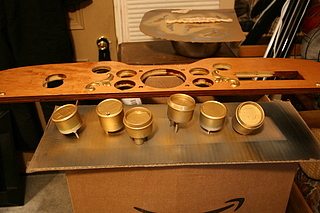
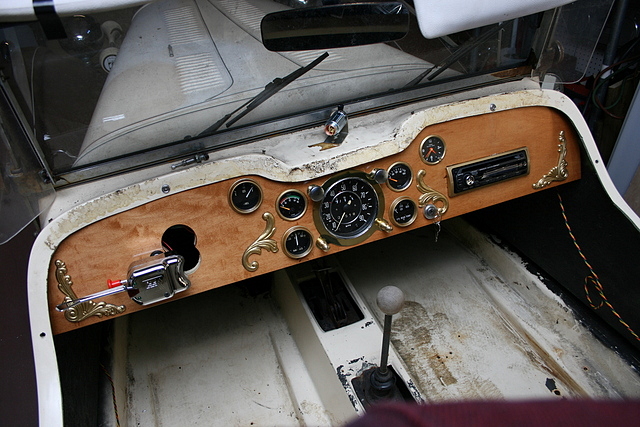
Next I stripped the dash out and used it as a template to cut a fresh dash from a sheet of Cherry veneer plywood.
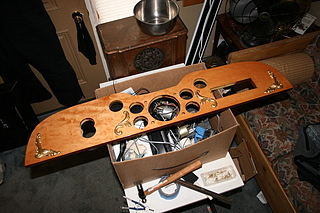
I gave the new dash a light stain and then added some golden accent pieces. Once these were epoxied on the whole dash got several coats of spar urethane.

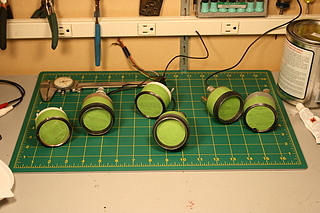
I reused most of the original gauges but added a clock and some gauges that came from a friends 1979 VW Sirocco which he gave me nearly 20 years ago! I cleaned up all of the gauges and painted their bezels gold as well. Once dry, they got a coat of Krylon Crystal Clear to protect the finish.
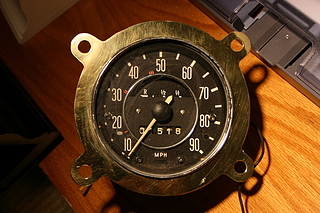
The speedometer came from the original VW Beetle and had no real mounting tabs or posts. I fabricated a bezel for it out of brass, polished it and gave it a coat of clear lacquer.
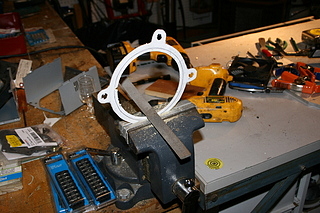
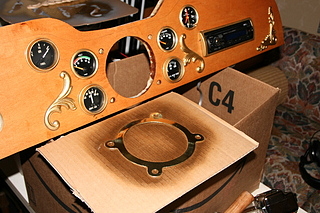
I epoxied the bezel to the speedo with JB Weld, the ears that will hold it in place will also provide the mounting holes for the headlight and wiper switches.
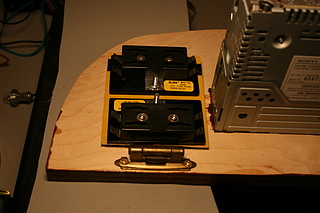
Here's my fuse panel, I used a cabinet hinge so I could flip it down for service.

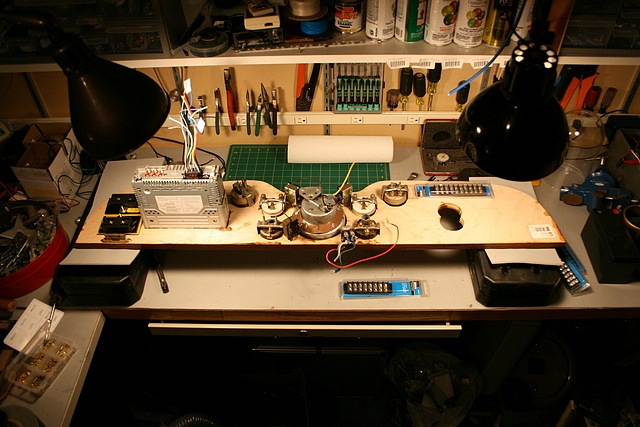
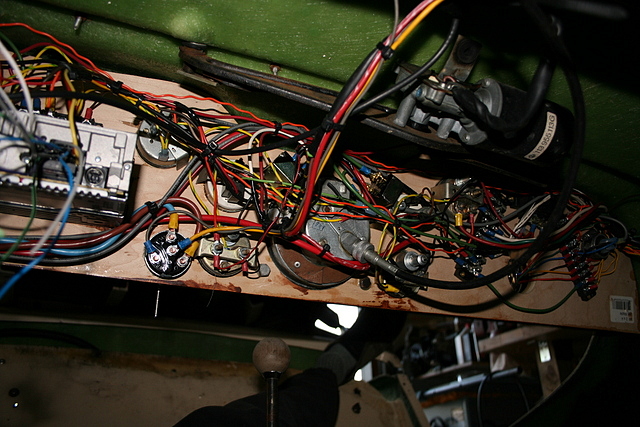
I started the wiring on my workbench.
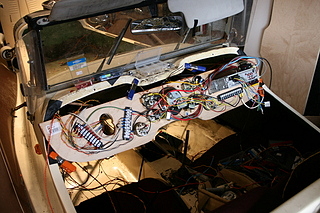
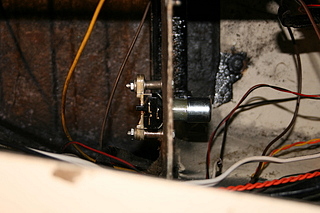
Then I used some clamps to secure the dash upside down in the cockpit for wiring to the car. I sat in the car for nearly eight hours one day last week getting everything hooked up! I was not happy with the dash mounted hi-beam switch that the car came with so I installed a classic foot operated switch from a 1967 Chevy Biscayne.
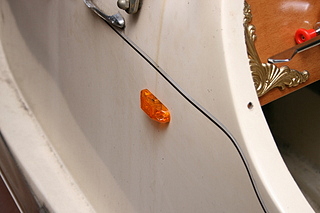
The fender mounted signal lights on the car were not DoT approved so I added the amber ones below.
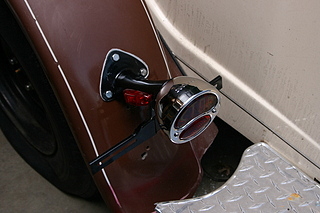
I replaced the Volkswagen tail lights with reproduction Ford Model A lights, but these are not DoT approved either so I will add another set to the rear of the car once I find some that will look right.
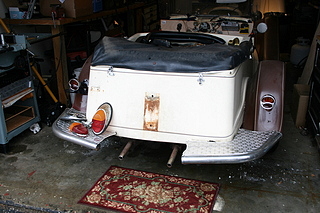
I also added side markers, red on the tail light mounts and yellow on both sides just ahead of the doors.
Here's the finished and fully wired dashboard. I hope you realize how painful it was to get this shot! Yep, that's my leg.
This will be a long term project so I'll post new work as I complete it. Go to the home page and subscribe to the RSS feed or email list if you want to be notified when I make new posts.
– Jake von Slatt 02/24/08
Your SSK Gazell project is wonderful. My son (Christopher) found and fell in love with a SSK made by CMC just a couple of months ago. We have been working on it as we have time in an attempt to bring it back to its former glory. It was in similar shape needing lots of love and work. PleasE share with us how you project came out. Also if you give us an email we will show you our project.
Michael Meisman
727688-8645 florida USA