Mini Steam / Goth House
 Just in time for Halloween, we have several new images from Liz Saxtree-Ford's miniature Steam Inn which won second place in an annual Dolls House Emporium's Creative Competition.The whole house is only a few meters high and wide. Everything you see is on a very small scale and the details are amazing. Liz describes the house as a Gothic pub with a twist with a steampunk look," a cross between the traditional and a Victorian scientific explorer." Many more photos along with a description on how the house was built are after the jump, Enjoy!
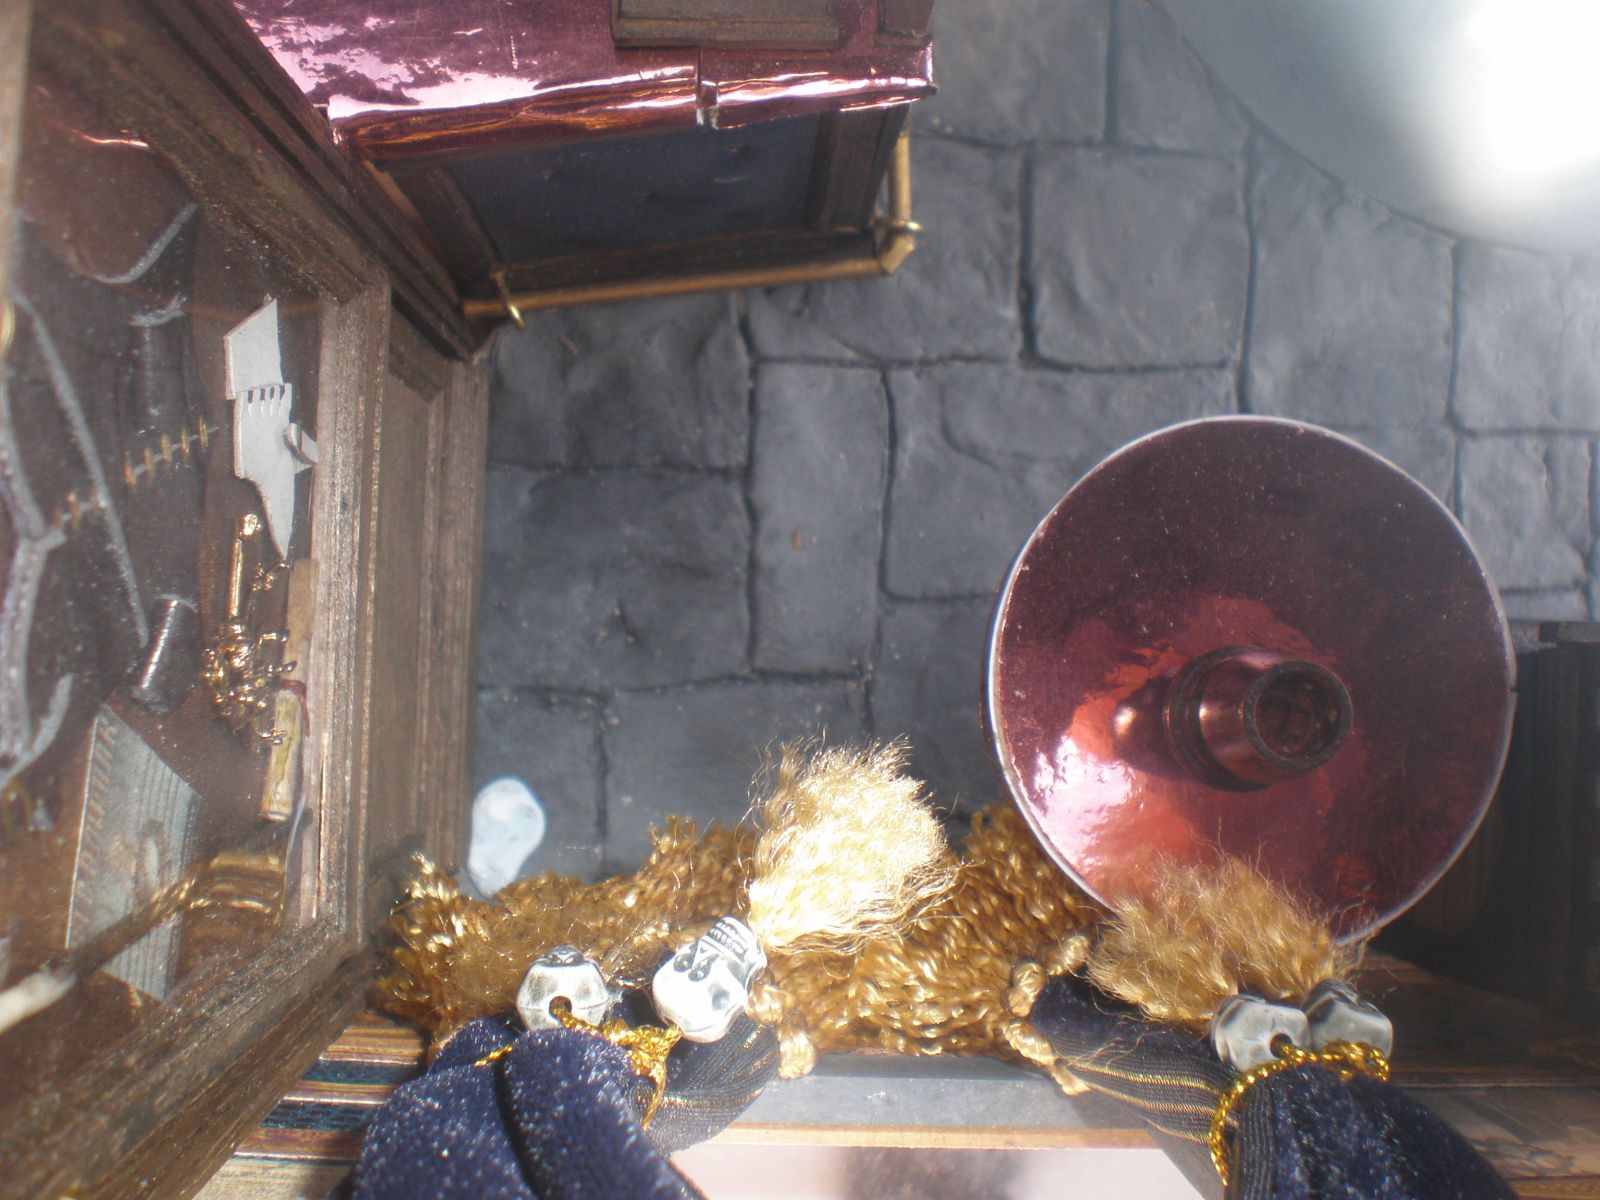
This one is one of my favorites with the books, corset and cain:


Text from Liz Saxtree-Ford explaining how the house was built:
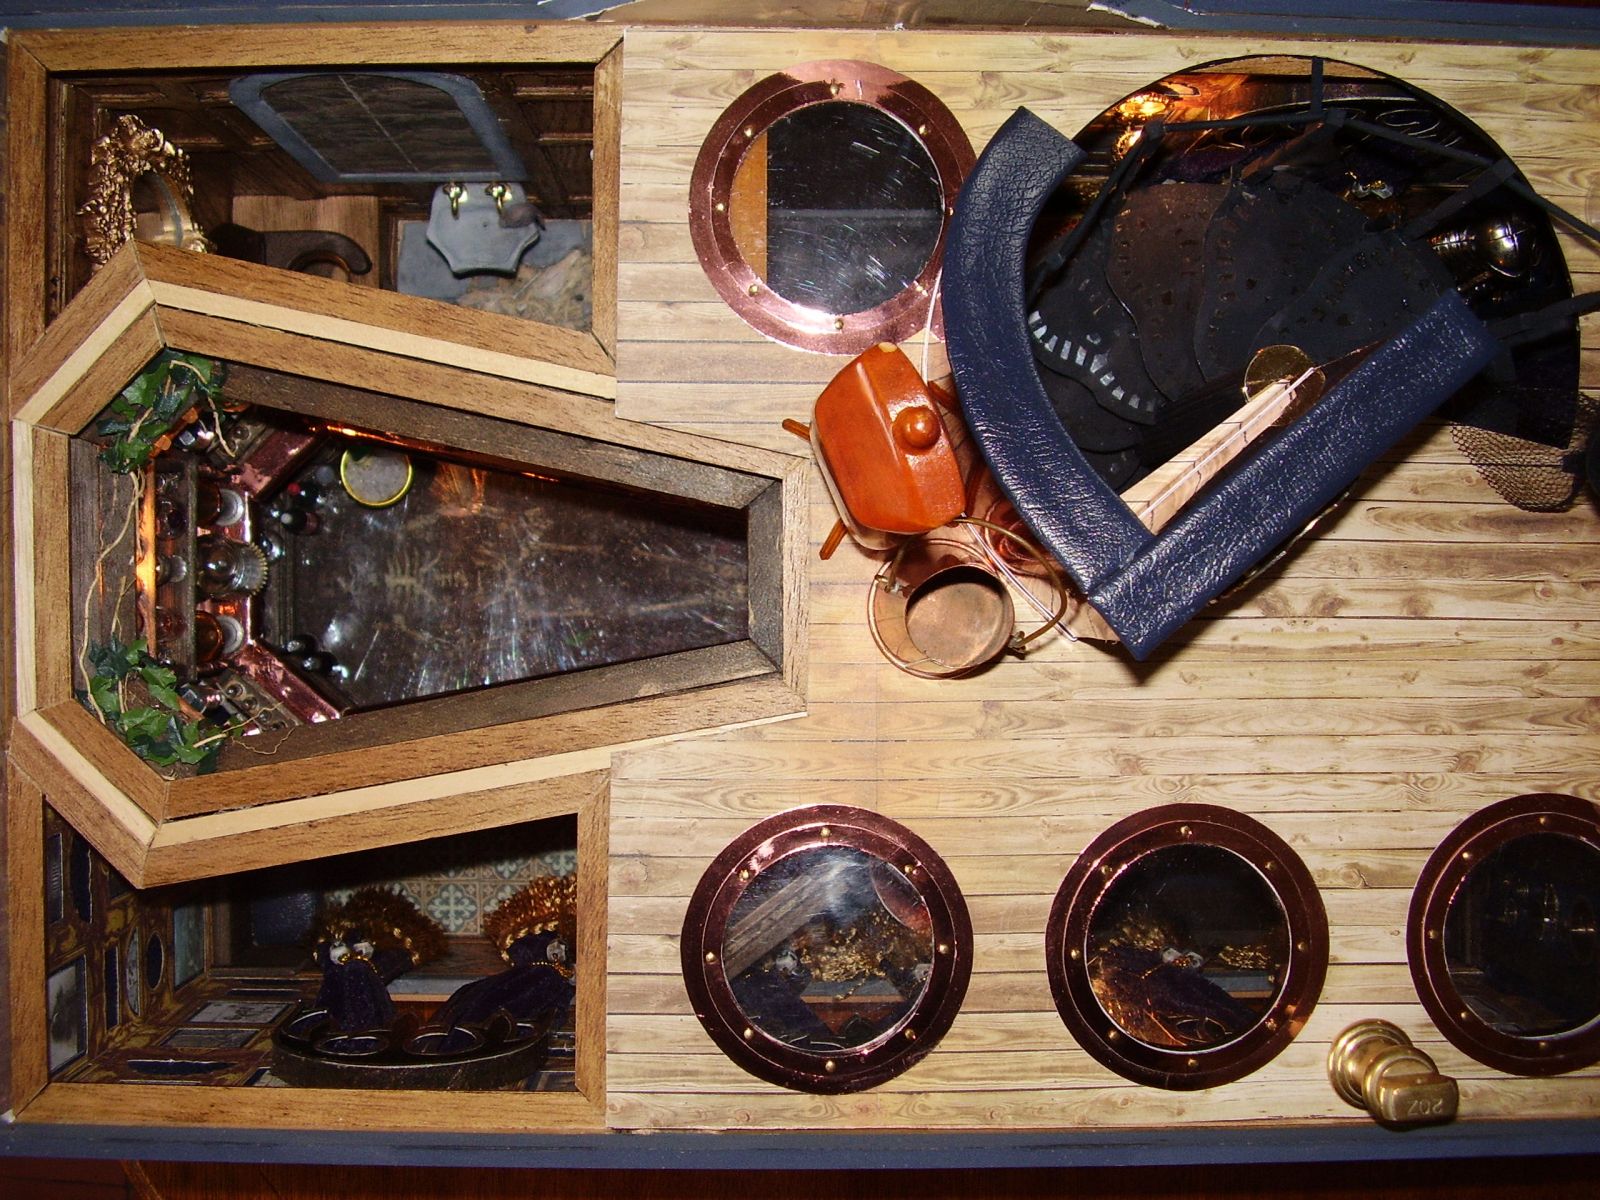
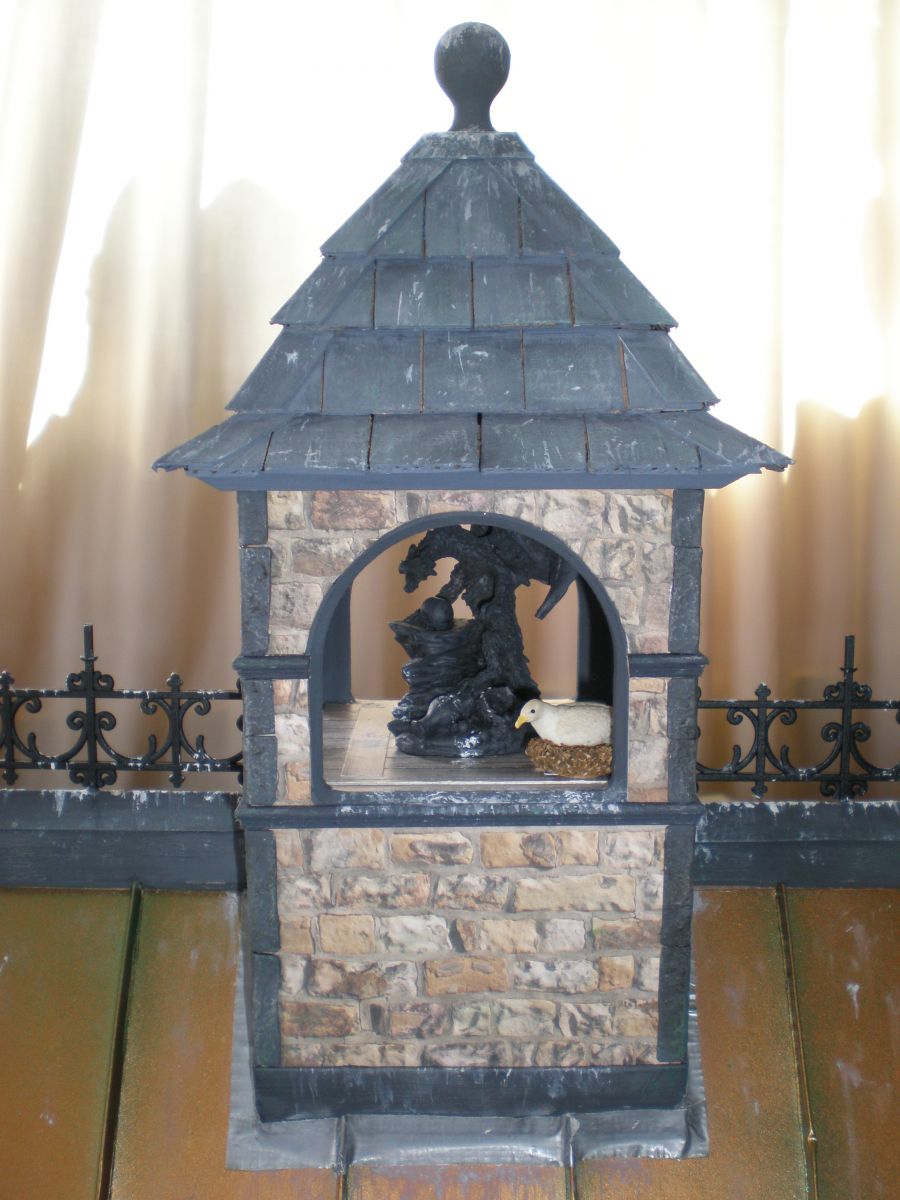
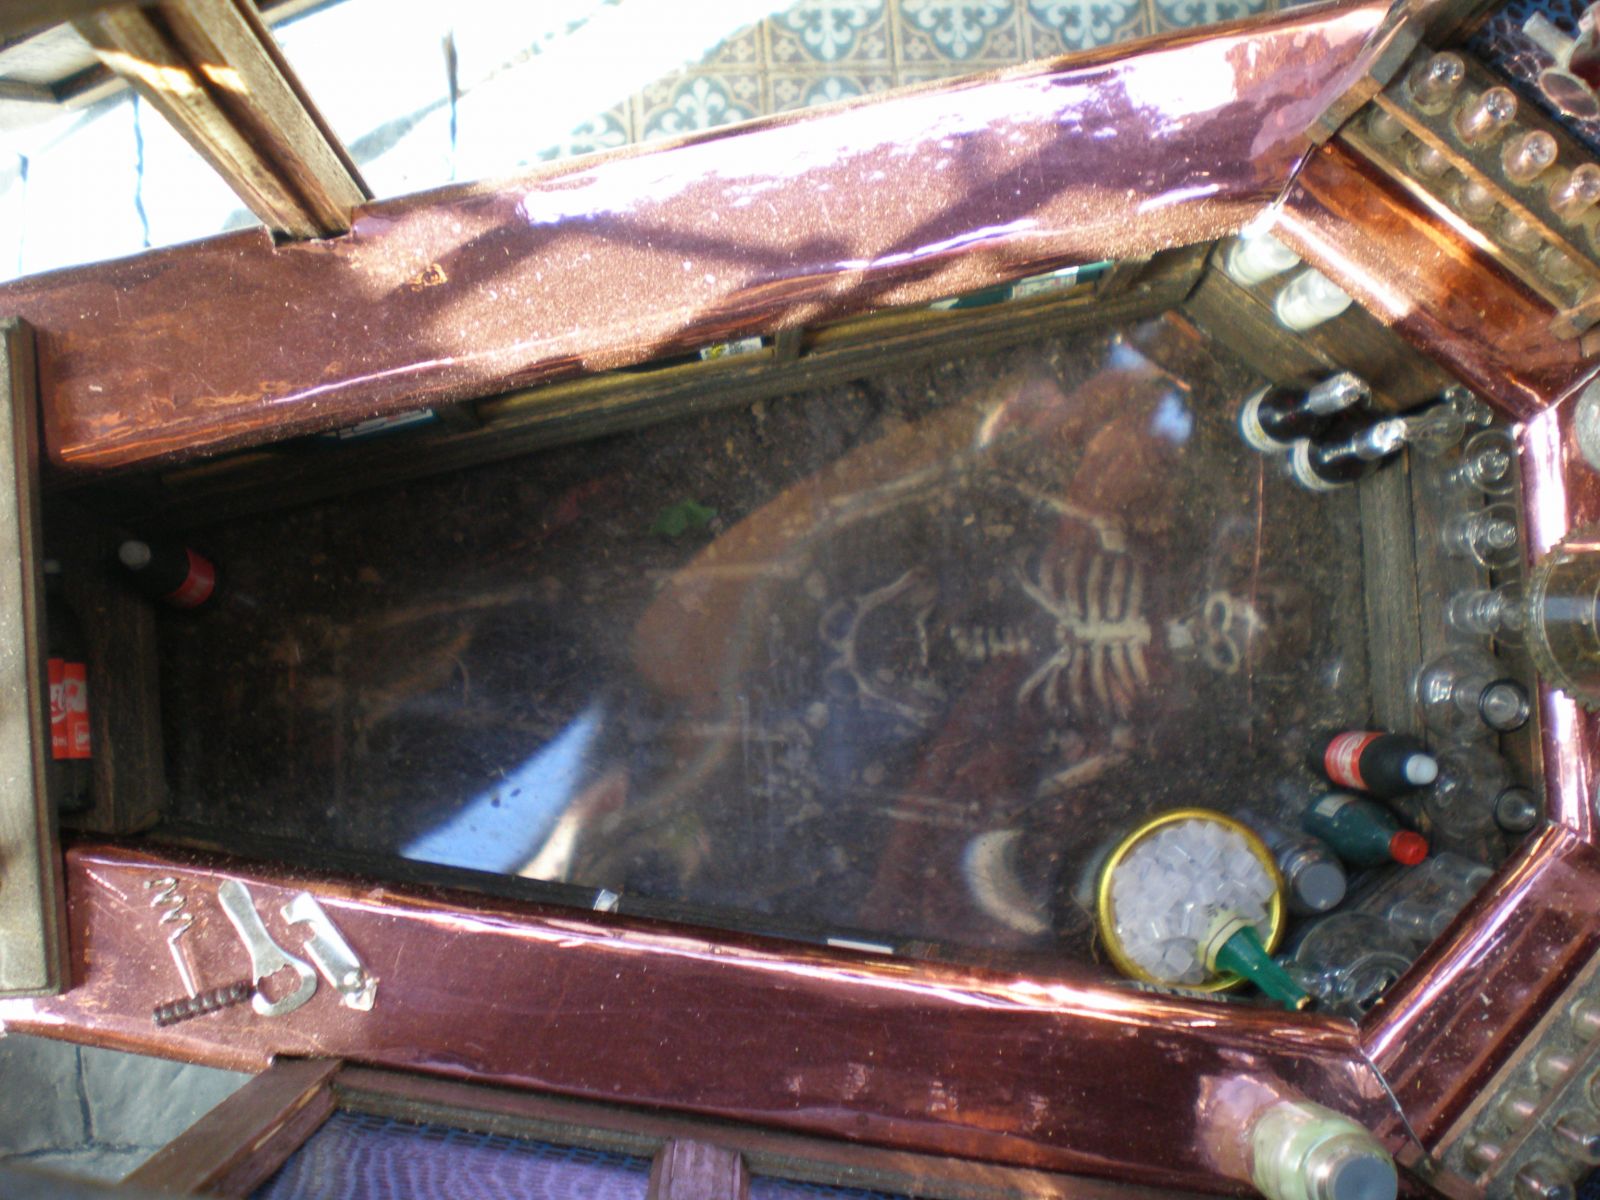
Following moans from family and friends, who, having seen the real thing, have said that the photographs did not show up enough of the detail, and, after reading in detail how others have made their models, I thought it might be interesting to share some more of my tips on how I created the `Steam Inn'. You may notice a few more things on it now that were there before I took the photographs but disappeared into the hedge with the wind – such as the stool cushions and the foliage for a start (the latter having been wrapped around the wiring as camouflage and which nearly took half the lighting with it!). But it was a very chilly and windy morning and I was on my own and running out of time – hence, getting close to tears with frustration, I eventually gave up on a few things. The final straw was a problematic camera. I even had trouble trying to get the photographs printed and it became an absolute last minute entry! But, thanks to my Father-in-law for the loan of his camera and Superglue, I now have (hopefully) some better pictures, taken both in daylight and at night with it lit up (the way I’d always envisaged it) – but unfortunately, David Bailey, I will never be…!I wanted to divide the building up into different areas but the bar had to be a dominant feature. I had already decided to make it coffin shaped and to bury a vampire under the floor, and after much playing around I placed it in the position it is now, with the rooms at either side built around it. It proved very difficult when it came to the wall building and the panelling, due to the odd angles, and much of it had to be stained or waxed, and assembled in small sections before being glued into its final position.The old fibreglass paper panelling in the toilet was some I had been given, although in a rather tatty state. However, patched together and waxed over with dark oak furniture wax, the small cracks and holes added to the effect nicely – it really looks as though the rats have been knawing at it! The rat pit was made by cutting out a hole in the base and gluing card underneath. I used a rather grim picture of a pile of mummified rats on the bottom and then laid others I had made out of modelling clay on top. Adding some sand, a few clay pebbles and covering it with perspex, I then made the stone flags from the modelling clay, painted them, and laid them around it. I built the toilet (the seat came from an old broken one that I'd saved in my ever-expanding bit-box) and lit it from underneath with a small pea bulb, painted green. I made the sink and the rat from more modelling clay (the tail of the rat at one point ending up in two pieces!) and likewise the vampire head that watches over from the top of the doorway.The panelling and shelving around the bar was all made by hand using small pieces of strip wood and miniature mouldings. I used leather-effect paper for the wall panels and leather-effect fabric for the bar, which I padded and `quilted' with small brass pins. The back wall and the bar top was made from wood covered with copper card. I cut out another hole in the base and this time filled it with compost, sand and parts of a small plastic skeleton that I added fangs to and then gruesomely stuck a small wooden stake between its ribs!The two display/bookcase doors are formed from two flat pieces of wood, edged with strip wood and small beading to give it some depth, and glazed with perspex. I made all the books and items within them (with the exception of the bunch of keys), even the cocktail walking stick with the tiny bone handle (which was found whilst weeding the vegetable bed!). These are my favourite bits.The top of the main walls of the inn were covered in craft paper with a perforated frame pattern. I removed the insides of the frames, backed them with an edging of paper and stuck lots of tiny pictures behind them, that I had collected and copied. There are even two photographs of myself and a friend in our `Gothic' costumes hidden amongst them! The bottom half of the walls are the other half of my original fibreglass paper. Above the doorways, I have used the leather-effect paper again and stuck on gold decals.The tiled back room floor was made using a picture of an original Victorian tile, shrunk and photocopied enough times to cover the floor, and then stuck onto card and varnished with PVA glue.The flagstones and headstone on the main floor and the porch floor were again made from painted, modelling clay and the pit in the porch was made from a mixture of PVA glue and UV craft paint swirled together and which I layered up gradually. The main porch wall is decorated with clock workings, a typical `Steampunk’ theme. The knight belonged to my son and the dragon was a `doctored’ night light holder that I made a base for.The curtains were made from a very fine velvet and edged with the smallest fringing I could find at the time (although it still proved bulky and I’ve had to stick them down as flat as I can). I also used the latter to make the tassels – `borrowing' the skulls from my small son's pirate fancy dress outfit (I have since replaced them!). I drew the filigree pelmets and cut them out of coloured card and then cut a very fine edging strip to go around them from gold paper.The wooden benches and pews were made by hand (the backs from dolls house floorboards) and for the cushions I used the leather-effect fabric again (now glued firmly on!) with some very thin foam for the padding. Smaller clock parts were used for decoration.The spiral staircase has to be one of the most difficult things I have attempted yet! It is made from paper doilies, painted and stuck onto thin Perspex and cut to shape. I used a thin piece of plastic piping, covered in ribbed paper, for the pole and cut supports from wooden kebab sticks and cardboard. The spindles were bought but the handrails were made by myself from short pieces of cocktail sticks (and as you can see from one of the photographs – I managed to loosen a piece whilst taking the photo!). As the front part of the upper floor had to be permanently fixed to hold the staircase in place, I had to continue working around it. If I had a pound for every spindle and banister rail that I knocked off and had to re-glue in the process, I would be staggering to the bank under the weight! The circular surround at the top of the stairs was created from cardboard, covered in copper card and leather-effect fabric.I added the portholes so the floor below can be viewed from above. (The circular tables were made from the cut-out pieces.) The back section lifts off for viewing the toilet, bar and backroom and their contents. The ceiling is covered in painted, embossed paper which just happened to match the paper below, and the lights are stick-on decals. On the upstairs floor and displayed underneath the roof are a collection of oddities connected with the Gothic theme and Victorian times. I put together some of the pictures, and handmade a lot of the items, including the mask, books, field glasses, telescope and butterfly net – those that were bought have been added to and adapted where possible. (The ‘brass’ around the telescope and field glasses by the way is the paper seal from a coffee jar – it looks very realistic and is very easy to roll and stick!)The outside is covered in photographic card for the main stonework, but the quoin stones were made using the inside of a cardboard egg box. The rough surface is ideal and looks very realistic when painted. The stonework along the bottom was made from picture mount as it already has an ideally shaped edge. The bricks were cut from old fibreglass brick paper, trimmed and stuck on individually around the door and window frames and which at the time seemed never-ending! The window glass is put together from strips cut from the bottom of supermarket tomato packaging (and yes, we had to eat quite a lot of tomatoes!). The main roof started life as pieces of metallic green card, which I cut and folded to make the roof ridges and then sprayed with copper paint to give a verdigrised look. The roof and hanging tiles were cut from cat food boxes and I cut strips of silver duct tape `borrowed' from my husband to make the leading. The small stone `carvings' are simply painted plastic buttons. Rubbing everything over with coloured pastels gave it a weathered look. This effect is easy and quick to do and works very well – any mistakes can be rubbed off and once completed, the surface can be sprayed with a sealant to fix it if necessary. The pub sign was made from a magazine cutting, chopped-up lolly sticks and bits of old chain and the lettering was stencilled on. The finishing touch was great fun – the bird droppings – but don’t worry, it’s really only blobs of white acrylic paint! And, at long last, the `Steam Inn’ was now completed.
Images Copyright: Liz Saxtree-Ford. thx! (working on another post with more photos next week)
Found through the Whitby Gazette