Jake’s Hollywood Adventure and Etching an iPod
OK, I was reckless. I went ahead and etched my iPod without doing extensive tests on electrolytic etching of stainless steel. But you see, I had a deadline – a flight to Los Angeles to be on television and I wanted the iPod done for the show.
I began by wet sanding the back of the iPod with 600 grit wet/dry paper. I sanded evenly over the entire surface and particularly right over the Apple logo. I believe that the Apple logo is laser etched and it is surprisingly tough to sand off. I probably could have made it entirely disappear but I'm lazy and, like I said, I had a deadline.
Oh, you want to hear about the trip to Hollywood? OK, it started with an email from a researcher for KCET, a public television station in Los Angeles. KCET is producing a show for PBS in concert with Wired Magazine and they thought I might make an interesting guest. If I was interested I was to contact Margo, one of the show's producers.
I wrote Margo and said "Why yes, that sounds like fun!". A day or so later she called and we discussed my projects and Steampunk in general.
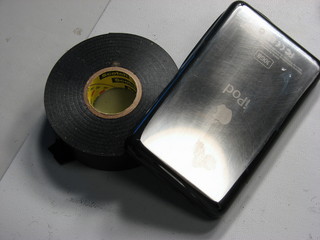
OK, back to the iPod. After sanding the iPod I carefully wrapped the edges and front with electrical tape to prevent any damage or liquid intrusion.
For most of my etching projects I've used ink-jet paper or press-n-peel blue along with an iron to transfer a toner resist mask to the workpiece. I was not comfortable at all with the idea of heating my iPod to well over 250 degrees with an iron so I decided to try a photo resist mask.
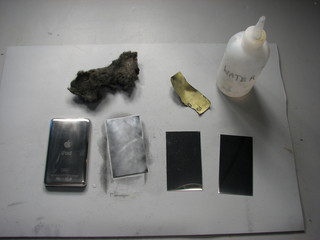
I went down to my local electronics store Electronics Plus and they had exactly what I needed, a bottle of ER-71 Photo Resist Liquid and ER-8 Photo Etch Developer from DATAK in Rockford, Illinois. I can't tell you how grateful I am to have Electronics Plus close by, it is the sort of electronics store that is getting harder and harder to find. It's what Radio Shack was 30 years ago, with a huge wall of components, ty-wraps, shrink tube, and the occasional piece of surplus electronics.
The next step in the process was to clean the iPod back carefully with alcohol and spray a couple of coats of the ER-71 Photo Resist Liquid on it. This had to be done in subdued light, particularly avoiding any light in the blue and UV part of the spectrum. Around here that means kerosene lamp light. After the resist was applied the iPod went into a oven at 140 degrees for about 20 minutes to cure.
Back to my story, after several phone conversations I agreed to ship all of my projects out for a "show and tell" segment, but the producers wanted more "science content" so I proposed etching an iPod in a demo since electrolytic etching with it's anodes and cathodes and electrons and ions is the just about the most "science-y" thing I do.
My e-ticket arrived in my in-box a few days later and I was off to the airport early on a Wednesday morning. I got to Logan, checked in and got my boarding pass. I glanced down at the printed pass and saw "SSSS" – Bugger! Of course, male, traveling alone, full fare, e-ticket = extra screening. I was SO glad I shipped all of my home-made electronics on ahead via FedEx. I can just imagine trying to explain Steampunk to a TSA agent!
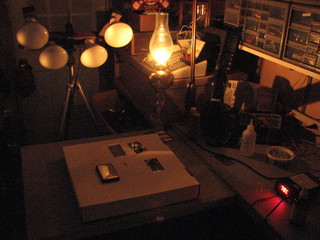
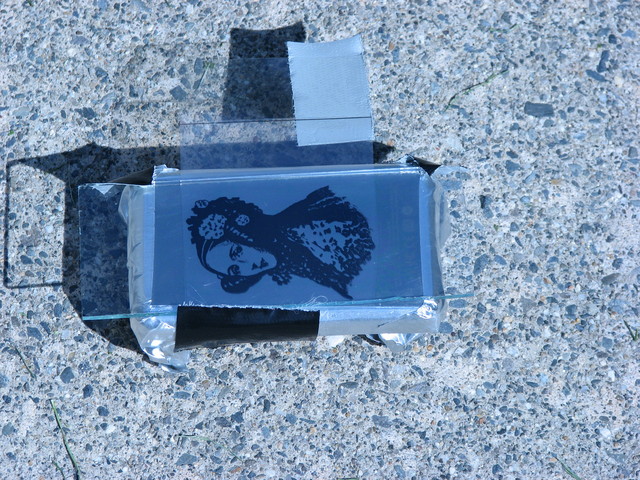
After the photo resist layer was completely cured I laser printed a positive image on some transparency film, sandwiched it under a piece of glass, and exposed it to the sun for 5 minutes. Then it went back into the darkened room to be developed.
The flight to LA was un-eventful and when I arrived there was a production assitant (who's name I am embarrassed to say I have forgotten even though we had several great conversions while mired in traffic on the 405 – dude, write me and tell me what a putz I am for forgetting your name!) standing in the baggage claim area with a sign that read "von Slatt".
He drove me to the studio and I met with some of the producers and Bill the propman who helped me unpack my stuff. All of them were very, very nice and kept telling me how happy they were that I had come and how great my stuff was. Now, I'm from New England and we're just not so forthcoming with praise – so the Hollywood treatment had me feeling a bit un-easy at first. But you know, one could definitely get used to it!
We setup the guitar, keyboard, monitor and the iPod and did a couple of run through of the interview – y'all will get to see that on TV so I'm not going to go into detail.
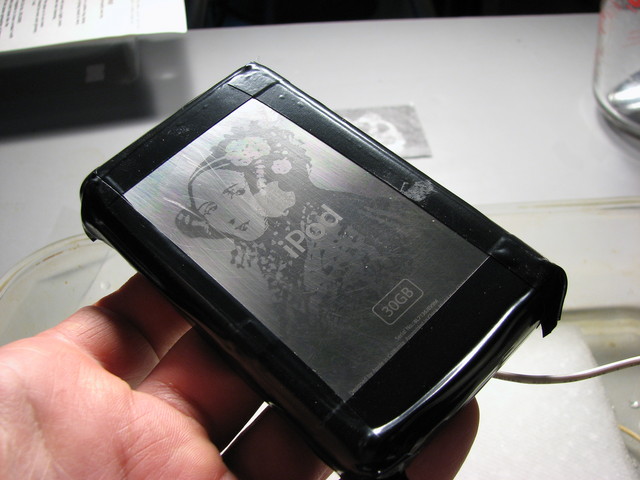
To develop the resist you dip the workpiece into the ER-8 Developer for 30-45 seconds and agitate, gently blot on some tissue paper, and then dip again for 10 second and allow to dry. The image is visible if you hold the piece at an angle to the light. You can see above that I used some aluminum duct tape to mask the edges of the iPod, I was afraid that the solvent based developer would attack the electrical tape.
After the run through on stage "my driver" took me back to the Universal Hilton at Universal Studios. Unfortunately, I was so tired at that point (it was nearly 11 PM for me) that I didn't take advantage of the park. I just ate a sandwich and drank a scotch from the mini-bar and went to sleep.
My "call time" was 10 AM the next day so I slept late and then had the supreme pleasure to announce to the concierge in the lobby "no thank you, the studio is sending a car" when he asked if he could get me a cab.
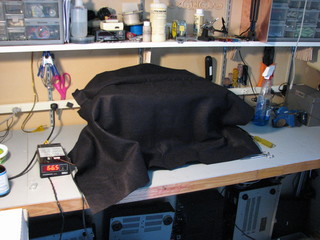
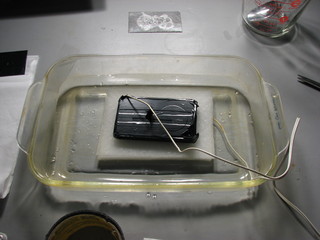
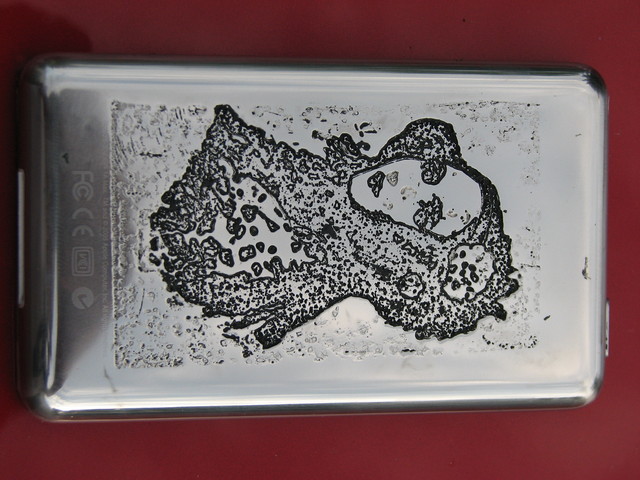
I decided to use salt water for this etch since I had such good luck with the Altoids tins. However, I did not want to submerge the iPod, a little salt water inside would surely ruin it! So I placed a stack of paper towel squares in a glass tray and filled it to just above the top of the stack. A plate of stainless steel was set below the stack and the iPod connected to the other lead and set on top. I used a 3 Volt 1 Amp wall-wart power supply for this etch and the ammeter was showing that it was at or a little above its rating. I used a heaping tablespoon of salt in a quart of water, a teaspoon would probably been sufficient.
After about 20 minute in the bath I noticed that the etch was not nearly as even as it was with the Altoids tins. Once the etch took hold in one spot it seemed to concentrate there, forming pits. I also had some holes in the mask that I patched with some black paint. I think the key to getting a good etch on stainless steel is to be sure that the image is made up of lines as it is the large open areas that etched so unevenly.
KCET is one of the few studios still in Hollywood proper and it is a really cool old building. It was originally a studio built in 1914 in the days of silent pictures. The studios and dressing rooms are in a masonry building of yellow brick with a red terracotta tile roof. Even in the heat of a California day in August the courtyard stayed relatively cool and there was a pleasant breeze.
Upon arrival I was shown to my dressing room where there was a fruit basket and an array of snacks. There were two other guests there but their call time had been much earlier, they also seemed like old hands at the TV thing and were packing up and moving on as I arrived.
I spent most of the day sitting in the dressing room reading my book, Eric Flint and David Weber's 1634: The Baltic War . Periodically throughout the day I heard extraordinary things like "Mr. von Slatt, they need you in make-up" and "Mr. von Slatt, you're wanted in wardrobe"
After a total of about an hour in the salt water I took the iPod out, cleaned it up and gave it a paint and a polish. The result is below. As you can see it is not nearly as successful as the Altoids tin, the etch seemed to strangely concentrate around the edges of the photo resist and it barely touched some of the broad areas where there was no resist. As I said before, I think a mask made up of all lines, in the manner of traditional print etchings, would have made a better image.
Safety note: Some alloys of stainless steel contain chromium which can form nasty compounds. The amounts formed here are tiny, but you should be careful as you dispose of the solution and paper towels. Do not use the etching container for food ever again!
Finally, about 4 PM on Thursday I went on stage and taped the piece. Earlier in the day I had done several more run throughs this time with Chris one of the show's hosts. Chris injected some jokes into the basic interview we had blocked out with the producers the day before and it threw me at first. But it also got me to be a little less stiff and I think the piece went pretty well in the end. I wonder if the Jack the Ripper joke will make it into the broadcast? Oh, and while we did show the iPod, I didn't end up demo-ing the etching process. We did something else that I think you will enjoy just as much!
The taping went smoothly and I was surprised how steady I was with 4 hi-def cameras clustered closely around me. At least I thought I was steady, when I actually see the piece I will probably hold my head in my hands and lament my total dorkyness!
The show is Wired Science and if they indeed decide to use my segment it should air sometime after October 7th, 2007 on a PBS affiliate near you.
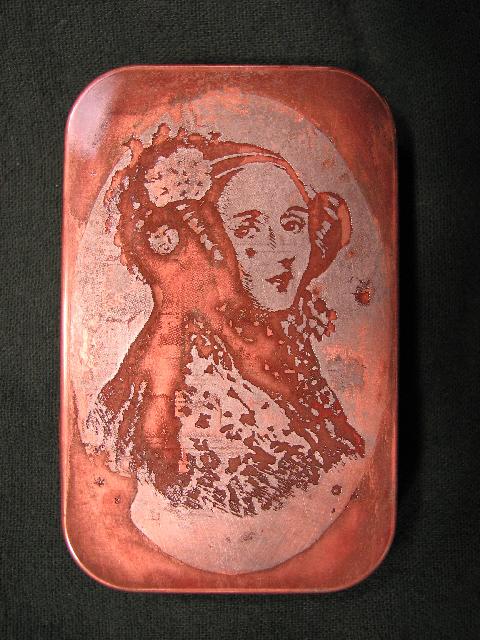
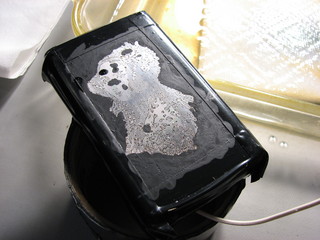
Here's the Altoids tin etch for comparison, you can see a higher degree of detail was transfered to the metal.