How to Build a Wimshurst Influence Machine – Part 4
This is part four in a series of articles describing how to build a Wimshurst Influence Machine with parts and materials available at your local home center and hardware store. In this part I detail the construction Leyden jars and the final assembly. If you missed the beginning of the series start here. This article was originally published in Make: Magazine volume #17.
Building the Leyden Jars and Final Assembly:
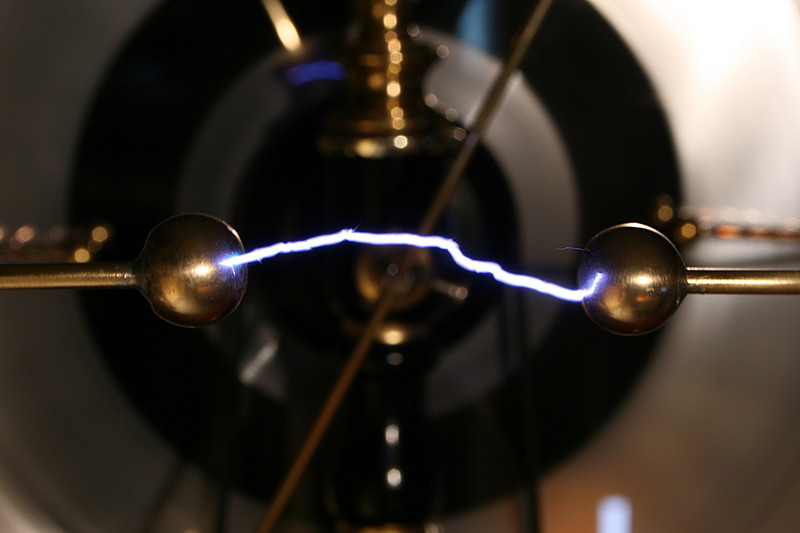
Incorporated into Wimshurst's machine are a pair of Leyden Jars which store the electric charge produced and provide for much bigger and more spectacular discharges. Leyden jars were initially invented in 1745 by Ewald Georg von Kleist. However, Pieter van Musschenbroek in Leiden independently developed the same device about a year later and went on to present his discovery to the scientific community. Thus this storage device is commonly known today as the Leyden Jar rather then the Kleist Bottle, though that term is still used occasionally in Germany.
The Leyden jar is the granddaddy of the modern day capacitor. It consists of inner and outer layers of aluminum foil separated by a dielectric or insulator. The amount of charge that a Leyden Jar can hold is determined by the area of these two plates, their distance from each other, and the dielectric or insulating capability of the material used to separate them. The original Leyden jars were made with silver or lead foil and glass. However, plastic is far a superior insulator due to glass' propensity to absorb some water molecules thus reducing is dielectric properties.
Our Leyden Jars are large enough to give you quite a jolt, but not so large as to be capable of actually harming a healthy person. However, Leyden Jars capable of administering a lethal shock are quite easily built – so be sure you fully understand their properties if you decide to construct larger jars. In fact, the first generally acknowledged accidental death by electrocution occurred in St. Petersburg in 1783 when a Professor Richman brought his head a bit too close to a charged bank of Leyden Jars, killing him instantly.
Making the Leyden Jars:
|
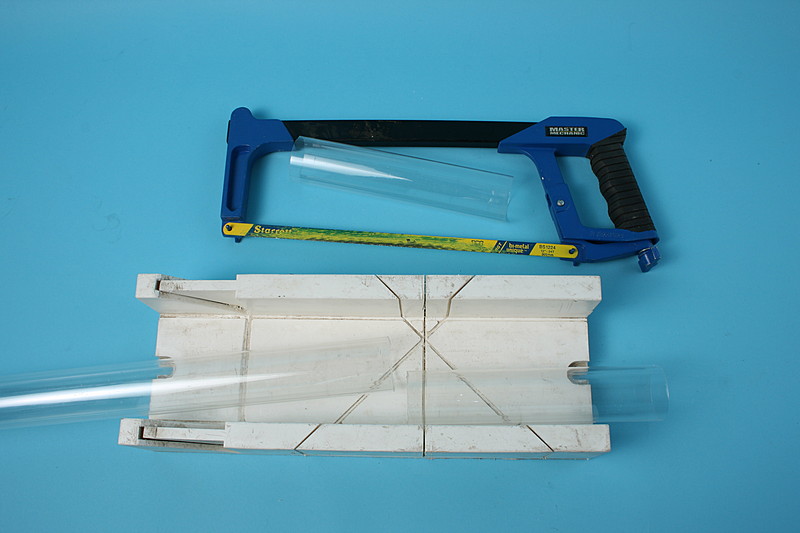
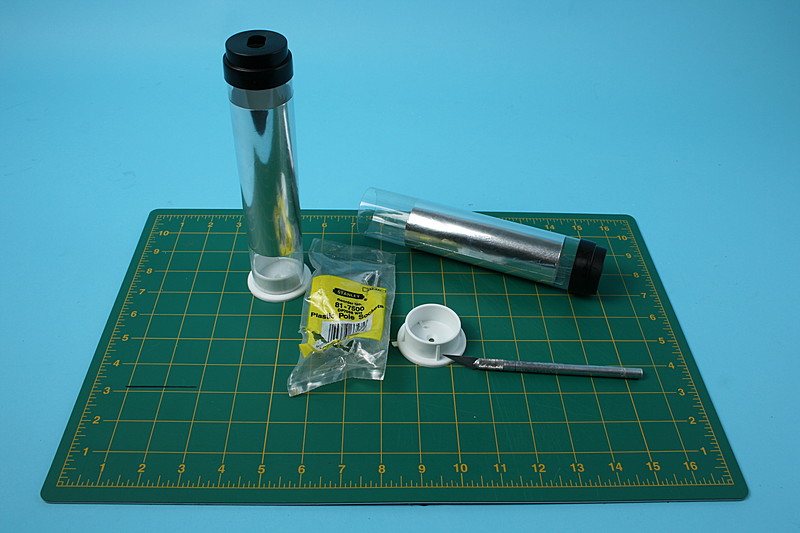
Cut the Leyden jar body:
|
wimshurst-layden-cut-tube.jpg |
|
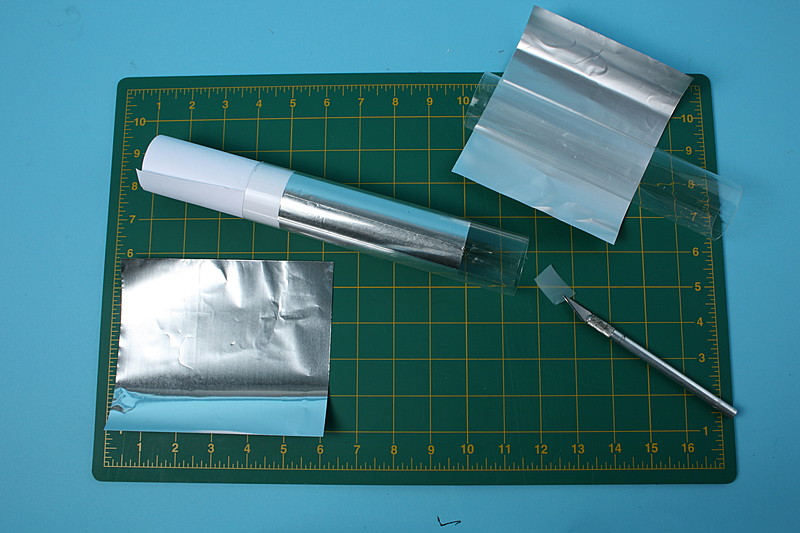
Cut and affix the inner plate:
|
wimshurst-layden-plate-inner.jpg |
|
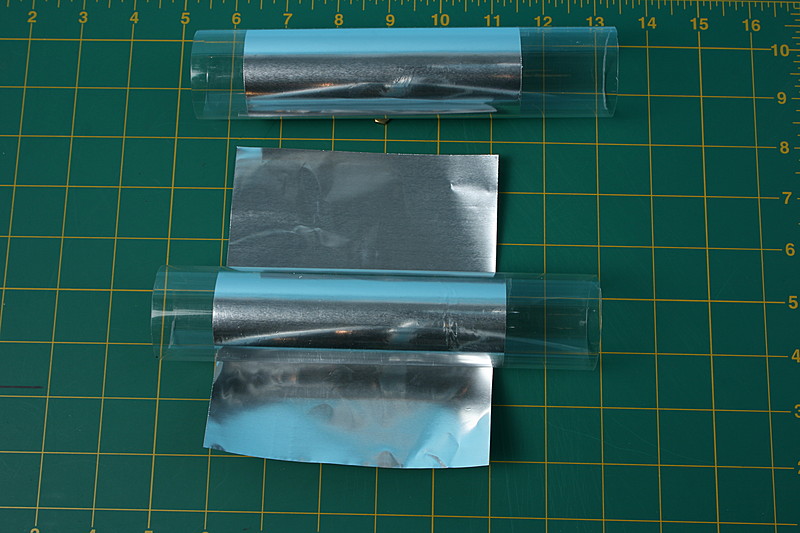
Affix the outer plate:
|
wimshurst-layden-plate-outer.jpg |
|
Make the bases:
Note: These are Stanley brand and I had to trim some reinforcing ribs off with an X-acto knife to make them slide into the tubes.
|
wimshurst-layden-plate-bottom.jpg |
Final Assembly:
|
Mount the disks and drive line:
Note: 5/16" set screw collars can be found at the hardware store but I made my own by drilling out a 5/16" nut and threading a #6-32 screw into the side.
Note: I found that my machine became difficult to turn once it was fully charged due to the electrostatic attraction of the disks. I cut a 2 ½" washer from a plastic milk jug and placed it on the shaft between the disks to remedy this problem.
|
wimshurst-axle-collars.jpg |
|
Align the disk and collector supports:
|
wimshurst-lineup-collectors.jpg |
|
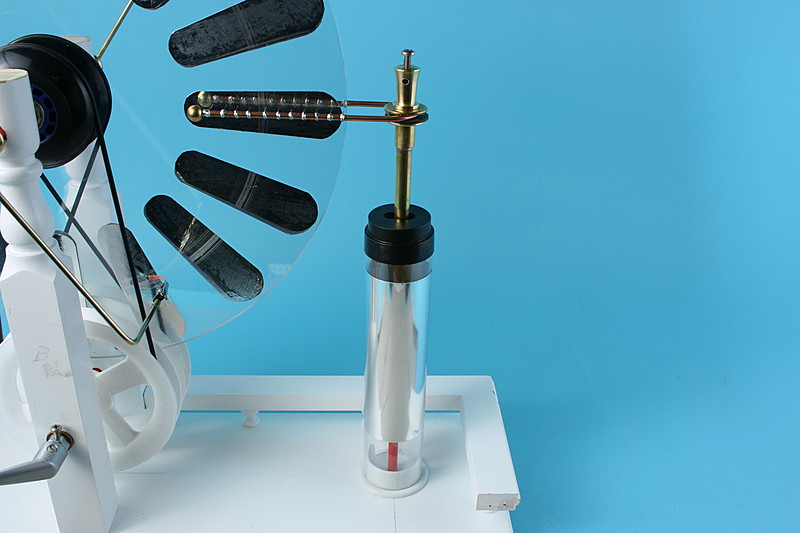
Install the Leyden jar base and inner plate contact:
|
wimshurst-layden-contact-inner.jpg |
|
Epoxy the charge collector assembly in place:
|
wimshurst-collector-epoxy.jpg |
|
Install Leyden jar and assemble collector:
|
wimshurst-layden-complete.jpg |
|
Install discharge electrode:
|
wimshurst-collector-inplace-2.jpg |
|
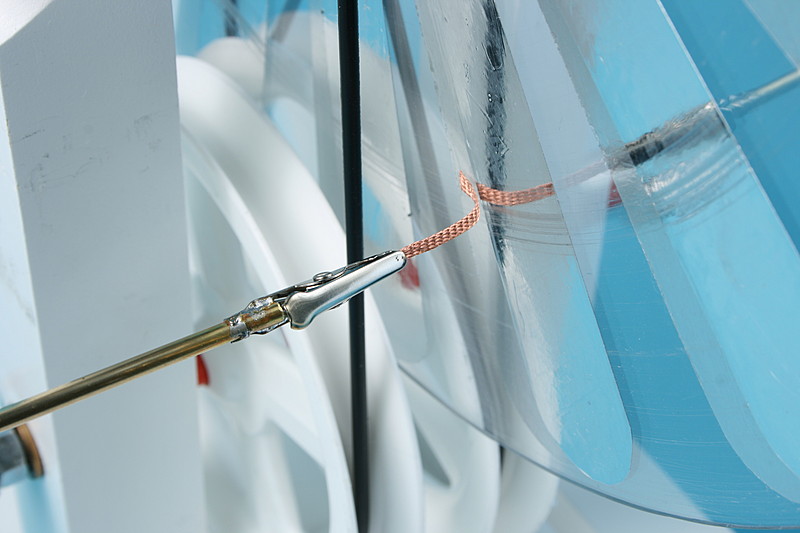
Install neutralizing brushes:
|
wimshurst-neutralizer.jpg |
|
Position brushes:
|
wimshurst-neutralizer-brush.jpg |
|
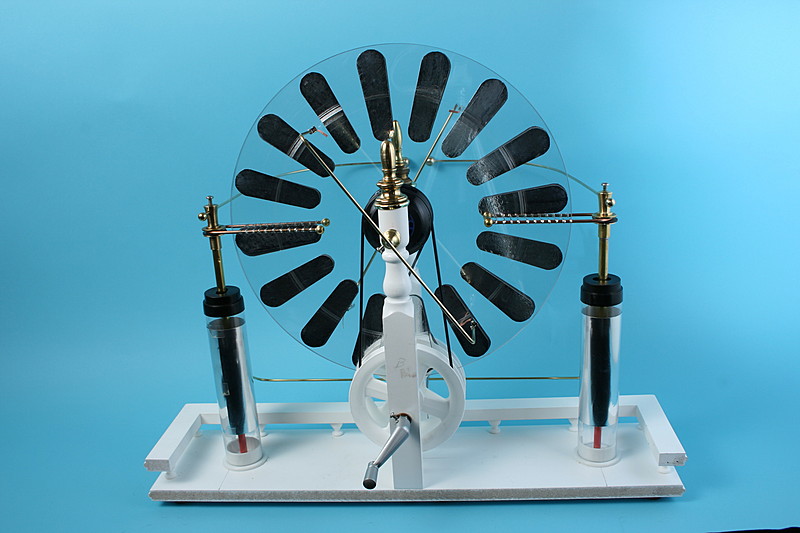
Mount the Leyden jar shunt and add optional finials:
The two tops of the disk supports looked a little bare to me so I raided my junk box for more lamp parts and came up with these decorative finials. The wealth of finial and cabinet knobs at the typical home center means that there are infinite opportunities for creativity here!
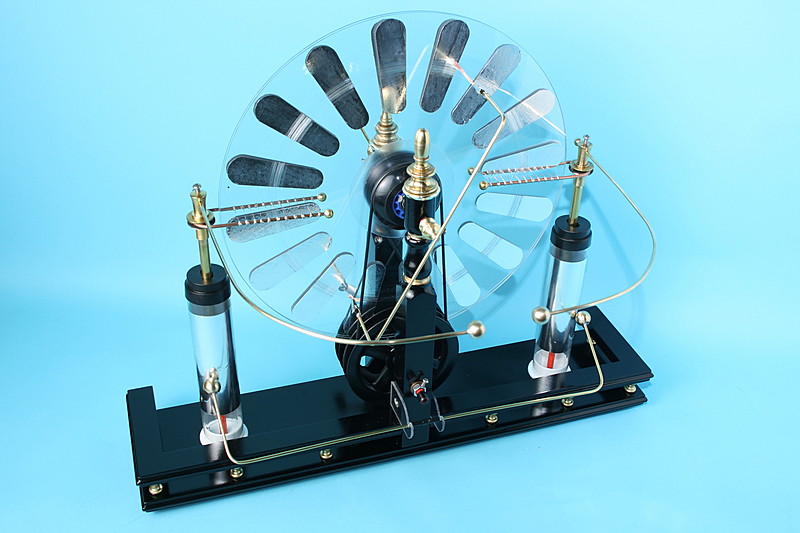
That's it! Your Wimshurst machine is done! |
wimshurst-complete-front.jpg
|


wimshurst-complete-back-2.jpg
Painting is optional but I decided that my machine would look better in black and gold so I completely disassembled it and painted the base and supports with black lacquer. I also painted the plastic pulleys with Krylon Fusion, but that turned out to be a mistake. If you do paint your pulleys, make sure to mask the area where the belt contacts the bottom of the pulley groove to prevent the belt from peeling off the dried paint.

wimshurst-all-parts-laid-out-painted.jpg
Fine design and execution. I will build a near copy. Thanks.